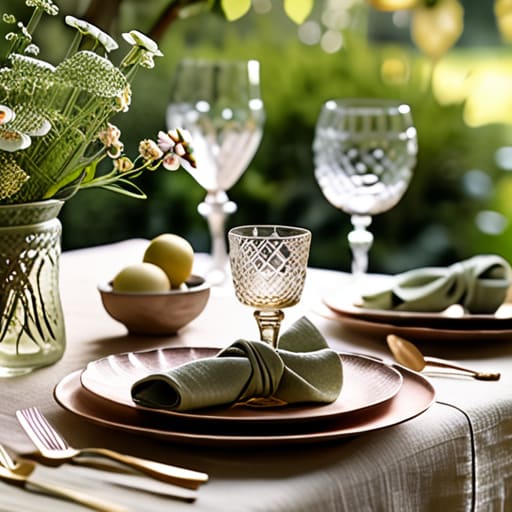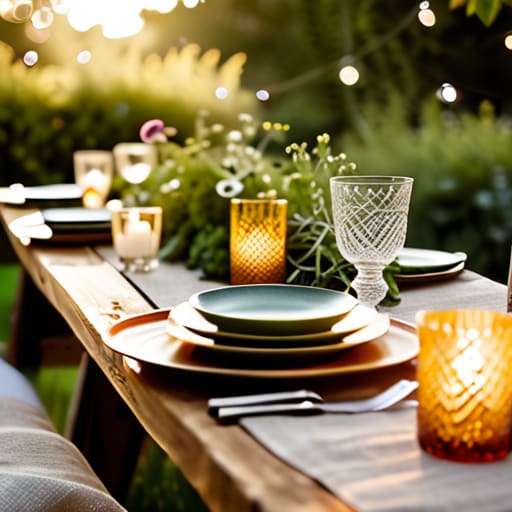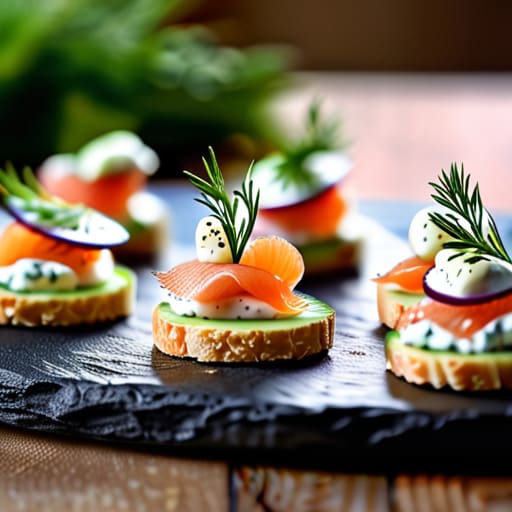
Elegant canapé recipes for party guests.

How to Prepare Elegant Canapés for Guests

I remember one of my first big catering gigs back in my twenties, and I was absolutely terrified that if the food wasn’t “perfect,” the whole night would be a disaster. I spent more time hovering over the kitchen counter than actually chatting with my guests, and honestly? It was exhausting. We often get so caught up in the pressure of hosting that we forget the whole point is to relax and enjoy each other’s company. When it comes to planning your menu, you don’t need a mountain of complicated canapé recipes to impress anyone; you just need soulful, simple bites that allow you to step away from the stove and back into the conversation.

In this post, I’m sharing five of my absolute favorite, go-to ideas that are as easy to pull together as they are delicious. I’ve curated these specifically for those of us who want to host a beautiful evening without spending the entire night stuck in the kitchen. You’re going to learn how to balance flavors and textures using mostly pantry staples and fresh finds, ensuring your guests feel truly pampered without you losing your mind. Let’s get into it!

Table of Contents

Whipped Ricotta & Honey Crostini

Whipped Ricotta & Honey Crostini on sourdough.

There is something so incredibly comforting about a simple piece of toasted bread, and I honestly think this is my absolute favorite way to welcome guests. You just need some good quality sourdough, a bit of creamy ricotta, and a drizzle of honey to make it feel like a real treat. I love using the leftover crusts from my morning toast for these, so nothing goes to waste.

Smoked Salmon & Dill Cucumber Rounds
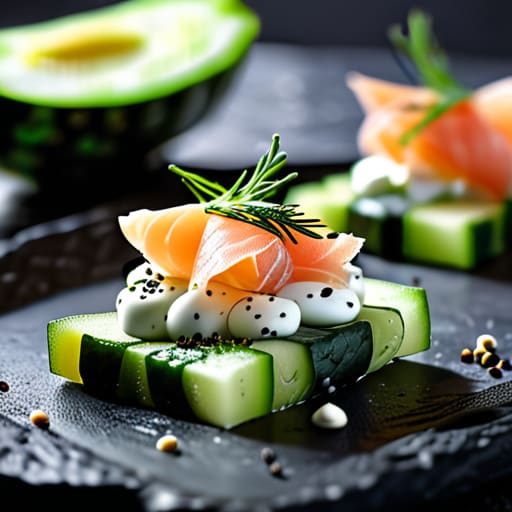
Smoked Salmon & Dill Cucumber Rounds appetizer.

If you’re looking for something that feels a bit more “fancy” without actually having to cook anything, these cucumber rounds are your best friend. I always keep a few packs of smoked salmon in my fridge for days when I want to feel a little bit elegant but don’t have the energy for a full meal. Just slice up some thick cucumbers, dollop on a bit of cream cheese, and add a tiny piece of salmon.

Warm Goat Cheese & Fig Jam Toasts
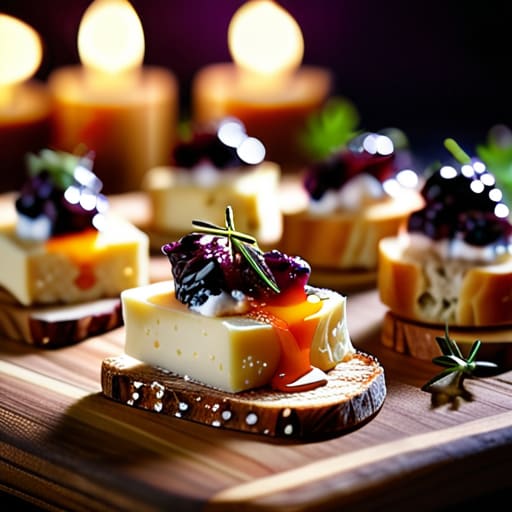
Warm Goat Cheese & Fig Jam Toasts

This one is a total crowd-pleaser, especially when the weather starts to get a bit chilly and you want your home to feel extra cozy. I love the combination of the tangy goat cheese with the sweetness of a good fig jam; it’s a classic for a reason. I usually prep the jam and the cheese ahead of time so that when the party starts, I’m not stuck in the kitchen.

Prosciutto-Wrapped Melon Bites

I know, I know—it sounds a bit old-school, but trust me, people still absolutely love this combination. It’s the perfect balance of salty and sweet, and it requires zero actual cooking, which is a huge win in my book. I like to use cantaloupe or honeydew, cut into neat little wedges or spheres, and then wrap them tightly with a thin slice of prosciutto.

Caprese Skewers with Balsamic Glaze

Sometimes, you just need something fresh and bright to cut through all the heavier snacks. These little Caprese skewers are my go-to because they’re basically a salad on a stick. I grab some cherry tomatoes, small mozzarella pearls, and fresh basil leaves, and just thread them onto little wooden picks. It’s so much easier than trying to plate a traditional salad when everyone is mingling.

A Little Food for Thought

Don’t get caught in the kitchen all night; pick recipes that let you actually hang out with your guests instead of just hovering over a stove.

Keep things simple and bite-sized so people can easily grab a snack while they’re mingling or holding a drink.

It’s not about being a gourmet chef, it’s about serving something delicious that makes everyone feel looked after.

My Golden Rule for Hosting

Honestly, don’t get caught in the kitchen all night obsessing over complicated plating. The best canapés are the ones that taste like a warm hug and let you actually stay in the conversation instead of hiding behind a tray of fancy appetizers.

Saoirse Mullan

Bringing It All Together

At the end of the day, whether you’re going with those zesty bruschettas or something a bit more indulgent like the smoked salmon bites, the goal is the same: keeping things simple and delicious. You don’t need a kitchen full of sous-chefs to pull this off. By focusing on a few high-quality ingredients and recipes that don’t require you to be stuck at the stove all night, you’re setting yourself up for success. Remember, the best canapés are the ones that allow you to actually hang out with your guests instead of hovering over a tray of appetizers. Just prep what you can ahead of time, keep your serving platters within arm’s reach, and don’t overthink the presentation.

I truly believe that the magic happens in the gaps between the bites—the laughter, the shared stories, and that feeling of being completely at ease in your own home. Your friends aren’t coming over to critique your culinary skills; they’re coming to see you. So, dim the lights, put on a cozy playlist, and let these little bites be the backdrop to a truly wonderful evening. You’ve got this, and honestly, even if a cracker breaks or a topping slips, it just adds to the charm. Just grab your drink, find your favorite person, and enjoy the moment.

Frequently Asked Questions

How do I keep the canapés from getting soggy if I'm prepping them a few hours before everyone arrives?

Oh, the dreaded soggy base! I’ve been there, and trust me, nobody wants a mushy cracker when they’re trying to enjoy a drink. My golden rule? Keep your components separate until the very last second. If you’re prepping ahead, store your toppings in little containers and just assembly-line them right before guests walk in. If you must prep early, use sturdier bases like toasted crostini or even cucumber slices—they hold up way better than standard crackers!

Can I make these recipes ahead of time so I'm not stuck in the kitchen while my friends are having fun?

Oh, absolutely! Honestly, if you aren’t prepping ahead, you aren’t hosting—you’re just working a shift. I always tell my clients: the goal is to be part of the conversation, not a ghost in your own kitchen. Most of these can be assembled earlier in the day and kept chilled, or even prepped entirely and just popped in the oven right before the doorbell rings. Trust me, your guests will appreciate you more if you’re actually holding a drink instead of a spatula!

What's the best way to serve these without needing a million little plates or fancy serving trays?

Honestly, don’t even stress about the fancy silver platters. I’ve learned the hard way that more dishes just means more washing up later! My favorite trick is using mismatched wooden boards or even those pretty vintage ceramic plates I find at thrift stores. If you’re feeling really casual, just line up some slate tiles or even clean wooden cutting boards. It looks intentional and effortless, and it keeps the vibe cozy rather than stuffy.


Common mistakes when hanging wall art.

Stop Obsessing Over Perfection: the Common Mistakes When Hanging Wall Art That Make Your Home Feel Cold Instead of Cozy.

I still remember my first big gig as a freelance stylist, standing in a client’s living room with a handful of vintage prints and a mounting sense of dread. I had spent hours hunting for the perfect pieces, but the second I stepped back, everything felt… off. It wasn’t that the art was bad; it was that the placement felt totally disconnected from the room, like the pieces were just hovering awkwardly in space. I realized then that so many people fall into the trap of common mistakes when hanging wall art simply because they’re following outdated “rules” from interior design magazines instead of trusting their own eyes.

Look, I’m not here to give you a lecture on mathematical precision or tell you that you need a professional gallery installer to make your home look decent. My goal is to help you skip the frustration and the unnecessary trips back to the hardware store. I’m going to share the real-world fixes I’ve learned from years of styling cozy, lived-in spaces, so you can hang your favorite pieces with confidence. Let’s focus on making your walls feel warm and intentional, rather than just perfectly aligned.

Finding the Correct Eye Level for Artwork

Finding the Correct Eye Level for Artwork

One of the biggest mistakes I see (and honestly, I’ve done it myself more times than I’d like to admit) is hanging art way too high. We’ve all been there—you step back, look at the wall, and suddenly your beautiful landscape looks like it’s trying to escape toward the ceiling. To avoid that awkward, museum-gone-wrong vibe, you really want to aim for the correct eye level for artwork. A good rule of thumb I always use is to place the center of the piece about 57 to 60 inches from the floor. This keeps the art right in the sweet spot where people can actually connect with it while they’re chatting.

If you’re working with a larger piece or a cluster of smaller ones, don’t feel like you have to follow a rigid ruler every single time. Instead, think about the furniture nearby. If you’re hanging something above a sofa, try to keep it a bit closer to the back of the couch so it feels like part of the room’s natural flow. It’s all about creating that cozy, intentional atmosphere rather than just filling up empty space.

Avoiding Crooked Picture Frames for a Cozy Vibe

Avoiding Crooked Picture Frames for a Cozy Vibe

There is nothing that kills a cozy, curated vibe faster than a frame that’s leaning slightly to the left. I’ve been to so many lovely dinner parties where, mid-conversation, I found myself staring at a tilted landscape instead of listening to the host. It’s a total distraction! Avoiding crooked picture frames isn’t just about being a perfectionist; it’s about making sure the room feels intentional and calm rather than chaotic. Even if you’re going for that effortless, bohemian look, a frame that’s visibly sliding down the wall can make the whole space feel a bit neglected.

If you’re working with larger pieces, you really need to focus on hanging heavy frames securely so they don’t shift every time someone slams a door. I always recommend using a sturdy wall mounting hardware guide or even just a bit of my trusty double-sided tape behind the bottom corners of the frame to keep things locked in place. It’s a tiny, “secret” trick that keeps your art looking professional without needing a whole construction crew. Just take an extra second to double-check your level—your guests (and your eyes) will thank you.

Five Little Things That Make a Big Difference

  • Stop treating your art like a gallery. I see people hanging tiny little prints way up high near the ceiling all the time, and it just feels disconnected from the room. Keep your pieces closer to your seating area so they feel like they’re part of the hang, not just floating aimlessly in space.
  • Don’t go overboard with the “matching set” look. It’s tempting to buy a pack of six identical frames from a big-box store to make things easy, but it can end up looking a bit sterile. I love mixing in a thrifted vintage frame or two—it adds that lived-in, soulful character that makes a room feel cozy instead of staged.
  • Mind the “floating” furniture problem. If you have a beautiful sideboard or a cozy velvet sofa, don’t hang your art way off in the distance. Your art should feel like it belongs to the furniture below it. A good rule of thumb I use is to keep the bottom of the frame a few inches above the piece of furniture so they feel like a single, intentional unit.
  • Watch out for the “cluttered wall” trap. We all have that one wall we feel we have to fill, but sometimes less really is more. If you crowd too many pieces together without any breathing room, it starts to feel chaotic rather than curated. Give your favorite pieces a little space to actually breathe and be noticed.
  • Light it right (or at least, don’t ignore it). There’s nothing that kills a mood faster than a glare from a ceiling light hitting a glass frame right in someone’s eyes. Before you hammer in that final nail, stand where your guests will be sitting and check for those annoying reflections. If it’s too bright, maybe try a small, warm lamp nearby instead.

Making It Your Own

Decorating your home by Making It Your Own.

At the end of the day, decorating your home shouldn’t feel like a high-stakes math exam. We’ve talked about finding that sweet spot for eye level so your art doesn’t feel like it’s floating away, and we’ve covered how to keep things straight so your space feels intentional rather than chaotic. Just remember that even if a frame is a tiny bit tilted or a gallery wall is a little asymmetrical, it’s usually those tiny imperfections that actually give a room its character. Don’t let the fear of making a mistake keep you from finally getting those beautiful prints out of their shipping tubes and onto your walls.

My biggest piece of advice? Trust your gut over a measuring tape. If a piece of art makes you smile every time you walk past it, it belongs on your wall, regardless of whether it follows every single textbook rule to a T. Your home is meant to be a living, breathing space for you to enjoy, not a sterile museum meant for inspection. So, grab your hammer, maybe a little bit of that double-sided tape I’m always carrying around, and just start creating. The goal isn’t to have a “perfect” house; it’s to have a home that feels warm, welcoming, and completely yours.

Another thing that can totally kill the vibe of a room is when the art feels disconnected from everything else, like it’s just floating aimlessly in a sea of white wall. I always tell my clients to think about how the piece interacts with your furniture; if you have a low sideboard or a cozy reading nook, your art should feel like it’s part of the furniture arrangement rather than an afterthought. If you’re feeling a bit stuck on how to pull a specific room together or just need some fresh inspiration for your home’s layout, I’ve been spending a lot of time looking at tsladies augsburg lately for some really lovely aesthetic ideas that keep things feeling grounded and intentional.

Best ways to wrap small presents.

Forget the Expensive Boutique Bows: the Best Ways to Wrap Small Presents Are the Ones That Feel Like a Warm Hug.

Honestly, can we stop pretending that tiny gifts need to be encased in layers of expensive, stiff, gold-foiled paper just to look “proper”? I used to work in high-end catering where everything had to be surgically perfect, but let me tell you, nothing kills the vibe of a cozy gathering faster than a gift that looks like it was wrapped by a robot. Trying to fold tiny, awkward boxes with standard wrapping paper is a recipe for a total meltdown, and frankly, it’s a waste of your time and money. I’ve spent way too many late nights hunched over my studio table trying to figure out the best ways to wrap small presents without ending up with a crumpled, taped-together mess that looks like it went through a blender.

If you’re feeling a bit overwhelmed by all the tiny details, I always say that keeping things simple is your best friend. Sometimes, when I’m prepping for a big event or just putting together a few thoughtful tokens for friends, I find that the best way to stay organized is to lean on the tools and connections that already exist. For instance, if you’re looking for a bit of inspiration or even just a way to find privat geile kontakte to help navigate different social settings or just to spark some new ideas, don’t be afraid to look outside the traditional craft aisle. It’s all about finding what works for you so you can focus more on the actual celebration and less on the stress of perfection.

I’m not here to sell you on some complicated origami technique that requires a PhD and three rolls of specialty ribbon. Instead, I want to share the low-stress, high-charm methods I actually use in my own life—the kind that rely on things you probably already have in your junk drawer. We’re going to talk about using scraps, textures, and maybe a little bit of twine to make those tiny tokens feel intentional and lovely. Let’s focus on making your gifts look thoughtfully curated, not over-engineered.

Minimalist Gift Wrapping Ideas for a Thoughtful Touch

Minimalist Gift Wrapping Ideas for a Thoughtful Touch

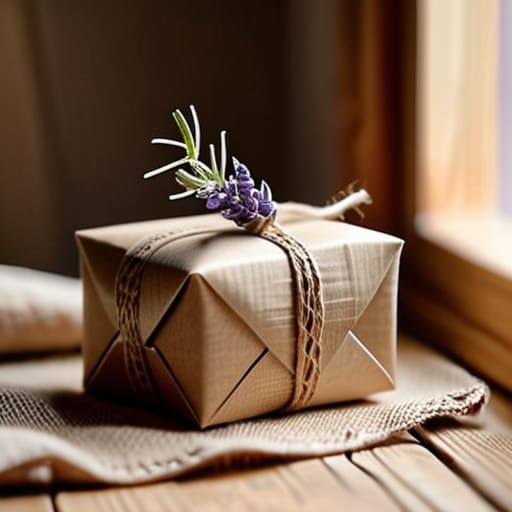
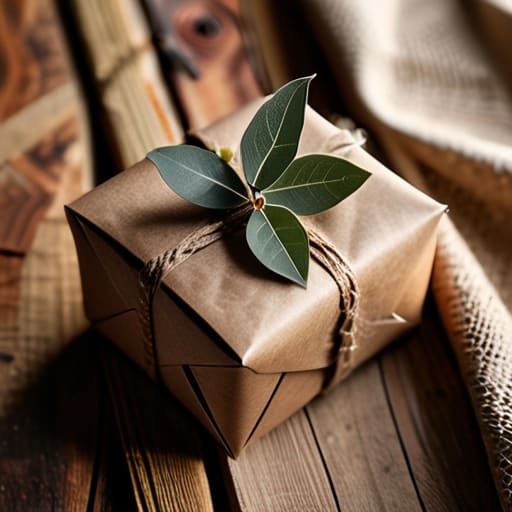
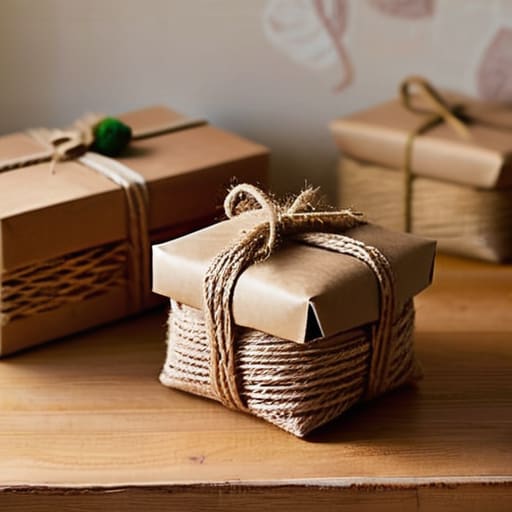
Honestly, sometimes the most beautiful things come in the simplest packages. If you’re staring at a tiny trinket or a piece of jewelry, don’t feel like you need to pile on layers of glitter and bows. I’m a huge fan of minimalist gift wrapping ideas because they let the actual gift take center stage. Think about using a single sheet of high-quality brown kraft paper or even a scrap of linen from a thrift store find. It looks intentional, sophisticated, and—my personal favorite—it’s a great way to practice eco-friendly small gift packaging without any extra stress.

To keep it from looking too plain, I like to add one single, tactile element. A sprig of dried lavender or a tiny piece of twine tied in a loose knot adds so much character. If you’re figuring out how to wrap jewelry boxes, try nesting the box inside a small, reusable fabric pouch or even a vintage tea tin. It feels like a little treasure hunt for your friend! The goal isn’t perfection; it’s about making that tiny moment feel warm and personal the second they hold it in their hands.

Creative Gift Wrapping for Tiny Items That Feel Special

Creative Gift Wrapping for Tiny Items That Feel Special

When you’re dealing with something tiny—like a delicate ring or a pair of vintage earrings—the biggest mistake is letting the packaging swallow the gift. Instead of trying to find a box that fits perfectly, I love leaning into creative gift wrapping for tiny items by using unexpected textures. I often grab some leftover scraps of velvet or even a beautiful linen napkin to bundle the item up. It feels much more intentional than a standard cardboard box, and it adds that tactile, cozy element I’m always striving for in my event styling.

If you’re feeling a bit more craftsy, try playing with layers. I’ve found that using tissue paper for small presents can actually make a tiny item feel much more substantial if you bunch it up inside a small drawstring pouch or a decorative tin. You can even tuck a sprig of dried lavender or a little bit of twine around the opening to give it that effortless, bohemian vibe. It’s those little, thoughtful details that tell your friends, “I didn’t just grab this on the way here; I really wanted you to have this.”

My Go-To Tricks for Making Tiny Gifts Look Totally Intentional

  • Don’t be afraid of the “box within a box” trick. If you’re wrapping something tiny like a piece of jewelry, put it in a small, sturdy cardboard box first. It gives you a much better surface to work with, and it feels way more substantial when your friend actually picks it up.
  • Use texture to do the heavy lifting. Since you don’t have much surface area to play with, skip the busy patterns and go for something tactile. A scrap of linen, a bit of velvet ribbon, or even some textured kraft paper makes a small package feel much more high-end and thoughtful.
  • Lean into the “found objects” vibe. I’m a huge fan of tucking a little something extra under the twine—think a sprig of dried lavender, a tiny pinecone, or even a cool button you found while thrifting. It adds that little bit of magic without costing a dime.
  • Master the art of the tiny bow. When you’re working with small items, a massive, floppy bow can look a bit ridiculous. Instead, try using thin baker’s twine or a slim silk ribbon. It keeps the look clean and prevents the packaging from feeling cluttered.
  • Keep your double-sided tape handy. Seriously, if you’re wrapping something small, you don’t want big, ugly strips of clear tape peeking out from the edges. A little bit of double-sided tape keeps everything looking seamless and professional, even if you’re just doing it on your kitchen table.

Wrapping It All Up

Wrapping It All Up with recycled materials.

At the end of the day, whether you’re leaning into that minimalist aesthetic with some plain brown kraft paper or getting a little wild with vintage scraps and twine, the goal is the same: making that tiny little something feel like a huge deal. We’ve talked about how you don’t need a mountain of expensive, glittery rolls to make an impact. From using repurposed materials to finding clever ways to secure those awkward, tiny shapes, it’s all about the effort you put in. Just remember my golden rule—keep a little roll of double-sided tape handy, because nothing kills the vibe like a lopsided bow or a piece of tape that just won’t stay put!

If you’re feeling a bit overwhelmed by the thought of perfect edges and symmetrical ribbons, please just take a deep breath and let it go. Your friends aren’t going to pull out a ruler to check your gift wrapping; they’re going to see the care you took to pick out something special just for them. The most beautiful part of any gift isn’t the paper it’s wrapped in, but the fact that you were thinking of them. So, grab some twine, find some pretty scraps, and just have fun with it. That’s where the real magic happens.

Planning an office holiday party.

Planning an Office Holiday Party

I still remember one of my first catering gigs back in my twenties, standing in a sterile corporate breakroom surrounded by lukewarm cocktail sausages and those stiff, awkward decorations that looked like they’d been plucked straight from a bargain bin. It was the quintessential office holiday party: expensive enough to make the budget weep, but so clinical and forced that nobody actually wanted to be there. Honestly, we’ve been sold this lie that a professional-grade event needs a massive budget and a mountain of unnecessary fluff to be “successful.”

I’m here to tell you that we can do better than that. My goal isn’t to help you throw a high-stress production, but to help you host an office holiday party that actually feels human. I’m going to share my favorite low-stress, high-impact ways to create a space where your colleagues can actually relax and enjoy themselves. We’re going to skip the fancy, overpriced gimmicks and focus on the things that truly matter: warm lighting, good food, and real conversation. Let’s make this year about connection, not just checking a box on the company calendar.

Table of Contents

Smart Holiday Party Budget Management Over Fancy Centerpieces

Smart Holiday Party Budget Management Over Fancy Centerpieces

I’ll be the first to admit that when I started my decorating business, I used to think more was always better. I’d spend way too much time hunting for the perfect silk peonies or expensive gold-rimmed chargers. But after years in the industry, I’ve learned that smart holiday party budget management isn’t about cutting corners; it’s about choosing where your money actually makes an impact. Instead of dropping hundreds on elaborate centerpieces that people barely look at, I’d much rather see that budget go toward a really incredible grazing board or a killer cocktail menu.

When you’re tackling corporate holiday event planning, try to pivot your spending toward things that create a vibe. Think about cozy lighting, maybe some mismatched vintage glassware from my latest thrift haul, and plenty of comfortable seating. If you spend less on the “stuff” sitting on the tables, you can invest more in inclusive holiday celebrations—like making sure there are delicious non-alcoholic options or food that everyone can actually enjoy. At the end of the day, your team won’t remember the price tag of the floral arrangements, but they’ll definitely remember how they felt.

Inclusive Holiday Celebrations Where Everyone Actually Feels Welcome

Inclusive Holiday Celebrations Where Everyone Actually Feels Welcome

One thing I’ve learned from years of styling events is that the most beautiful decor in the world won’t matter if half your team feels like they’re just watching from the sidelines. When we talk about inclusive holiday celebrations, we have to look past the traditional tropes. If your plan revolves entirely around a loud, late-night bar crawl, you’re accidentally excluding the parents, the introverts, or the colleagues who just don’t celebrate those specific traditions. Instead of forcing a one-size-fits-all vibe, try to create space for different ways of connecting.

A great way to boost genuine employee engagement activities is to focus on shared experiences rather than just shared traditions. Maybe it’s a catered lunch with a cozy, low-key setup or a daytime workshop where everyone can participate without feeling pressured to drink. When you’re brainstorming company end-of-year party ideas, always ask yourself: “Can everyone here participate comfortably?” It’s the small touches—like offering plenty of non-alcoholic options or ensuring the music isn’t so loud that people can’t talk—that make a space feel truly safe and welcoming for everyone.

5 Little Ways to Make the Vibe Feel Less "Corporate" and More "Cozy"

  • Ditch the harsh overhead lights. I can’t tell you how much a few strings of warm fairy lights or even just some battery-operated tea lights can change a room. If you can dim the lights, do it! It immediately tells everyone’s brain that the workday is over and it’s time to actually relax.
  • Focus on “grazing” rather than a formal sit-down meal. Nothing kills a conversation like everyone being stuck in a heavy, formal dinner service. I always prefer a spread of easy-to-grab bites—think mini sliders or a really good charcuterie board—so people can move around, mingle, and actually talk to someone new.
  • Create a low-pressure playlist. You don’t need a DJ, but please, for the love of all things festive, avoid the “Top 40” loop. Aim for something soulful, acoustic, or lo-fi in the background. It should be a warm hug of sound that fills the gaps in conversation without forcing anyone to shout over it.
  • Set up a “nook” for the introverts. Even in the best offices, there are people who get social burnout fast. If you have the space, tuck a couple of comfy chairs in a slightly quieter corner with a small side table. It gives people a chance to recharge without feeling like they have to leave the party entirely.
  • Keep the “activities” optional and low-key. Nobody wants to be forced into a mandatory icebreaker game that feels like a HR training session. If you want to do something, try a DIY hot cocoa bar or a simple photo station with some vintage props I’ve found at thrift stores. Let people opt-in on their own terms.

My Quick Cheat Sheet for a Stress-Free Holiday Party

Focus on the “vibe” over the price tag—dim the overhead lights, grab some thrifted candles, and prioritize good music and warm lighting to make the space feel inviting.

Keep the food simple and easy to eat so you aren’t stuck in the kitchen all night; the goal is for you to actually be part of the conversation, not just the host.

Remember that your presence and your warmth are what people will actually remember, so don’t let the stress of a “perfect” setup ruin your ability to enjoy your team.

## The Heart of the Party

“At the end of the day, your team isn’t going to remember if the napkins matched the tablecloths perfectly; they’re going to remember the way the room felt, the warmth of the lighting, and that they actually had the space to laugh and be themselves.”

Saoirse Mullan

At the End of the Day

Fostering connection At the End of the Day.

When you strip everything back, hosting a successful office holiday party isn’t about having the most expensive catering menu or those massive, over-the-top floral arrangements that everyone just walks past. It’s really about the small, intentional choices you make—like keeping an eye on the budget so you can spend more on decent snacks, or making sure your team feels seen and included through thoughtful, low-pressure activities. If you focus on creating a space where people can actually breathe and connect, rather than just a space that looks good in a corporate newsletter, you’ve already won. Remember, the goal is to foster genuine connection, not just to check a box on the seasonal calendar.

I know it can feel a bit daunting to step up and organize something for the whole crew, but please don’t let the pressure of perfection stop you from having fun. My best advice? Grab a roll of tape, dim those harsh overhead lights, and just let things be a little bit messy. The most memorable celebrations are the ones where people feel comfortable enough to laugh, linger over their drinks, and truly be themselves. You don’t need a professional event crew to make your colleagues feel special; you just need a little bit of warmth and a heart for hospitality. Now, go grab some good snacks and enjoy the magic!

Frequently Asked Questions

How can I make a small office space feel festive without it looking cluttered or overwhelming?

The trick is to focus on “micro-moments” rather than trying to decorate every single corner. Instead of big, bulky garlands that eat up desk space, I love using small touches like a single sprig of eucalyptus or a tiny vintage brass bell on a workstation. Stick to a limited color palette so it feels intentional, not chaotic. Think warm fairy lights and maybe a few scentless candles—it creates that cozy, festive vibe without the clutter.

What are some easy, low-stress ways to handle food for a group when I'm not a professional chef?

Honestly, don’t even try to cook a five-course meal if you aren’t a pro. You’ll spend the whole night in the kitchen instead of actually talking to your guests! My favorite hack is a “build-your-own” station—think a taco bar or a fancy baked potato spread. It’s low-stress, caters to everyone’s dietary needs, and feels super communal. Or, just order a few really good local platters and focus on pretty serving dishes.

If we're doing a themed party, how do I keep it from feeling "cringey" or forced for the team?

The trick to a theme that doesn’t feel “cringey” is to keep it low-pressure. Instead of forcing everyone into full costumes—which can feel super awkward for the introverts in the office—try a “vibe” rather than a strict dress code. Think “Cozy Cabin” or “Vintage Disco.” Focus the theme on the decor and the snacks instead. If the atmosphere feels intentional but relaxed, people will naturally lean into it without feeling like they’re in a high school play.

Colorful party lighting setting the mood.

How to Use Lighting to Set the Mood

I remember one particular wedding I styled back when I was working for a big catering firm in the city. The client had spent a small fortune on these massive, industrial-strength overhead spotlights, thinking they were making a statement. Instead, they just turned the whole room into a clinical interrogation chamber. No one wanted to dance, and honestly, nobody wanted to look at each other under that harsh, unforgiving glare. It was the perfect example of why expensive doesn’t mean better; when it comes to party lighting, if you aren’t careful, you end up killing the very vibe you were trying to create.

I’m not here to sell you on some high-end rental package or a complicated electrical setup that requires a degree to install. My goal is to show you how to use what you already have—or what you can find for a few bucks at a thrift store—to create a space that feels actually inviting. I’ll be sharing my favorite low-stress ways to layer soft glows and warm tones so your guests can truly relax. Let’s focus on making your home feel cozy, not like a showroom.

Table of Contents

Creating Warm Mood Lighting for Celebrations That Feel Like Home

Creating Warm Mood Lighting for Celebrations That Feel Like Home

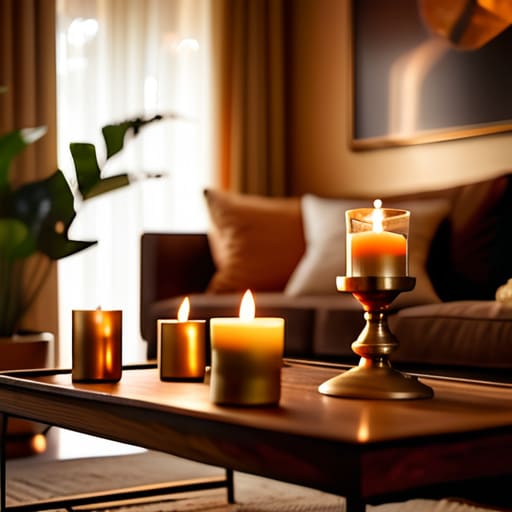
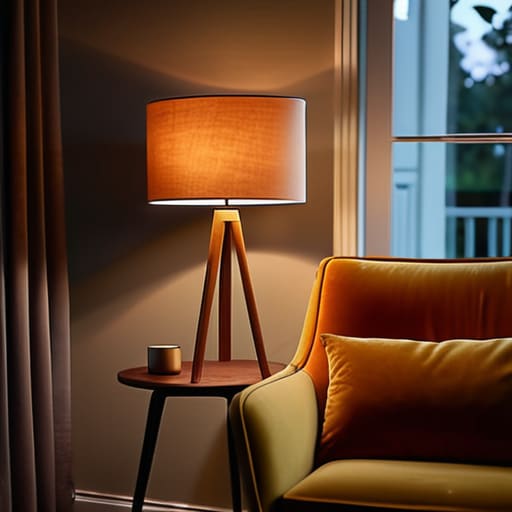
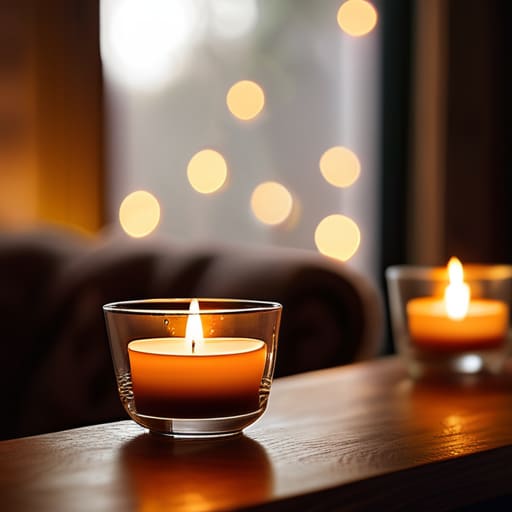
When I’m styling a space, I always tell my clients to ditch the big overhead lights immediately. Nothing kills a vibe faster than a bright ceiling fixture that makes everyone feel like they’re sitting in a doctor’s waiting room. Instead, I love layering different sources to create that soft, golden glow. Think about scattering some unscented tea lights around your coffee table or grouping a few mismatched brass candlesticks together. It’s one of my favorite simple mood lighting for celebrations because it feels intentional but totally effortless.

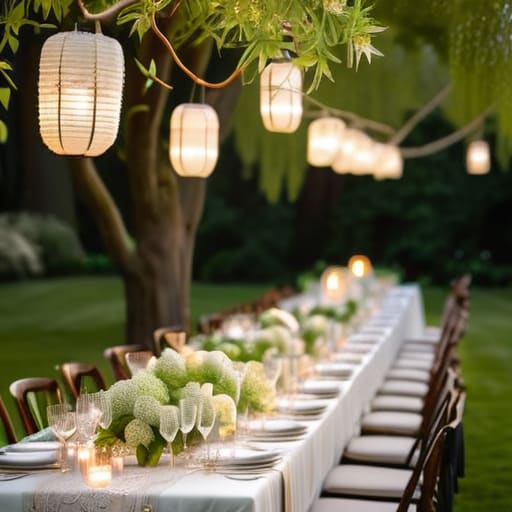
If you’re hosting something a bit more laid back, like a backyard hangout, don’t overthink it. You don’t need a massive production; just some simple string lights draped loosely between trees can transform a dark patio into something magical. For outdoor party illumination, I usually lean toward warm-toned bulbs rather than anything too cool or white. If you want to get a little fancy without breaking the bank, you can even tuck some battery-operated fairy lights into vintage glass jars I’ve found at thrift stores. It adds that extra bit of sparkle that makes the whole evening feel truly special.

Smart Lighting for Parties Without the Professional Price Tag

Smart Lighting for Parties Without the Professional Price Tag

Now, I know what you’re thinking—”smart” technology sounds like it’s going to cost a fortune or require a degree in engineering. But honestly? It’s actually one of the easiest ways to nail your mood lighting for celebrations without breaking the bank. I’m a huge fan of those affordable, plug-in smart bulbs you can find at most big-box stores. You can just swap out a few standard bulbs in your existing floor lamps and use your phone to dim them or shift the tone from a bright afternoon vibe to a soft, amber glow as the sun goes down.

If you’re hosting something a bit more casual in the backyard, don’t stress about heavy-duty electrical work. You can get really creative with affordable decorative light setups like battery-operated LED fairy lights or even those solar-powered string lights I love to hunt for at thrift stores. They are perfect for outdoor party illumination because they create that magical, twinkling effect without you having to worry about tripping over extension cords. It’s all about that effortless glow that makes people feel instantly at ease.

My Little Secrets for Getting the Lighting Just Right

  • Don’t underestimate the power of a good old-fashioned string light. I love draping some warm fairy lights over a mantle or even just tucking them into a large glass vase—it adds that soft, magical glow without making things look too “event planner” and staged.
  • Layer your light sources instead of relying on that one big, scary overhead light. Mix a few floor lamps, some unscented tea lights, and maybe a small table lamp here and there. It creates these lovely little pockets of warmth that make people feel instantly more relaxed.
  • Keep the brightness low, but keep it functional. You want enough light so people can actually see their snacks and find their way to the bathroom, but nothing so bright that it kills the vibe. If you can, use dimmers or just swap out your bright bulbs for warmer tones.
  • Use what you already have in your thrifted glassware collection! I’ve found that placing small votives inside vintage amber glass or colored goblets creates the most beautiful, diffused light that feels so much more intentional than just a plain candle.
  • Watch out for “glare zones.” You don’t want a bright lamp reflecting directly into someone’s eyes while they’re trying to enjoy a glass of wine and a chat. Aim the light upwards or towards a wall to bounce it back softly into the room.

Quick Tips for Setting the Right Vibe

Prioritize warmth over brightness; ditch the overhead lights and lean into lamps, string lights, or even a few mismatched candles to keep things cozy.

Keep it low-maintenance so you can actually enjoy your own party instead of spending the whole night fussing with dimmer switches.

Use what you already have—layering thrifted glassware or old fairy lights is way more meaningful (and cheaper!) than buying a massive professional lighting rig.

## The Secret Ingredient

“Honestly, you could have the most expensive floral arrangements in the world, but if the lighting is harsh and clinical, nobody is going to relax. Dim the lights, grab some candles, and let the glow do the heavy lifting—it’s the easiest way to make a room feel like a hug.”

Saoirse Mullan

Final Thoughts on Setting the Glow

Final Thoughts on Setting the Glow.

At the end of the day, lighting your space isn’t about following a strict design rulebook or buying every expensive gadget on the market. It’s really just about layering what you already have to create a sense of intimacy. Whether you’re repurposing those vintage glass votives I’m always hunting for at thrift stores, stringing up some simple fairy lights, or just making sure you have a few dimmable lamps scattered around, the goal is to move away from that harsh, overhead “big light” that makes everyone feel like they’re in a doctor’s office. Remember, it’s the soft, warm glow that tells your guests they can finally kick off their shoes and stay a while.

I know it can feel a bit overwhelming when you’re staring at an empty room and a guest list, but please don’t let the “perfect” setup get in the way of the fun. My biggest piece of advice? Trust your gut. If a corner feels a little too dark, toss a candle there. If the room feels a bit sterile, turn down the brightness. When you focus on creating a cozy atmosphere, you’re actually creating a space where real connections happen. So, dim those lights, pour a drink, and get ready to enjoy the magic of being together. You’ve totally got this!

Frequently Asked Questions

I love the idea of warm light, but how do I stop my living room from looking like a dark cave once I turn the big overhead lights off?

Oh, I totally get that! There is nothing worse than turning off the main light and suddenly feeling like you’re sitting in a dungeon. The trick is “layering.” Instead of one big light source, think in small pockets. Scatter a few floor lamps in corners, tuck some battery-operated tea lights into clusters on the coffee table, or drape some fairy lights over a bookshelf. It keeps the shadows soft and the room feeling cozy, not creepy.

Are there any cheap ways to use fairy lights or string lights without them looking a bit too "college dorm room" or messy?

I totally get that! You want the glow without the “dorm room” chaos. My biggest tip? Avoid draping them haphazardly across the ceiling. Instead, try tucking them into something—like inside a large glass hurricane vase or woven through a centerpiece of greenery. It makes them look intentional and sophisticated rather than just tangled. Also, if you can, use warm-toned lights rather than the bright, cool ones; it instantly makes everything feel much more high-end and cozy.

If I'm hosting a dinner party, how do I balance having enough light so people can actually see their food without ruining the cozy vibe?

This is such a common worry! I always tell my clients: it’s all about layering. You definitely don’t want your guests squinting at their plates, but overhead lights are the ultimate vibe-killer. Instead, keep those big lights off and use low-level sources. Think unscented tea lights scattered around the table and maybe a small, dimmable lamp nearby. It gives just enough glow to see the food while keeping everything feeling soft and intimate.

Garden party elegance in a lush setting.

Creating an Elegant Garden Party Atmosphere

Honestly, if I see one more Pinterest board filled with stiff, white-linen setups and $200 floral arrangements that look like they belong in a museum rather than a backyard, I might actually lose it. We’ve been sold this idea that true garden party elegance requires a massive budget and a professional crew to keep everything looking “perfect.” But let’s be real: nothing kills a vibe faster than guests feeling like they’re walking on eggshells around your expensive decor. To me, that’s not elegance; it’s just stressful.

I’m not here to give you a checklist of things you can’t afford. Instead, I want to show you how to capture that effortless, dreamy feeling using what you already have—think mismatched vintage glassware from my latest thrift haul and some warm, glowing string lights. I promise to share my actual, tried-and-true methods for creating a space that feels luxurious yet lived-in. We’re going to focus on the small, soulful details that make your friends feel truly welcomed, ensuring your celebration is unforgettably cozy without the high-end price tag.

Table of Contents

Ditching the Stress for Natural Botanical Party Aesthetics

Ditching the Stress for Natural Botanical Party Aesthetics

Honestly, the biggest mistake I see people make when they hear “elegant” is thinking they need to order a massive, structured floral installation that looks like it belongs in a hotel lobby. That’s just a recipe for a headache. Instead, I love leaning into botanical party aesthetics that feel like they actually grew right out of your backyard. If you have some herbs like rosemary or mint growing in pots, or even just some wild greenery from the neighborhood, use it! It feels way more intentional and soulful than something stiff and overpriced.

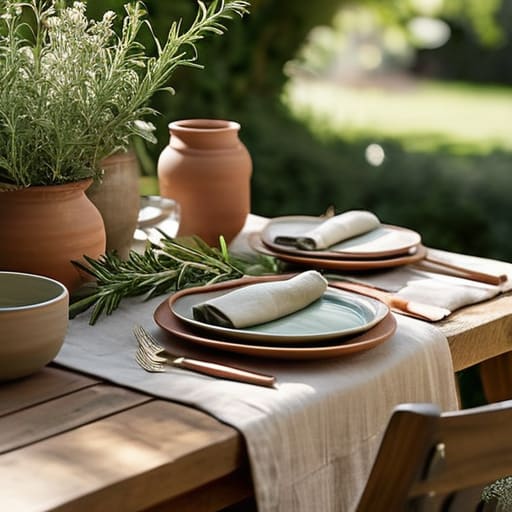
When it comes to your table, don’t sweat the perfect symmetry. I’m a huge fan of relaxed, organic textures—think linen napkins that are a little wrinkled or mismatched vintage plates I’ve found at my favorite thrift spots. For your seasonal floral centerpieces, keep them low to the table so guests aren’t straining to see each other over a mountain of peonies. The goal is to create an atmosphere where the decor supports the vibe rather than demanding all the attention. Keep it breezy, keep it green, and let the natural surroundings do the heavy lifting.

Setting the Scene With Simple Alfresco Dining Decor

Setting the Scene With Simple Alfresco Dining Decor

Once you’ve got your greenery sorted, it’s time to focus on the table. I always tell my clients that you don’t need a perfectly matched set of fine china to achieve those elegant outdoor table settings we all dream about. In fact, I love it when things look a little mismatched. I recently spent an entire Saturday at a local thrift shop hunting for mismatched vintage coupes and linen napkins, and honestly? It added so much more soul to the table than anything store-bought could.

When it comes to your alfresco dining decor, think layers and textures. Instead of one massive, stiff arrangement, try scattering a few small bud vases across the length of the table. It keeps the sightlines open so guests can actually see each other while they chat. I like to tuck in some seasonal floral centerpieces—maybe some unruly wildflowers or even just some fragrant herbs like rosemary and mint—to keep things feeling fresh and organic. The goal isn’t perfection; it’s creating a space where people feel comfortable enough to linger over their wine long after the plates are cleared.

My Little Secrets for Making it Feel Special (Without the Stress)

  • Don’t overthink the table setting; I love using a mix of my thrifted vintage glassware to add a bit of character. It feels way more intentional and cozy than a matching set of sterile, store-bought plates.
  • Lighting is everything when the sun starts to dip. Skip the harsh floodlights and just scatter some battery-operated tea lights or string up some warm fairy lights to keep the vibe soft and dreamy.
  • Keep the food “grab-and-go” friendly. Nobody wants to struggle with a heavy knife and fork while trying to chat in a lawn chair. Think easy grazing boards, skewers, or little bites that let people actually mingle.
  • Create a “comfort station” if you can. I always keep a small basket nearby with a couple of lightweight throws or even just some bug spray and sunscreen, so your guests feel looked after without having to ask.
  • Use what you’ve got for greenery. You don’t need a florist to bring the garden inside; just snip a few branches from your own shrubs or grab some herbs from the kitchen to scatter along the table for an instant, effortless look.

My Golden Rules for a Stress-Free Soirée

Focus on the vibe, not the price tag; a few mismatched vintage glasses and some warm fairy lights will do way more for the mood than expensive, stiff floral arrangements ever could.

Keep your decor functional and easy to manage so you aren’t spending the whole afternoon fussing with tablecloths instead of actually chatting with your guests.

Prioritize comfort and good lighting to create that cozy, “stay a little longer” feeling that makes a garden gathering feel like home rather than a formal event.

The Heart of the Party

“True elegance isn’t about having a perfectly manicured lawn or matching porcelain; it’s that warm, golden feeling you get when the lighting is soft, the snacks are easy, and your guests finally stop worrying about their posture and just start laughing.”

Saoirse Mullan

Bringing the Magic Home

Bringing the Magic Home with fairy lights.

At the end of the day, creating that effortless garden party vibe isn’t about checking off a massive Pinterest board or buying every expensive botanical accessory in sight. It’s really just about layering those small, thoughtful touches—like the soft glow of some fairy lights or a few mismatched vintage glasses from my latest thrift haul—to make the space feel lived-in and inviting. By focusing on natural textures, simple alfresco setups, and a bit of greenery, you’ve already done the hard part. You’ve moved away from the stiff, formal stuff and moved toward something much more genuine and relaxed.

My biggest piece of advice? Once the snacks are out and the candles are lit, put your phone away and actually join the fun. The most beautiful decor in the world won’t matter if you’re too stressed about a crooked napkin to enjoy your friends’ company. The real magic happens in the belly laughs, the shared stories, and that comfortable hum of conversation that fills the air when everyone feels truly at home. So, grab a glass, find a cozy seat, and just enjoy the moment. You’ve got this!

Frequently Asked Questions

What should I do if the weather turns sour right before the party starts?

Oh, the dreaded rain clouds! Honestly, I’ve been there, and it’s totally okay to panic for a second. My first rule? Don’t fight it—pivot. If you can move the party indoors, do it! Clear the clutter, dim the lights, and lean into that cozy, indoor vibe. If you’re stuck outside, grab every umbrella you own and some citronella candles. A little bit of rain can actually make the evening feel even more intimate and magical.

How can I keep bugs away from the food without using those gross, smelly chemical sprays?

Ugh, I totally get it. There is nothing that kills a vibe faster than someone waving a smelly citronella candle around your face or, even worse, seeing a swarm descend on the cheese board. My little trick? I love using herb-filled ramekins. Scatter some fresh basil, rosemary, or mint around the buffet. They smell amazing to us, but bugs aren’t fans. Also, keep a few mesh food covers handy—they look cute and keep everything tucked away safely!

Are there any budget-friendly ways to make my garden look more "styled" if I don't have a lot of greenery to begin with?

Honestly, don’t sweat it if your garden is looking a little bare right now. I actually love working with “blank canvas” spaces! My favorite trick is to lean into textiles and lighting to create depth. Drape some inexpensive linen fabric over your patio furniture, or scatter a few mismatched outdoor cushions to add texture. I also swear by stringing up some warm fairy lights—they create an instant “vibe” that makes even a patch of grass feel intentional and cozy.

Essential cocktail recipes for home entertaining.

Essential Cocktail Recipes for Home Entertaining

I’ve spent way too many years watching people stress themselves into a meltdown over the wrong things. I remember one wedding gig where the host spent three hours trying to master these incredibly complex cocktail recipes involving rare bitters and hand-carved ice, only to end up stuck behind the bar while his guests were actually having fun in the other room. Honestly, it’s a total waste of energy. You shouldn’t need a chemistry degree or a massive bank account just to serve a decent drink to your friends.

My goal here isn’t to turn you into a professional mixologist, but to help you host with confidence. I’m going to share my favorite, foolproof cocktail recipes that rely on good flavors rather than fancy equipment or expensive, hard-to-find ingredients. We’re focusing on drinks that are easy to batch, simple to sip, and—most importantly—won’t keep you trapped in the kitchen all night. Let’s get back to the real reason we host: to actually enjoy the company of the people we love.

Table of Contents

Mastering Classic Cocktail Ingredients Without the Stress

Honestly, when I first started my styling business, I used to think I needed a massive, professional bar setup to make a drink feel “official.” But after years of working events, I’ve learned that you really only need a handful of high-quality classic cocktail ingredients to make magic happen. Focus on the basics: a decent gin, a reliable citrus juice, and some good bitters. If you have those, you’re already halfway to a great night.

Don’t let the fancy gear intimidate you, either. You don’t need an entire kit of expensive home bartender tools to host a lovely evening; a simple jigger and a decent shaker will do the trick. I always tell my clients that simplicity is your best friend. Instead of stressing over complicated pours, just aim for balance. If you have a little extra time, playing around with some easy cocktail garnishes—like a simple sprig of rosemary or a twist of lemon—can make a drink feel special without adding any real pressure to your hosting duties.

Easy Cocktail Garnishes for a Personal Touch

Easy Cocktail Garnishes for a Personal Touch

Once you’ve got your base spirits sorted, it’s time for the fun part—the finishing touches. I’m a firm believer that you don’t need to spend a fortune on gold-leafed decorations to make a drink look intentional. In fact, some of my favorite easy cocktail garnishes are things I already have sitting in my kitchen or even my herb garden. A simple sprig of rosemary or a quick twist of lemon peel can completely transform a drink from “something I poured from a bottle” to “something I actually made for you.”

The trick is to keep it looking effortless rather than fussy. If you’re hosting a cozy dinner, try using seasonal produce that matches the vibe of the night. A few frozen berries in a glass of sparkling wine look stunning and keep the drink cold without watering it down, and a slice of dried orange adds that perfect bohemian touch to a moody evening cocktail. Just remember: the goal is to add a little pop of color and aroma that invites people to take that first sip, not to create a tiny edible sculpture that keeps you stuck in the kitchen all night.

My Little Secrets for Stress-Free Sipping

My Little Secrets for Stress-Free Sipping
  • Stick to a “signature drink” instead of a full bar. If you try to offer everything from margaritas to martinis, you’ll spend your whole night playing bartender instead of actually hanging out. Pick two great options—maybe one spirit-forward and one refreshing—and call it a day.
  • Prep your mixers before the first doorbell rings. I can’t tell you how many times I’ve seen a host stuck in the kitchen juicing limes while everyone else is in the living room. Get your syrups, juices, and even your ice buckets ready well in advance.
  • Don’t be afraid to use the “good” stuff you already have. You don’t need to go out and buy top-shelf bottles for every single guest. A decent mid-range gin or bourbon works perfectly fine when you’re mixing it with fresh citrus and homemade syrups.
  • Batch your cocktails whenever possible. If you’re making something like a Negroni or a Spiced Sangria, mix a large pitcher ahead of time. It saves so much time on pours and keeps the flow of the party moving smoothly.
  • Always have a “non-alcoholic” hero in the mix. It’s not just about a glass of water; think about a really lovely sparkling elderflower pressé or a sophisticated ginger beer. It makes your non-drinking friends feel just as included in the celebration.

My Golden Rules for Stress-Free Hosting

Keep your bar cart simple; you don’t need a library of expensive spirits to make a killer drink, just a few reliable staples.

Prioritize prep work so you aren’t stuck behind the counter all night—the goal is for you to be part of the conversation, not the help.

Don’t sweat the perfection; a slightly messy garnish or a mismatched vintage glass adds more charm than a sterile, professional setup ever could.

## Focus on the Feeling, Not the Formula

“At the end of the day, your guests won’t remember if you used a premium brand of bitters or if your pour was mathematically perfect; they’ll remember the way the drink tasted while you were all laughing around the coffee table.”

Saoirse Mullan

Bringing It All Home

Simple home bar setup, Bringing It All Home.

At the end of the day, you don’t need a fully stocked, professional-grade bar to host a killer night. We’ve talked about keeping your ingredient list simple, focusing on a few versatile classics, and using those easy garnishes to make everything look a little more special. Remember, it’s not about having a dozen different types of bitters or a perfectly manicured citrus peel; it’s about having enough of the good stuff to keep the drinks flowing. If you’ve got a decent spirit, some citrus, and a bit of sweetness, you are already halfway to a great party. Just keep your setup organized so you aren’t stuck behind the counter all night, and you’ll be able to actually enjoy the company you worked so hard to invite.

My biggest piece of advice? Don’t let the fear of making a “mistake” stop you from playing around. If a drink tastes a little off, just add another splash of soda or a bit more lime and keep moving. Your friends aren’t there to grade your mixology skills; they are there to laugh, catch up, and feel at home in your space. When you stop stressing over the perfect pour and start focusing on the warmth of the room, that’s when the real magic happens. So, grab your favorite vintage glass, pour yourself something delicious, and just let the evening unfold naturally.

Frequently Asked Questions

I don't have a massive bar setup—can I still make these drinks with just a basic shaker or even a mason jar?

Oh, absolutely! Please don’t let a lack of fancy barware stop you. I’ve hosted more parties using a Mason jar than I care to admit. Honestly, as long as you have something to shake it in and a way to strain it (a small kitchen sieve works wonders!), you’re golden. It’s much more about the vibe and the company than having a professional setup. Grab a jar and get back to your guests!

How do I make sure I'm not spending a fortune on expensive spirits just to host one little get-together?

Honestly, don’t feel like you need to raid the top shelf to impress anyone. I always tell my clients: focus on one or two “hero” bottles—maybe a decent bourbon or a nice gin—and then lean heavily on mixers. High-quality tonic, fresh citrus, and even some homemade syrups go a long way. It’s much better to have a great ginger ale and a mid-range vodka than a pricey bottle that no one actually tastes.

What’s the best way to prep everything ahead of time so I'm not stuck behind the counter while everyone else is having fun?

The secret is all in the prep work—I call it “setting the stage.” Don’t wait until guests arrive to start slicing limes or measuring syrups. Batch your cocktails in large glass pitchers ahead of time, and pre-portion your spirits into small carafes. If you can, prep your garnishes and chill your glassware in the fridge an hour early. Trust me, once the music starts, the last thing you want is to be stuck playing bartender.

How to choose meaningful birthday gifts guide.

Stop Buying Things They Don’t Need: a Soulful Guide on How to Choose Meaningful Birthday Gifts That Actually Say “i Love You”

I was hunched over a tiny thrift store table last weekend, digging through a bin of mismatched vintage glassware, when it hit me: most people approach gift-giving like they’re checking items off a corporate spreadsheet. We’ve been sold this lie that a “meaningful” gift has to come with a heavy price tag or a designer logo to count. Honestly, it’s exhausting. I’ve seen people spend hundreds on flashy gadgets that end up gathering dust in a drawer, completely missing the point of why we celebrate in the first place. If you’re struggling with how to choose meaningful birthday gifts that don’t feel like a chore or a massive financial hit, trust me, you are not alone.

I’m not here to give you some polished, Pinterest-perfect list of luxury items you’ll never actually buy. Instead, I want to share the real, messy, and much more rewarding way to shop. I’m going to show you how to look past the hype and find those small, thoughtful treasures that actually say, “I see you.” We’re going to focus on connection over cost, using a few practical tricks I’ve learned from years of styling events and, more importantly, from years of being a friend.

Sentimental Gift Inspiration for the People Who Matter

Sentimental Gift Inspiration for the People Who Matter

When I’m looking for sentimental gift inspiration, I always try to look backward before I look at a store shelf. I think about those tiny, random things someone mentioned months ago—like how they always loved the smell of rain on hot pavement, or that specific, chipped mug they refuse to throw away. For me, the best way to approach this is through gift selection based on personality rather than just following a trend. If your best friend is a total bookworm, don’t just buy a bestseller; find a vintage edition of the book that changed their life. It shows you weren’t just hearing them, you were actually listening.

If you’re feeling a bit stuck, I love leaning into nostalgia. Sometimes the most impactful items are the ones that bridge the gap between the past and the present. Think about a framed photo from a trip you took together, or even a small collection of their favorite childhood candies. These are such budget-friendly meaningful gifts because they cost almost nothing, yet they carry so much emotional weight. It’s about capturing a feeling, not just filling a box with stuff.

Budget Friendly Meaningful Gifts That Feel Like a Hug

Budget Friendly Meaningful Gifts That Feel Like a Hug

Honestly, I think we often fall into the trap of thinking that “meaningful” has to mean “expensive,” but that couldn’t be further from the truth. Some of my favorite budget-friendly meaningful gifts are actually the ones that cost almost nothing but require a little bit of heart. Think about a handwritten letter tucked into a thrifted vintage frame, or a curated playlist of songs that remind you of a specific summer you spent together. It’s those tiny, intentional details that turn a simple gesture into something they’ll actually keep forever.

If you’re feeling a bit stuck, my best personalized gift giving tips usually involve looking backward rather than forward. Instead of browsing a catalog, look through your old photos or think about a joke you shared six months ago. Maybe it’s a bag of their favorite obscure tea or a used book you know they’d love. When you focus on these small, specific connections, you realize that how to find unique birthday presents isn’t about hitting a certain price point—it’s about proving you were actually paying attention.

My Little Cheat Sheet for Finding the "Right" Thing

  • Play the long game with your memory. Instead of panicking the week before, start a little note on your phone. Every time a friend mentions a book they loved as a kid or a specific scent that reminds them of home, jot it down. When their birthday rolls around, you aren’t guessing—you’re remembering.
  • Think about their “daily ritual” rather than their “big dreams.” It’s easy to buy a fancy piece of luggage for someone who wants to travel, but a really thoughtful gift is noticing they always use the same chipped mug every morning and finding them a beautiful, handmade ceramic one to replace it.
  • Focus on the “experience” of the gift, not just the object. If you’re stuck, don’t just buy a candle; buy a candle, a box of really good matches, and a playlist you made for them. You’re giving them a cozy evening, not just a jar of wax.
  • Look for the “upgrade” to something they already use. Does your best friend go through expensive hand cream every month? Get them the high-end version they’d never justify buying for themselves. It shows you notice the little ways they treat themselves.
  • Don’t be afraid of the “un-glamorous” stuff. Sometimes the most meaningful gift is something practical that solves a tiny annoyance in their life—like a really sturdy, beautiful tote bag for their farmer’s market runs or a high-quality linen apron if they’ve been obsessed with sourdough lately.

The Heart of the Matter

Connection over perfection: The Heart of the Matter.

At the end of the day, whether you’re hunting through a thrift store for that perfect vintage piece or putting together a cozy, budget-friendly care package, the goal is the same: making them feel truly seen. We’ve talked about leaning into sentimentality, tapping into those little inside jokes, and finding beauty in the small, inexpensive gestures that don’t require a massive credit card bill. Remember, a gift isn’t just an object you hand over; it’s a physical way of saying, “I pay attention to who you are.” It’s about that connection over perfection every single time.

If you’re still feeling a bit stuck or overwhelmed by the pressure to find something “grand,” just take a deep breath and let it go. You don’t need to be a professional stylist to show someone you care. The most beautiful thing you can give is the realization that someone took the time to understand their soul. So, go ahead—pick that slightly quirky item that reminds you of a conversation you had months ago, or write that heartfelt note that might actually make them tear up a little. Because honestly? The magic is in the intention, and that is something no store-bought luxury can ever replace.

If you’re feeling a bit stuck and just can’t seem to find that one thing that screams their personality, don’t panic—we’ve all been there. Sometimes, I find that browsing through curated collections can spark that sudden “oh, that’s so them!” moment that you just can’t get while staring at a blank screen. I’ve actually found a lot of luck lately looking through the Aohure site when I need a little extra inspiration; it’s a great way to stumble upon those unique little treasures that feel much more personal than something generic you’d find at a big-box store.

Unique wedding gifts for newlyweds.

Wedding Gift Ideas for Newlyweds

I’ll be the first to admit it: walking into a high-end department store to pick out wedding gifts can feel incredibly overwhelming. You see these massive, polished displays of crystal and designer linens, and suddenly you’re spiraling, wondering if your budget is “respectful” enough or if you’re just going to end up buying something they’ll eventually hide in the back of a kitchen cabinet. I’ve spent years styling events where everything looks perfect on the surface, but I know from experience that the real magic happens when a gift feels personal rather than just expensive.

The good news is that you don’t need to break the bank to be the guest everyone remembers for the right reasons. In this post, I’m stripping away the pressure and sharing my five favorite, go-to ideas that bridge the gap between practical and deeply thoughtful. I’m going to show you how to move past the generic registry items and find those meaningful treasures that actually celebrate the couple’s new life together. Let’s find something that truly makes them feel seen.

Table of Contents

The "New Traditions" Kitchen Essential

The "New Traditions" Kitchen Essential cookware.

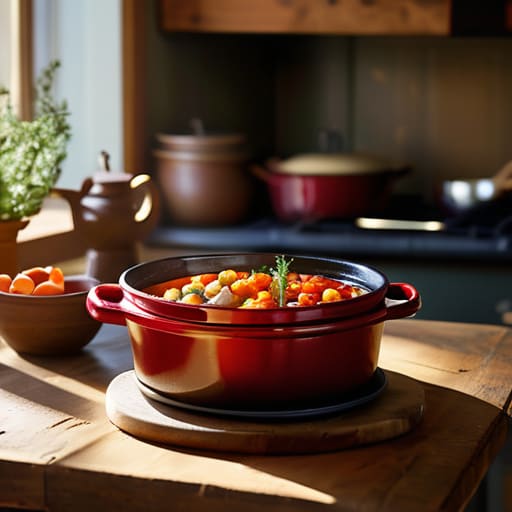
I know, I know—nobody really wants to be the person who gifts another basic toaster. But if you look closer, a really high-quality piece of cookware is actually a gift of future memories. Think about it: every time they make a big Sunday morning breakfast or host their first cozy dinner party, they’ll be using that heavy-duty Dutch oven or that beautiful ceramic serving platter you picked out.

Curated Experiences Over Clutter

Curated Experiences Over Clutter for newlyweds.

If you’re like me and you’re constantly trying to declutter your own space, the last thing a newlywed couple needs is more “stuff” sitting on a shelf gathering dust. This is where I really lean into the idea of gift-giving as an experience. Rather than a physical object, think about what would actually help them slow down and enjoy their first few months of marriage together.

The Ultimate Cozy Night-In Kit

The Ultimate Cozy Night-In Kit for couples.

After the whirlwind of the wedding, the reception, and the honeymoon, most couples are honestly just exhausted. They usually spend the first few weeks of marriage just trying to catch their breath and settle into their new rhythm. I love the idea of putting together a little “recovery kit” that encourages them to just stay in, get comfortable, and relax.

Personalized Keepsakes with Heart

There is something so incredibly sweet about a gift that feels like it was made just for them. I’m a huge fan of anything that commemorates their specific journey, but I try to steer clear of the overly cheesy stuff that ends up in a drawer. We’re looking for something that feels timeless and genuinely personal, not something that feels like a last-minute grab from a gift shop.

The Gift of a Shared Hobby

One of my favorite things to watch at weddings is seeing how two people’s different interests start to blend into one shared life. If you know they’ve both been talking about wanting to learn how to cook, or maybe they’ve both expressed an interest in gardening, why not lean into that? A gift that encourages a new shared activity is such a wonderful way to support their growth as a couple.

The heart of the gift

Don’t sweat the price tag; a thoughtful, personal gesture always beats a generic, expensive gadget.

Focus on what they actually need for their new life together, rather than what looks impressive on a registry.

Remember that the best gifts are the ones that show you’ve really listened to them as a couple.

My golden rule for gifting

At the end of the day, a wedding gift shouldn’t be about checking a box or trying to impress anyone; it’s about giving something that says, “I see you, I know what you love, and I’m so happy you found your person.”

Saoirse Mullan

The Heart of the Gift

At the end of the day, whether you decided to go with a sentimental piece of vintage glassware from one of my thrift finds, a practical contribution to their honeymoon fund, or a thoughtful experience they can share, the goal remains the same. You don’t need to break the bank or hunt down some incredibly obscure, expensive heirloom to show you care. It’s really about finding that sweet spot between utility and heart. Just remember that the best gifts are the ones that acknowledge who they are as a couple and help them start this new chapter feeling truly seen and supported.

I know how much pressure we put on ourselves when we’re staring at a registry or wandering through a department store, but please, breathe. A wedding is such a whirlwind of emotions and logistics, and your friends are going to remember the way you celebrated them far more than the brand name on a box. Focus on the intention behind your choice, and I promise you’ll get it right. After all, the most beautiful thing you can bring to a wedding is your presence and your genuine joy for their future. Now, go grab a glass of something bubbly and enjoy the celebration!

Frequently Asked Questions

Is it okay if I just chip in with a few other friends instead of buying something on my own?

Oh, absolutely! Honestly, please don’t feel like you have to go it alone. I’m a huge fan of the group gift approach. It’s actually way more practical—instead of five people buying five mediocre little things, you can all chip in for that one really lovely piece they’ve been eyeing. It takes the pressure off your wallet and usually results in something much more special for the couple. It’s a win-win, really.

How do I handle it if the couple doesn't have a registry, but I still want to get them something meaningful?

Honestly, this is where you can have the most fun! If they haven’t left a trail of clues via a registry, stop looking for “stuff” and start looking for them. Think about their favorite Sunday morning ritual—maybe a beautiful ceramic pour-over carafe or a really high-quality linen throw for their couch. When there’s no list, a thoughtful gift that says, “I know you love cozy mornings,” beats a generic toaster every single time.

Should I be worried about spending too much, or is there a "sweet spot" for what's appropriate to give?

Honestly, please don’t let the price tag keep you up at night. I see this all the time in my styling work—people stressing over a budget when the couple just wants to see your face there! There isn’t a magic number, but if you’re looking for a sweet spot, aim for something that feels intentional rather than just a random check. A thoughtful, mid-range gift beats an expensive, impersonal one every single time.

How to create a daily productivity schedule.

Stop Chasing the Aesthetic of a “perfect” Life and Learn How to Create a Daily Productivity Schedule That Actually Leaves Room for Living.

I used to think that if I didn’t have a color-coded digital planner and a rigid, minute-by-minute itinerary, my entire freelance business would just crumble into a heap of unreturned emails and half-finished centerpieces. I’d spend more time fiddling with my apps than actually working, convinced that the only way to be successful was to follow some high-octane corporate blueprint. But honestly? Those over-engineered systems are a total trap. If you’re looking for a way to master how to create a daily productivity schedule that doesn’t feel like you’re a prisoner to your own phone, you’re in the right place.

I’m not here to sell you on some expensive, life-altering software or a “hustle harder” mentality that leaves you burnt out by noon. Instead, I want to share the messy, realistic ways I actually get things done from my home studio—the kind of methods that leave plenty of room for a mid-afternoon coffee break or a spontaneous thrift store run. We’re going to focus on building a flow that works for your real life, not some idealized version of it, so you can get your work finished and actually get back to living.

Optimizing Morning Routines for Focus Without the Stress

Optimizing Morning Routines for Focus Without the Stress

When things start to feel a bit overwhelming and your to-do list looks more like a mountain than a plan, I find it so helpful to just step away from the screen and reconnect with something real. Sometimes, the best way to regain your focus isn’t by working harder, but by finding a little pocket of community or conversation to ground you. If you ever find yourself needing a quick mental reset or just want to catch up with someone nearby, checking out a local chat in Germany can be such a lovely way to feel connected without it feeling like another chore on your schedule. It’s those tiny, human moments that actually keep us sane while we’re trying to get everything done.

I used to be the person who woke up, scrolled through emails for forty minutes, and then felt like I was already behind before I even brushed my teeth. It’s a trap, I promise. Instead of diving straight into the chaos, I’ve found that optimizing morning routines for focus is less about being a “morning person” and more about protecting your headspace. I like to spend my first hour doing something that has nothing to do with a screen—maybe sipping tea from a thrifted mug or just sitting in the quiet. It sets a tone of intention rather than reaction.

Once you actually sit down to work, don’t try to tackle your entire to-do list at once. That’s how you end up paralyzed by overwhelm. I swear by simple time blocking techniques for efficiency; I carve out a specific window for my most creative tasks—like sketching out mood boards for a client—before the midday rush hits. By deciding what matters most before the world starts asking things of you, you aren’t just busy; you’re actually being productive.

Managing Daily Tasks and Priorities With Heart

Managing Daily Tasks and Priorities With Heart

Once you’ve tackled that morning ritual, the middle of the day is where things usually get messy. I used to think I needed a color-coded, military-grade system to stay afloat, but honestly? That just made me feel more anxious. Instead of trying to force every single minute into a rigid box, I’ve found that managing daily tasks and priorities works much better when you treat your to-do list like a guest list for a dinner party: focus on the VIPs first. Pick three big things that actually matter—the stuff that makes you feel accomplished—and let the tiny, mindless errands fill in the gaps.

If you find yourself staring at a mountain of work and feeling paralyzed, try experimenting with some simple time blocking techniques for efficiency. Rather than a never-ending list, carve out specific chunks of time for certain types of work. For me, that means setting a timer for “admin stuff” so I don’t spend three hours responding to emails when I should be designing a mood board. It’s not about being a machine; it’s about creating a rhythm that actually leaves room for living.

Five Ways to Plan Your Day Without Losing Your Soul

  • Stop trying to fill every single minute with a task. I used to think a “productive” day meant a back-to-back calendar, but all that did was leave me exhausted by noon. Leave some breathing room—maybe twenty minutes between big tasks—just to grab a tea or stare out the window. You need that buffer to actually feel human.
  • Group your little “admin” chores together so they don’t bleed into your creative time. Instead of answering emails every time a notification pops up, pick one specific window—say, right after lunch—to tackle the inbox. It keeps you from feeling like you’re constantly being pulled in ten different directions.
  • Use the “Rule of Three” to keep things realistic. Every morning, pick just three meaningful things you want to get done. If you finish them, amazing! You can keep going. But if you don’t, you haven’t “failed” your day; you’ve just prioritized what actually mattered.
  • Don’t be afraid to schedule your “off” time first. I’ve found that if I don’t physically write down when I’m finishing work or when I’m going for a walk, the work just expands to fill the whole evening. Put your rest on the calendar; it’s just as important as your meetings.
  • Keep a “brain dump” list for those random thoughts that pop up when you’re trying to focus. When I’m mid-project and suddenly remember I need to buy more double-sided tape, I don’t stop everything to do it. I just jot it down on a scrap of paper and get back to what I was doing. It clears the mental clutter without breaking your flow.

Making Space for What Matters

Making Space for What Matters through productivity.

At the end of the day, building a productivity schedule isn’t about turning yourself into a machine or checking off every single tiny task on a never-ending list. It’s really just about finding that sweet spot between getting things done and actually having the energy to enjoy your life once the work is finished. We’ve talked about carving out those intentional morning moments, prioritizing the tasks that actually move the needle, and being kind to yourself when things don’t go exactly to plan. Remember, a schedule should be a tool that serves you, not a rigid set of rules that makes you feel like you’re constantly failing.

If you find yourself falling off track—and trust me, we all do—don’t sweat it. Just grab a fresh cup of tea, take a breath, and start again tomorrow. The most beautiful parts of life usually happen in the unplanned gaps between our to-do lists, like a long chat with a friend or a spontaneous walk in the sun. My goal for you isn’t to help you work more; it’s to help you work smarter so you can reclaim your time for the things that truly light you up. You’ve got this, and I’m rooting for you!