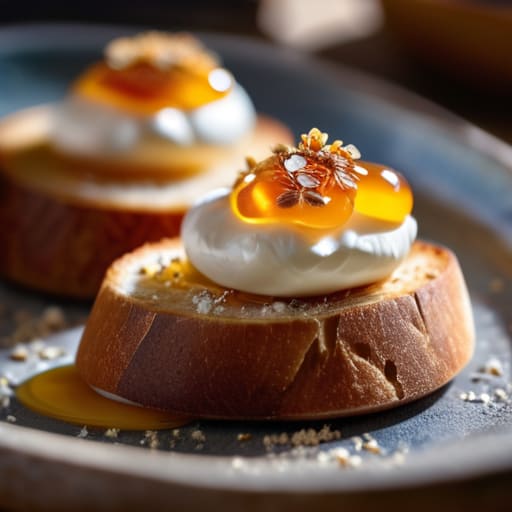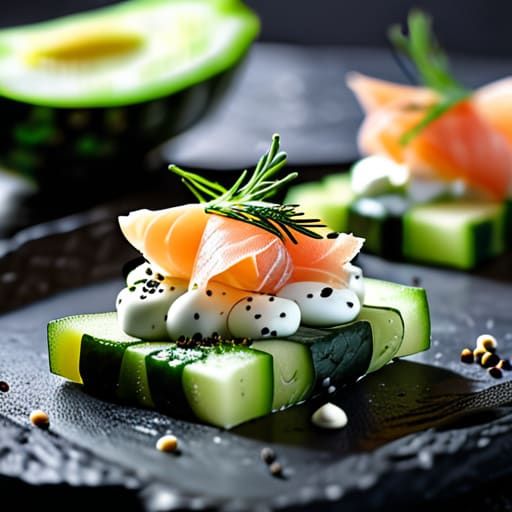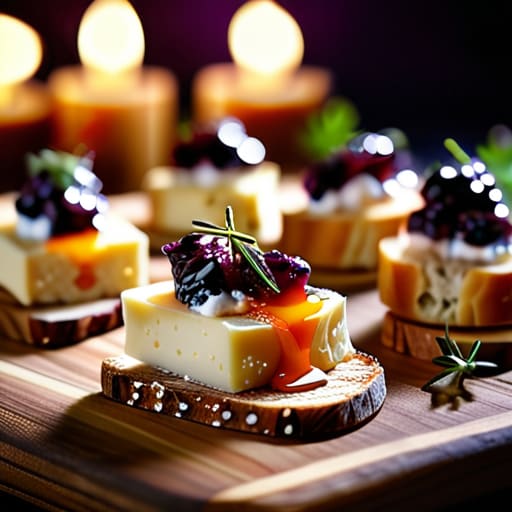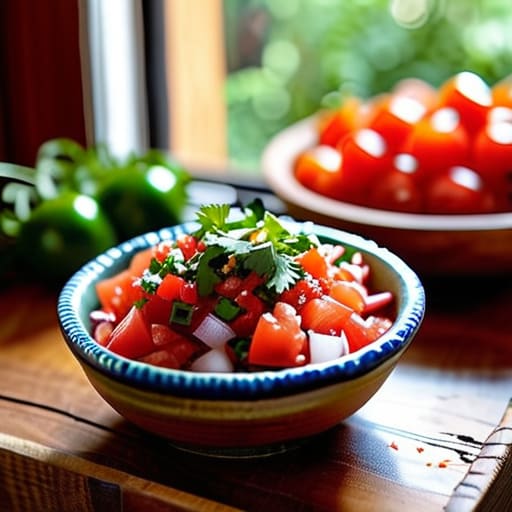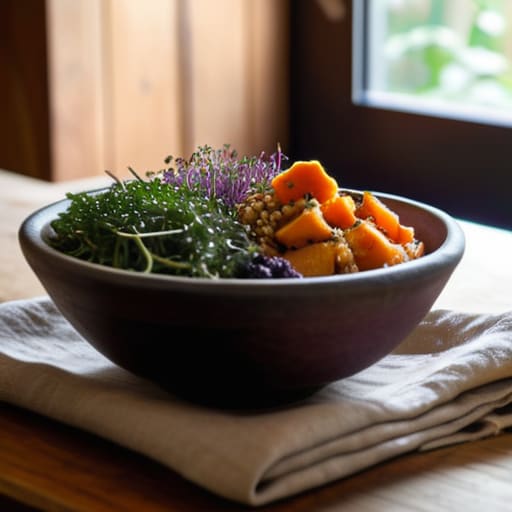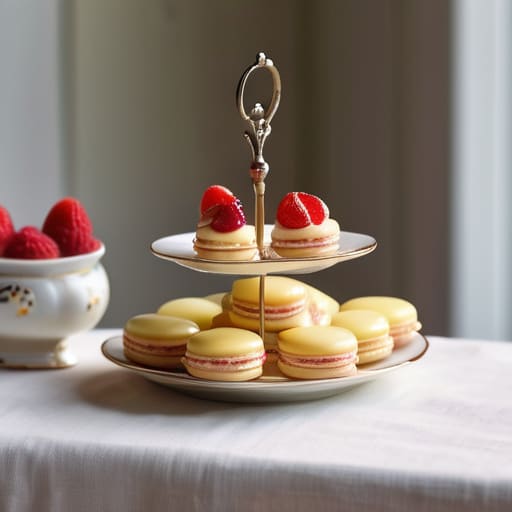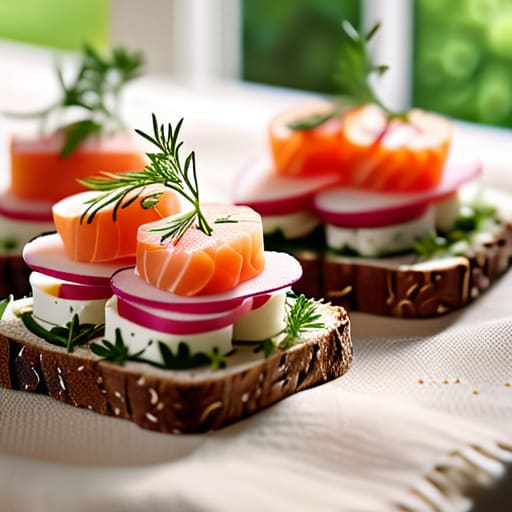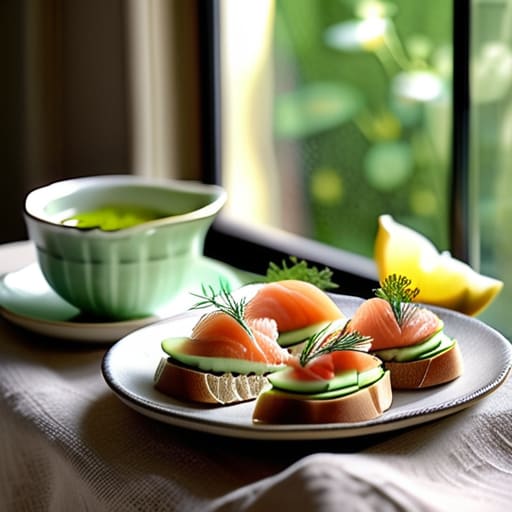
Category: Food

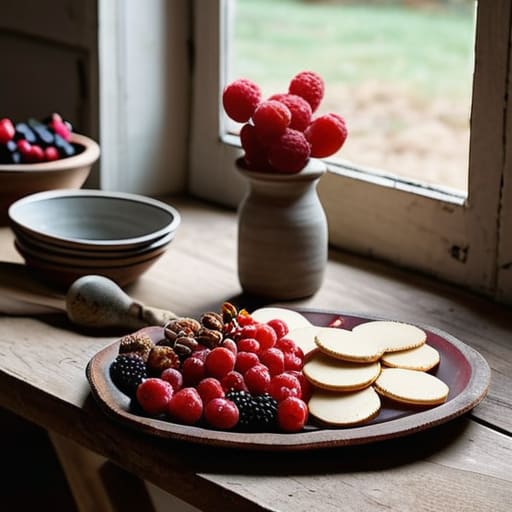
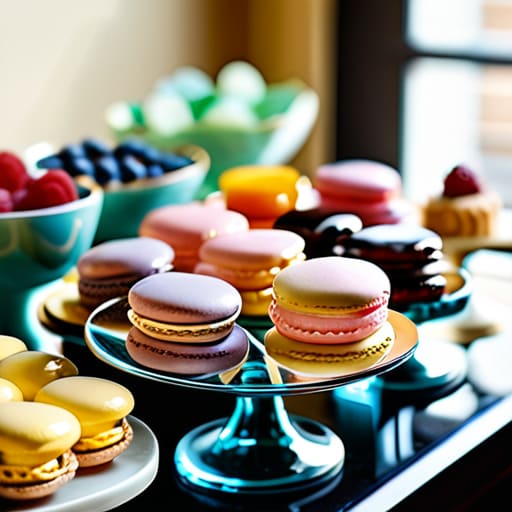
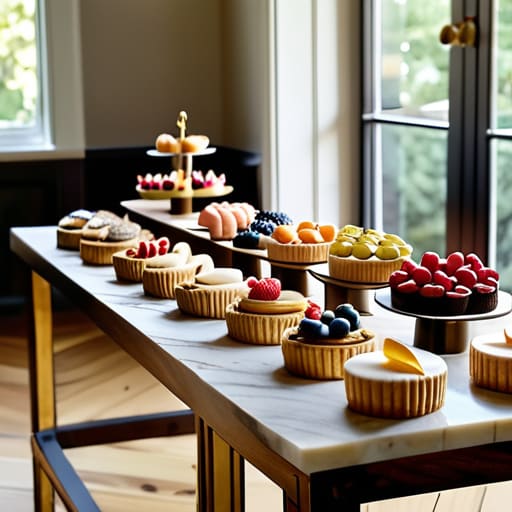
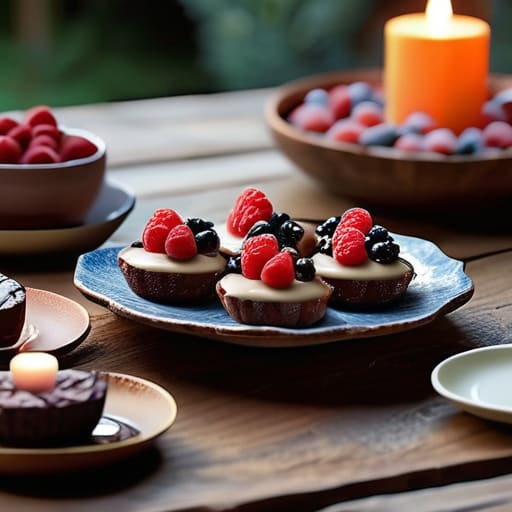
Organizing a beautiful dessert buffet layout.

How to Organize a Dessert Buffet

I still remember one of my first big catering gigs back in my twenties, standing in a massive hotel kitchen staring at a towering, three-tiered sugar sculpture that cost more than my monthly rent. It looked incredible in photos, but honestly? It was a total nightmare. Nobody actually wanted to eat it, and guests felt too intimidated to even grab a napkin, let alone a piece of cake. I realized then that a fancy dessert buffet shouldn’t be a museum exhibit designed to make you feel inadequate; it should be a delicious, approachable spread that invites people to linger and grab a second helping while they’re mid-conversation.

I’m not here to tell you that you need a professional pastry chef or a designer budget to pull this off. Instead, I want to share how you can build a stunning, soulful dessert table using what you already have—maybe even some of that vintage glassware I’m always hunting for at thrift stores. I’ll be sharing my no-nonsense guide to arranging treats that look beautiful but, more importantly, actually taste like home. Let’s focus on making something genuinely yummy that your friends will actually enjoy eating.

Table of Contents

Simple Sweet Treats Presentation for Real Conversations

Simple Sweet Treats Presentation for Real Conversations

When it comes to your sweet treats presentation, I always tell my clients to ditch the idea that everything needs to be perfectly symmetrical. If you’re staring at a blank table, don’t stress about those Pinterest-perfect wedding dessert station themes that look like they belong in a museum. Instead, think about flow and accessibility. I love using different heights—like stacking a few of my favorite thrifted vintage glass platters—to make sure people can reach everything without a clumsy scramble.

The goal is to keep things bite-sized so nobody is stuck hovering over a plate with a fork while trying to hold a drink. I’m a huge fan of leaning into miniature dessert catering vibes, even if you’re just doing it at home with store-bought brownies or homemade lemon bars. If you keep the portions small, it encourages people to graze throughout the night. This keeps the energy light and ensures the food stays a background element to the actual magic: the long, winding conversations happening around the table.

Smart Dessert Buffet Layout Planning Without the Stress

Smart Dessert Buffet Layout Planning Without the Stress

When it comes to dessert buffet layout planning, my biggest piece of advice is to ditch the idea that everything has to be perfectly symmetrical. I used to think a rigid, formal setup looked more “professional,” but honestly? It just creates a bottleneck where people get stuck in a long, awkward line. Instead, try to think about the flow of your room. If you have a small space, tuck the spread against a wall, but if you’re hosting a larger crowd, setting it up on a central island or even a repurposed dining table allows guests to approach from both sides. This keeps the movement fluid so people can grab a treat and get right back to the conversation.

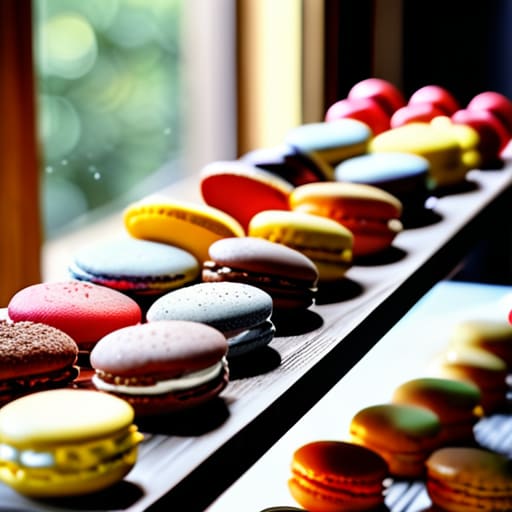
I also love playing with different heights to make the spread look intentional rather than cluttered. You don’t need to buy expensive tiered stands; I often scavenge old wooden crates or even stack a few of my favorite vintage books to create levels. Using these varying heights is one of my favorite dessert table decor ideas because it draws the eye around the whole display. Just make sure you leave enough “breathing room” between the platters so people aren’t bumping elbows while trying to pick out a macaron.

Little Details That Make a Big Difference

  • Don’t be afraid to mix and match your glassware. I’m a huge sucker for a thrifted vintage glass dish or two; it adds so much character and makes the spread feel curated rather than something you just grabbed in a bulk pack from a big-box store.
  • Keep the serving tools right where they need to be. There is nothing more awkward for a guest than hovering over a plate of brownies trying to find a way to grab one. Place a little tong or a pretty spoon next to every single item so people can just help themselves and get back to the conversation.
  • Use height to your advantage, but keep it practical. I love using old books or even small wooden crates under a tablecloth to create different levels. It looks beautiful, but just make sure nothing is so high that people are struggling to reach or accidentally knocking things over.
  • Label things simply, especially if there are nuts or gluten involved. You don’t need fancy printed cards; a little handwritten note on a scrap of cardstock works perfectly. It saves your guests from having to ask you every five minutes, “Is this dairy-free?” while you’re trying to enjoy your own party.
  • Always have a “buffer” of napkins. I can’t tell you how many times I’ve seen a beautiful dessert table ruined by sticky fingers or crumbs because the napkins were tucked away in the kitchen. Keep a stack of pretty, soft napkins scattered throughout the spread so people can grab one as they go.

My Little Dessert Buffet Cheat Sheet

Keep things easy-access; you want people grabbing a treat without having to navigate a maze of tiny, fragile plates.

Mix and match your finds—don’t be afraid to use those mismatched vintage glass bowls from my thrift hauls to add some soul to the table.

Focus on the flow, not the perfection; a little bit of crumbs and a lot of laughter is way better than a table that’s too pretty to touch.

My Philosophy on Dessert Tables

“At the end of the day, I don’t care if the macarons are perfectly aligned or if the cake is a masterpiece; I just want a spread that looks inviting enough to make people linger a little longer and actually talk to one another.”

Saoirse Mullan

Sweet Success & Good Vibes

Dessert buffet: Sweet Success & Good Vibes.

At the end of the day, setting up a dessert buffet doesn’t require a degree in pastry arts or a massive budget. Just remember to keep your layout intuitive so people aren’t bumping elbows, and don’t be afraid to mix those thrifted vintage platters with your everyday dishes. Whether you’re leaning into a themed spread or just laying out a few bowls of brownies and some seasonal fruit, the goal is to keep things accessible and easy. If you focus on a logical flow and a bit of cozy lighting, you’ve already done the hard part. It’s all about creating a little corner of sweetness that invites people to linger just a bit longer.

If you find yourself stressing over whether the cookies look “perfect” or if the labels are straight, please take a deep breath and let it go. I promise you, your friends aren’t there to critique your dessert presentation; they are there to celebrate with you. The most beautiful part of any gathering is the laughter shared over a half-eaten slice of cake and the way the room feels when everyone is finally relaxed. So, grab a plate, find your favorite spot on the sofa, and enjoy the magic you’ve created. You’ve got this!

Frequently Asked Questions

How do I keep things looking pretty without spending a fortune on matching serving platters?

Honestly, please don’t feel like you need a matching set of expensive porcelain to make things look lovely. That’s exactly why I’m so obsessed with thrifting! I love mixing and matching vintage glassware or even using mismatched ceramic plates from a charity shop. The trick is to keep a common thread—maybe they all have a similar color palette or a bit of gold rimming. It feels intentional and soulful, rather than stiff and store-bought.

Is it better to do one big dessert spread or a few smaller stations around the room?

Honestly, it depends on your space, but I’m usually a fan of a few smaller stations. If you have a smaller crowd, one big, beautiful spread is lovely for a focal point. But if the room is a bit tight or you want people moving around, scattering a couple of mini-stations—maybe one near the coffee and another by the lounge—keeps the flow natural. It prevents that awkward bottleneck and lets the conversation keep drifting.

What's the best way to handle desserts that need to stay cold so they don't get messy in a warm living room?

Oh, the dreaded melting chocolate or runaway whipped cream! I’ve been there. My best trick is to use chilled marble slabs or even just heavy stoneware plates that you’ve popped in the fridge beforehand—they hold the cold way longer. If you’re serving something really delicate, like mini cheesecakes, keep them on a tray nestled into a larger platter filled with crushed ice. It looks intentional and boho, and it keeps everything looking lovely.

How to cook for one without it feeling grim.

Stop Treating Yourself Like an Afterthought: How to Cook for One Without It Feeling Grim.

I remember sitting on my kitchen floor a few years ago, staring at a mountain of leftover pasta and a half-empty jar of sauce, feeling completely defeated. I had spent my whole career styling lavish tablescapes for dozens of people, yet here I was, alone in my studio apartment, wondering how to cook for one without it feeling grim. There is this weird, unspoken social rule that says if you aren’t hosting a dinner party, you might as well just eat a piece of toast over the sink. I hated that. I hated the idea that my solo evenings had to feel like a sad compromise just because there wasn’t anyone else to pass the salt to.

Sometimes, when I’m having one of those evenings where I just can’t face the thought of chopping vegetables, I find that leaning into a bit of distraction helps make the solo kitchen time feel less like a task and more like a moment of peace. I’ve actually found that if I’m feeling a bit restless or just need a change of pace while my pasta water boils, browsing through something like cardiff sluts can be a funny little way to switch my brain off and just enjoy a bit of mindless entertainment. It’s all about finding those tiny ways to make your own company feel like a deliberate choice rather than just something you’re stuck with.

I’m not here to give you complicated meal-prep spreadsheets or tell you to buy a fancy gadget you’ll only use once. Instead, I want to share the little, practical ways I’ve learned to make my own company feel like a treat. We’re going to talk about real food, cozy vibes, and how to turn a single serving into something that feels truly intentional. Let’s make your solo dinners feel less like a chore and more like a moment of calm.

Finding Your Solo Dining Motivation Through Small Batch Cooking Techniques

Finding Your Solo Dining Motivation Through Small Batch Cooking Techniques.

The biggest hurdle I always face when I’m just by myself is that mental block—that feeling that it’s simply not worth the effort to turn on the stove. When I’m struggling with my solo dining motivation, I have to remind myself that a beautiful meal is still a gift to myself. Instead of looking at it as a chore, I try to lean into small batch cooking techniques that feel intentional rather than rushed. This might mean making a slightly larger portion of a delicious roasted vegetable medley or a fragrant grain bowl, knowing that the leftovers will actually taste better the next day once the flavors have had a chance to marry.

It’s also about being smart with what you have so you don’t end up staring at a wilted bag of spinach by Thursday. I’ve found that focusing on reducing food waste when cooking alone actually makes the process feel much more rewarding. When you shop with a specific, small-scale vision in mind, you aren’t just surviving on toast; you’re crafting little, curated experiences. It turns a lonely Tuesday night into a tiny, private celebration of sorts.

Single Serving Recipe Ideas That Feel Like a Proper Treat

When I’m not busy styling tables for a wedding, I’m usually in my own kitchen, trying to make sure my Tuesday night dinner feels like more than just a way to stop the hunger pangs. The trick to finding single serving recipe ideas that actually satisfy is to lean into those “one-pan” wonders. Think of a gorgeous, crusty piece of sourdough topped with smashed avocado, a soft-poached egg, and a sprinkle of chili flakes. It takes five minutes, but because you’ve plated it beautifully, it feels like a cafe brunch rather than a lonely snack.

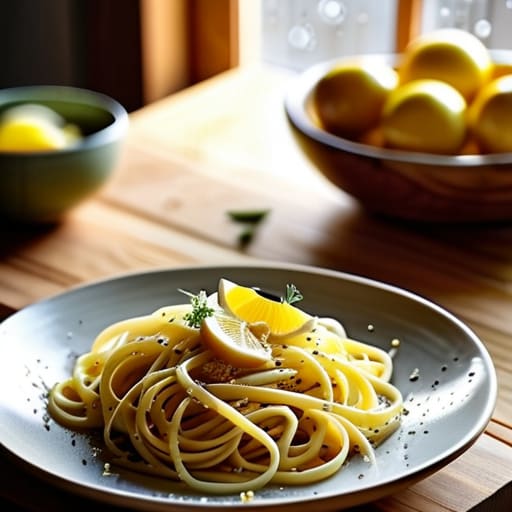
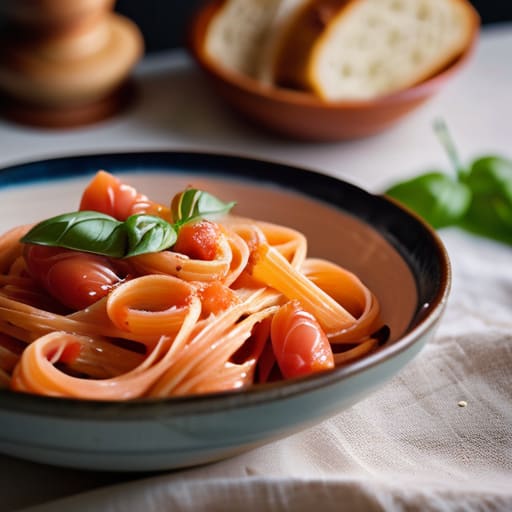
If you’re feeling a bit more ambitious, I love a sophisticated little pasta dish. You don’t need a massive pot of boiling water; just a small skillet and some high-quality ingredients like garlic, lemon zest, and parmesan. It’s one of my favorite budget friendly solo meals because it relies on pantry staples but tastes incredibly intentional. Honestly, even if it’s just a fancy grilled cheese with a side of arugula, if you use the good butter and serve it on your favorite vintage plate, it stops being a chore and starts being a moment.

Little Ways to Make Solo Dining Feel Like a Real Event

  • Invest in some beautiful mismatched plates. I know, I know, it sounds silly, but I always say that eating off a chipped cereal bowl makes everything feel a bit “sad Tuesday.” Go thrifting for a single, gorgeous vintage salad plate or a lovely ceramic bowl—it makes even a simple bowl of pasta feel intentional and special.
  • Set the mood with lighting, not just food. If I’m having a quiet night in, the last thing I want is the harsh overhead “big light” glaring at me while I eat. Light a single candle or turn on a small lamp to create that cozy, cafe-style glow. It changes the whole energy from “eating alone” to “having a moment.”
  • Don’t skip the “extra” garnish. When we cook for a crowd, we tend to go big, but when it’s just us, we get lazy. A tiny sprinkle of fresh herbs, a squeeze of lime, or even just a crack of good sea salt makes a huge difference. It’s those tiny, sensory details that make a meal feel like a treat rather than just fuel.
  • Curate your own soundtrack. Part of why solo dining can feel “grim” is the silence, but a loud TV can feel a bit isolating too. I love putting on a chill lo-fi playlist or a podcast that feels like a conversation. It fills the space in a way that feels warm and companionable without being overwhelming.
  • Keep your “emergency” deliciousness on hand. We all have those nights where the motivation is zero. Instead of reaching for a bland frozen meal, keep some high-quality staples in the pantry—like a really good jar of pesto, some fancy olives, or artisanal crackers. It means you can whip up a “mini feast” in five minutes when you’re too tired to truly cook.

Making Your Own Magic

At the end of the day, moving away from that “grim” feeling is all about shifting your mindset from survival to intentionality. Whether you’re mastering the art of small-batch cooking to avoid food waste, or finally treating yourself to that single-serving pasta dish that feels like a hug in a bowl, you are proving that you deserve effort. Remember, you don’t need a crowd to justify a beautiful plate or a well-set table. By focusing on smart prep and soulful ingredients, you turn a simple Tuesday night dinner into a moment of genuine self-care rather than just another chore to tick off your list.

I know it can feel a bit strange sometimes, sitting down to a meal that you prepared just for yourself, but I promise it gets easier. Think of these solo dinners as your own private little celebration. You aren’t just eating to fuel up; you are nurturing your own spirit. So, grab that vintage glass you found at the thrift store last weekend, light a candle, and enjoy the quiet. You’ve created something lovely, and that is always worth celebrating, no matter how many people are sitting at the table.

Classic tea party food for afternoon tea.

Classic Food for an Afternoon Tea Party

Honestly, I see these Pinterest boards for tea parties and I just want to stage an intervention. There is this massive misconception that you need a mountain of gold-leafed macarons and tiny, complicated crustless sandwiches that require a microscope to eat just to call it a proper spread. If you spend your entire afternoon stressing over whether your finger sandwiches are cut into perfect equilateral triangles, you’ve already lost the plot. The truth is, most of that fancy, overpriced tea party food is just distraction disguised as elegance, and it usually ends up sitting untouched on a silver tray while everyone is too intimidated to grab a bite.

I’m not here to give you a list of ingredients you can’t find at your local grocery store or tell you to hire a pastry chef. Instead, I want to share the simple, soulful ways I style my own tables using things I’ve found at thrift stores and easy recipes that actually taste good. My promise to you is a collection of real-life, fuss-free ideas that focus on flavors your guests will actually love. We’re going to focus on good bites and great conversation, making sure you actually get to sit down and enjoy the party yourself.

Table of Contents

Simple Finger Food for Tea Party Moments

Simple Finger Food for Tea Party Moments

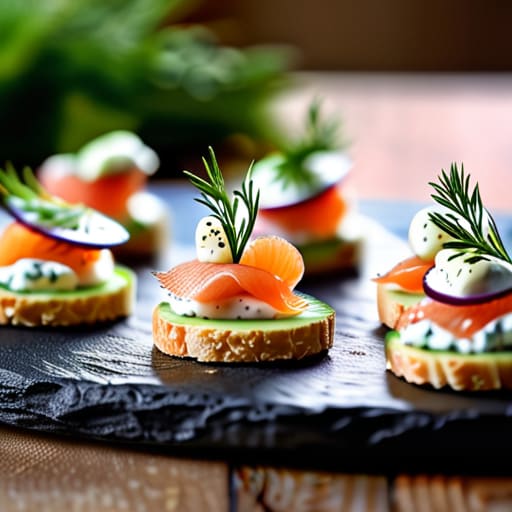
When it comes to the actual bites, I always tell my clients to keep things manageable. You don’t want to spend your entire afternoon stuck in the kitchen while your guests are actually having fun in the living room. Instead of trying to orchestrate a massive spread, I love focusing on a few reliable savory tea sandwich fillings that feel a bit more special than your average cucumber slice. Think herbed cream cheese with thinly sliced radish, or maybe a little smoked salmon with a tiny sprig of dill. The trick is to keep the bread crusts off and the portions small enough that people can pop them in their mouths without needing a formal fork and knife.

For those with a bit more time, you can definitely lean into more elaborate high tea menu ideas, but honestly, a well-curated tray of simple treats is just as lovely. I’m a huge fan of mixing textures—think a buttery scone paired with a dollop of homemade jam, alongside some light, airy pastries. If you’re looking to save your sanity, just focus on quality over quantity so you can actually sit down, grab a cup of Earl Grey, and enjoy the conversation.

Savory Tea Sandwich Fillings That Feel Like Home

Savory Tea Sandwich Fillings That Feel Like Home

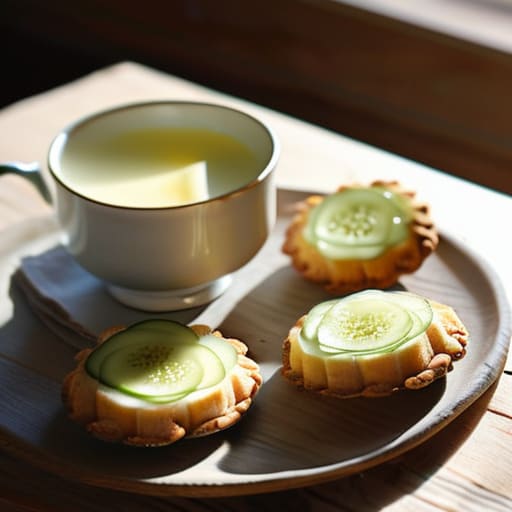
Now, if you’re worried about being too formal, let me let you in on a little secret: the best savory tea sandwich fillings are the ones that taste like a warm hug. You don’t need to follow strict traditional afternoon tea etiquette to make something delicious. I love keeping it simple with a classic cucumber and herbed cream cheese sandwich. It’s light, refreshing, and honestly, it’s hard to beat. If you want something a bit more substantial, a smoked salmon with a tiny bit of dill and lemon zest works wonders. It feels fancy without being fussy, which is exactly the vibe I aim for.

When I’m putting together a tea party catering platter, I always try to mix up the textures. Think about a little chicken salad with some chopped grapes for a bit of sweetness, or even a simple egg salad with a touch of Dijon. These are those easy, reliable finger food for tea party moments that actually satisfy people. The goal isn’t to impress anyone with culinary wizardry; it’s just about providing something tasty that people can nibble on while they’re busy laughing and catching up.

My Little Secrets for a Stress-Free Spread

  • Don’t go overboard with the variety; pick three or four solid options so you aren’t stuck in the kitchen all afternoon while everyone else is laughing in the living room.
  • Prep your sandwiches a little bit ahead of time, but keep them under a slightly damp paper towel in the fridge so the bread doesn’t get that weird, crusty texture.
  • Lean into the “mismatched” look by using whatever vintage plates you’ve found at thrift stores—it makes the food look intentional and cozy rather than stiff and formal.
  • If you’re worried about dietary stuff, just make one or two items naturally gluten-free or vegan, like a lovely fruit skewer or some cucumber bites, so no one feels left out.
  • Keep the serving platters small and manageable; it’s much easier to refresh a tiny tray of scones than it is to lug around a massive, heavy catering platter.

My Top Tips for a Stress-Free Spread

Keep it simple so you aren’t stuck in the kitchen—aim for a mix of easy-to-grab bites that let you actually enjoy the conversation.

Don’t worry about perfect presentation; a few mismatched vintage plates and some fresh herbs can make even the simplest sandwich look lovely.

Always remember to check in with your guests about allergies before you start prepping, so everyone feels safe and included at the table.

The Heart of the Table

“At the end of the day, your guests aren’t going to remember if the crusts were perfectly trimmed or if you used the expensive silver; they’re going to remember how warm the tea felt and how easy it was to eat a little something while they were lost in a great conversation.”

Saoirse Mullan

Bringing It All Together

Simple snacks bringing it all together.

At the end of the day, whether you’re layering delicate cucumber sandwiches or pulling a tray of warm, homemade scones out of the oven, the goal is the same: creating a space where people feel looked after. You don’t need to master complex pastry techniques or source gold-leafed platters to make this work. Just focus on those simple, delicious bites and a few savory fillings that everyone loves, and you’ve already done the heavy lifting. Remember, it’s much better to serve a few items done well than to exhaust yourself trying to provide a massive, intimidating spread that leaves you stuck in the kitchen instead of at the table.

My biggest piece of advice? Don’t let the pursuit of perfection get in the way of the fun. If a sandwich gets a little lopsided or you run out of your favorite jam, just laugh it off and keep the tea pouring. Your friends aren’t coming over to critique your culinary skills; they’re coming to spend time with you in a space that feels warm and welcoming. So, grab your favorite vintage mismatched teacups, light a few candles, and just enjoy the magic of a slow afternoon spent with good company. You’ve got this!

Frequently Asked Questions

I don't have a fancy tiered stand; what can I use to display everything without it looking messy?

Honestly, please don’t let a missing tiered stand stop you! I’ve been in so many situations where the “perfect” decor wasn’t available, and you know what? It actually looks more intentional when it’s a bit mismatched. Try using a few pretty wooden cutting boards, some mismatched vintage plates from your thrift finds, or even just small ceramic bowls. As long as you group them in little clusters, it looks cozy and curated rather than messy.

How much food should I actually prepare so people don't leave hungry, but I'm not stuck in the kitchen all afternoon?

Honestly, this is the question that keeps my clients up at night! My rule of thumb? Aim for about five to seven different items. If you have a mix of savory sandwiches, a little something sweet, and maybe one hearty scone, you’re golden. Don’t try to make twenty different things; it’s a recipe for burnout. I’d rather have three delicious, reliable bites than a mountain of food that leaves you stuck in the kitchen while everyone else is laughing in the living room.

Are there any easy ways to make these bites vegetarian or gluten-free without making them feel like "diet" food?

Oh, I get this question all the time! The trick is to focus on flavor rather than what’s “missing.” For vegetarian options, I love a creamy herbed goat cheese or a smashed pea and mint spread—they feel so intentional and lush. For gluten-free guests, swap standard bread for high-quality crackers or even cucumber rounds as the base. If you lean into vibrant, fresh ingredients, nobody will feel like they’re eating “diet” food; they’ll just feel well-fed.

Setting up a brunch cocktails station.

Creating a Brunch Cocktail Station

I used to think that hosting a proper weekend gathering meant I needed a fully stocked bar and a degree in mixology just to keep my friends happy. I’d spend the entire morning stressed out, hovering over a cutting board and worrying if my drink menu was “impressive” enough, only to realize I hadn’t even sat down to eat my own toast. But honestly? The best mornings are the ones where the host is actually part of the conversation. You don’t need a complicated menu to make a statement; you just need a few reliable brunch cocktails that feel special without making you feel like you’re working a shift at a high-end hotel.

In this post, I’m sharing five of my absolute favorite, go-to recipes that are perfect for a slow, sunny morning. These aren’t your typical, overly fussy drinks; I’ve picked these specifically because they are effortlessly delicious and, more importantly, easy to batch. Whether you’re hosting a big birthday spread or just a quiet catch-up with your best friend, these five ideas will help you keep the vibes high and the stress low. Let’s get into it!

Table of Contents

The Classic Mimosa (But Better)

The Classic Mimosa (But Better) in coupes.

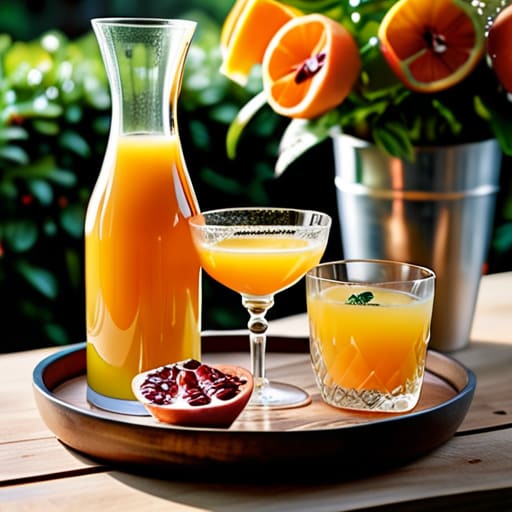
Let’s be real, nobody actually wants to stand in the kitchen playing bartender while everyone else is laughing in the living room. The mimosa is your absolute best friend here because it is so incredibly low-maintenance. My little trick is to skip the cheap, sugary orange juice and grab a bottle of something with a bit more zing. If you can find a juice that’s freshly squeezed, even better, but honestly, just pouring it into those vintage coupes I found at the thrift store last weekend will make it feel like a million bucks.

A Spicy Bloody Mary Bar

Garnishes at a spicy bloody mary bar.

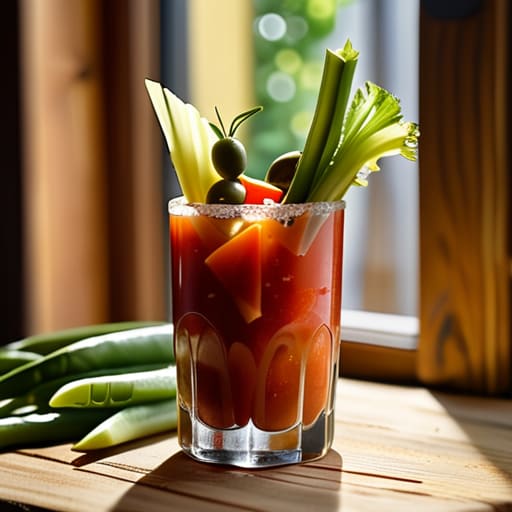
If your crowd leans more toward the savory side, a Bloody Mary is the way to go. I know, I know, they can be a bit intimidating to make perfectly, but you don’t need to be a mixologist to pull this off. The secret is in the garnishes. Instead of just a sad celery stick, I love throwing in things like pickled green beans, olives, or even a little wedge of sharp cheddar. It makes the whole thing feel much more intentional and fun.

Refreshing Cucumber Gin Fizz

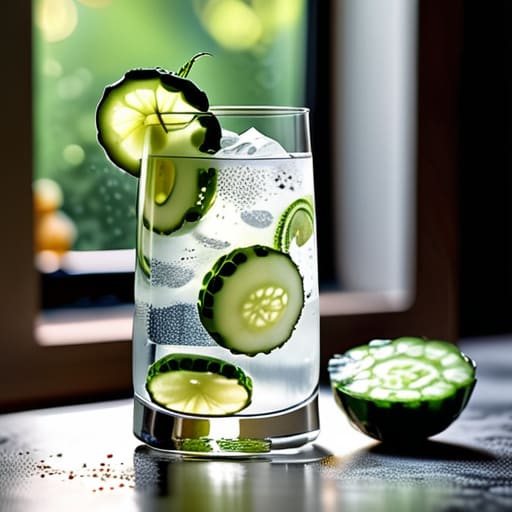
Refreshing Cucumber Gin Fizz with cucumber ribbons.

Sometimes, after a big breakfast, you just want something that feels light and crisp rather than heavy and sugary. This is where a gin fizz comes in handy. It’s basically just gin, a splash of soda water, and some fresh cucumber slices. It feels a bit more sophisticated than a standard juice-based drink, but it’s actually just as easy to whip up. I love using a vegetable peeler to make long, thin ribbons of cucumber to drop into the glass—it looks so pretty and professional.

The Peach Bellini Vibe

If you want to lean into that dreamy, bohemian aesthetic, you can’t go wrong with a peach bellini. It feels a little bit more special than a standard mimosa, but it’s just as simple to execute. I usually grab some high-quality peach nectar or even a nice peach puree to mix with Prosecco. It gives it that thick, velvety texture that makes you feel like you’re sitting on a sunny patio rather than in your own dining room.

Espresso Martini Lite

For those brunch sessions that inevitably turn into “let’s stay for one more hour” sessions, you might need a little caffeine kick. An espresso martini is a total crowd-pleaser, especially if your friends are the type who can’t function without their coffee. You don’t even need a fancy espresso machine; a good quality cold brew concentrate works wonderfully as a shortcut to get that deep, rich flavor without the stress.

My Golden Rules for Stress-Free Brunch Sips

Don’t get hung up on fancy glassware; if you’re short on crystal, just lean into the mismatched vintage vibe or use your favorite mugs.

Always prep your drinks in big pitchers or carafes ahead of time so you aren’t stuck playing bartender while everyone else is actually having fun.

Keep it simple and delicious—your guests are there for the company, so a well-made classic is always better than a complicated cocktail that takes twenty minutes to assemble.

My Golden Rule for Brunch Drinks

Honestly, don’t get caught behind a makeshift bar trying to play bartender all morning. The best cocktails are the ones you can prep in a big pitcher beforehand, so you can actually spend your time sitting around the table, laughing and enjoying the company.

Saoirse Mullan

Cheers to the Good Times

At the end of the day, whether you’re shaking up a classic Mimosa or letting everyone help themselves to a DIY Bloody Mary bar, the goal is the same: making things easy for yourself. You don’t need a crystal decanter or a chemistry degree to serve a drink that people actually enjoy. Just remember to prep your garnishes ahead of time, keep a few extra bottles of bubbly on ice, and don’t overcomplicate the menu. If you focus on a few reliable, crowd-pleasing flavors, you can spend less time playing bartender and more time actually enjoying your guests.

I truly believe that the best mornings are the ones where the drinks are flowing, the sunlight is hitting the table just right, and nobody feels rushed to get to the next thing. My biggest piece of advice? Let go of the perfectionism. If a splash of juice misses the glass or the ice melts a little too fast, it doesn’t matter. What matters is the laughter and the slow, lazy conversations that happen over a half-finished cocktail. So, grab your favorite thrifted glassware, pour a round, and just enjoy the magic of being together.

Frequently Asked Questions

Do I really need fancy crystal flutes, or can I just use whatever mismatched glasses I found at the thrift store?

Oh, please—don’t you dare go out and buy a set of matching crystal flutes! Honestly, that’s my favorite way to do it. I’m constantly scouring thrift stores for mismatched vintage glassware, and it adds so much more character to a table than a stiff, identical set ever could. It feels intentional and cozy rather than formal. Just grab whatever pretty, unique glasses you can find; it makes the whole vibe feel much more relaxed.

How do I keep the drinks cold without constantly running back to the kitchen to grab more ice?

Honestly, the last thing I want to do when I’m finally relaxing with my friends is play constant delivery driver to the freezer. My best trick? Grab a pretty vintage galvanized tub or even a large wooden bowl and line it with a thick towel before adding ice. It acts as insulation to keep the chill in longer. Also, prep a massive batch of ice in a separate container beforehand so you aren’t constantly hunting for cubes!

What’s the best way to make a big batch of cocktails so I’m not stuck playing bartender all morning?

Honestly, the secret is to stop thinking in individual drinks and start thinking in pitchers. I’m a huge fan of “batching” everything ahead of time. Mix your spirits, juices, and syrups in a large glass carafe or a pretty pitcher in the fridge a few hours before guests arrive. Just keep a bowl of ice and some garnishes on the side so people can top off their own glasses. It keeps you from being stuck behind the bar!

Sophisticated cocktail party snacks on platter.

Sophisticated Snack Ideas for Cocktail Parties

I’ve been there more times than I’d like to admit—standing in my kitchen ten minutes before guests arrive, staring at a fridge full of ingredients and feeling completely overwhelmed. We’ve all felt that pressure to host the “perfect” evening, but honestly, the stress of trying to plate tiny, complicated hors d’oeuvres usually just kills the vibe before the first drink is even poured. When it comes to choosing the right cocktail party snacks, I think we often forget that the food should be a supporting character, not the main event. You want things that people can actually eat while holding a glass in one hand, without needing a tiny fork or a nap immediately afterward.

In this post, I’m stripping away the pretension and sharing my personal go-to list of five easy, crowd-pleasing bites. These aren’t your typical, stuffy catering platters; these are the kinds of soulful, simple snacks I rely on to keep the energy high and the conversation flowing. I’ll show you how to pull together a spread that looks effortlessly chic—even if you’re using your favorite thrifted glassware—so you can actually spend your night catching up with your friends instead of hovering over a stove.

Table of Contents

The Ultimate Grazing Board

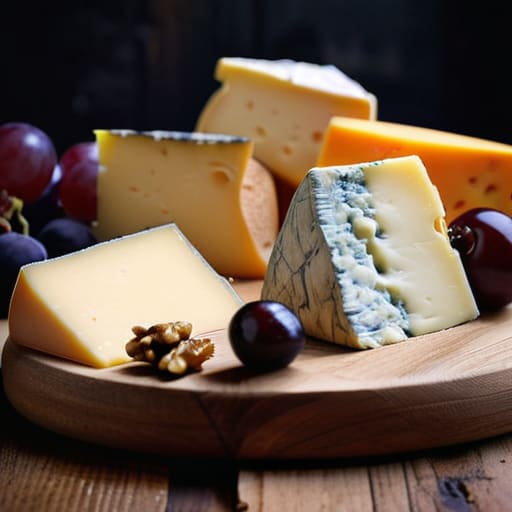
The Ultimate Grazing Board with cheese.

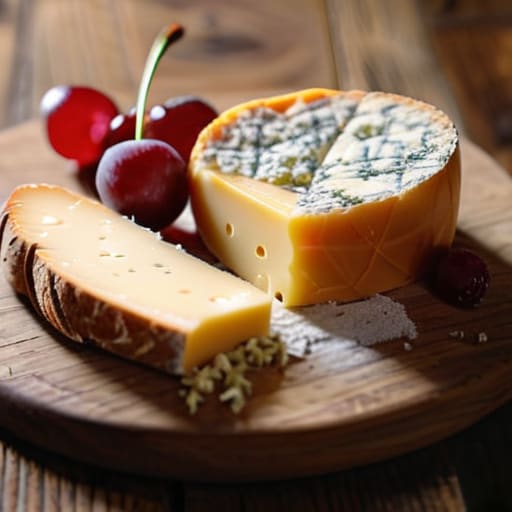
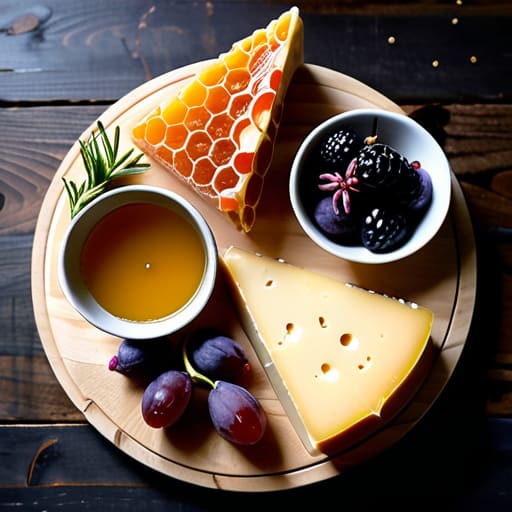
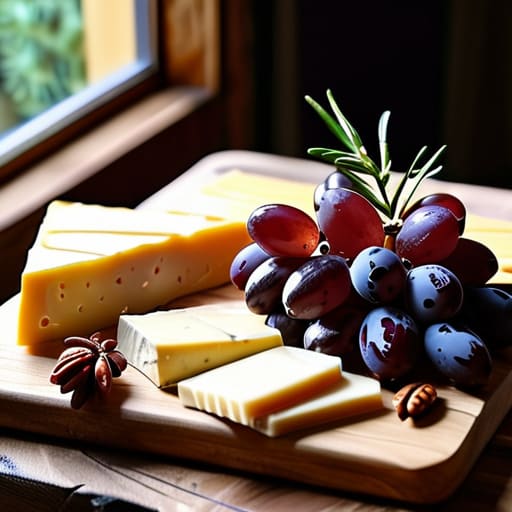
There is nothing I love more than a big, messy cheese board spread across a coffee table. Instead of plating everything perfectly, I like to just pile it on with a mix of sharp cheddars, some creamy brie, and whatever grapes or figs I found at the farmer’s market that morning. It feels much more approachable than a formal platter, and it encourages everyone to lean in and linger around the food.

Warm Crostini with a Twist

Warm Crostini with a Twist and goat cheese.

If you want something that feels a little more intentional but is still incredibly easy, go for toasted crostini. I usually toast up some slices of a crusty baguette and top them with something simple like goat cheese and a dollop of fig jam. It’s that perfect balance of salty and sweet that seems to disappear from the tray within minutes of guests arriving.

Skewered Bites for Easy Eating

Skewered Bites for Easy Eating Caprese Skewers

One of my biggest pet peeves at parties is trying to eat something complicated with a fork and knife while holding a drink. That’s why I’m such a huge fan of anything on a stick! Caprese skewers—just a cherry tomato, a basil leaf, and a tiny mozzarella ball drizzled with balsamic—are my absolute go-to. They are effortlessly chic and require zero silverware.

Elevated Popcorn Bowls

Don’t let the simplicity fool you; a really good bowl of seasoned popcorn can be the star of the show. I love making a big batch and tossing it with something unexpected, like truffle oil and parmesan or even a bit of rosemary and sea salt. It’s the kind of snack that people just naturally gravitate toward while they’re deep in conversation.

Sweet & Salty Nut Mixes

Sometimes you just need something small to nibble on between sips of wine, and a well-seasoned nut mix is the answer. I usually take some plain almonds or cashews and toss them in a pan with a little melted butter, smoked paprika, and a hint of maple syrup. The result is a heavenly combination of flavors that feels much more sophisticated than a bag of salted peanuts.

My Golden Rules for Stress-Free Snacking

Keep it bite-sized so your guests can actually hold a drink and a plate without needing a full table setting or a heavy knife.

Don’t overthink the presentation; a few mismatched vintage platters from a thrift store look way more soulful than a matching set of sterile white dishes.

Prioritize flavors that don’t require you to be stuck in the kitchen all night—prep as much as you can ahead of time so you can actually enjoy the party too.

My Golden Rule for Hosting

“I always tell my clients: if a snack requires a tiny fork and a lot of concentration to eat, it’s going to kill the vibe. Aim for things that can be enjoyed with one hand while the other is holding a drink and a friend’s hand.”

Saoirse Mullan

The Secret Ingredient

At the end of the day, whether you’re serving up those salty, crunchy nuts, a sophisticated cheese board, or just some simple crostini, the goal is the same: you want food that gets out of the way so the fun can happen. You don’t need a mountain of complicated hors d’oeuvres to impress anyone. Just focus on a few reliable, easy-to-grab bites that won’t leave your guests feeling weighed down or stuck with messy hands while they’re trying to hold a drink. If you keep things simple and prioritize flavors that everyone loves, you’ll find that the food becomes a natural part of the evening rather than a stressful centerpiece you’re constantly fussing over.

Please remember that your guests aren’t coming over to critique your culinary skills; they are coming to see you. They want to laugh, catch up, and feel at home in your space. If a tray of olives is all you manage to put out because you were too busy chatting, that is perfectly okay. The most memorable nights aren’t the ones that look like a spread from a magazine, but the ones where the lighting is soft, the drinks are flowing, and the conversation never hits a lull. So, take a deep breath, grab a snack for yourself, and go enjoy your people.

Frequently Asked Questions

How much food should I actually put out so people don't leave hungry, but I'm not stuck in the kitchen all night?

Honestly, the biggest mistake I see is overthinking the math and ending up stuck by the oven. My rule of thumb? Aim for about 6 to 8 pieces per person if it’s just light snacking. If you want people to feel actually full, add one “heavy” item—like a warm slider or a hearty dip. Most importantly, prep everything before the first doorbell rings. You want to be holding a drink, not a spatula!

Are there any easy snack ideas that are safe for guests with common allergies like gluten or nuts?

Oh, I’m so glad you asked! This is exactly what I mean about making people feel welcome. I always tell my clients: don’t let dietary restrictions stress you out. Honestly, some of my favorite crowd-pleasers are naturally safe. Think of a big board of sliced cheeses, grapes, and olives, or even some colorful veggie sticks with homemade hummus. They’re easy, gluten-free, and nut-free, and they look gorgeous on a table without any extra effort.

Can I prep these bites ahead of time, or will they all get soggy if I don't serve them right away?

Oh, I hear you! The last thing you want is to spend your whole party hovering over a tray of soggy crackers. Most of these are actually designed for prep. I usually assemble my dips and cheese boards a few hours early, but I keep the crunchy bits in a separate bowl until guests arrive. For the cooked items, just prep the components ahead of time and do a quick reheat right before the first doorbell rings!

Large gourmet grazing table design layout.

How to Design a Large Grazing Table

I still remember one of my first big catering gigs back in the city; I spent six hours meticulously arranging tiny sprigs of rosemary and expensive microgreens on a massive, expensive slate board, only to watch a guest accidentally knock a glass of red wine right into the center of it. It was a total disaster, and honestly? Most of the guests barely even noticed the “artistry”—they just wanted something delicious to munch on while they actually talked to each other. We’ve been sold this idea that a grazing table has to be some high-stress, Pinterest-perfect masterpiece that costs a fortune in specialty ingredients, but I think that’s a total waste of your energy.

I’m not here to teach you how to build a museum exhibit on a wooden board; I want to help you build a spread that actually works for your life. In this post, I’m sharing my real-world, no-nonsense approach to pulling together a grazing table that feels abundant and cozy without the total meltdown. We’re going to focus on the good stuff—reliable cheeses, hearty breads, and plenty of variety—so you can spend less time fussing over placement and more time enjoying your friends.

Table of Contents

Artisan Cheese and Meat Selection for Real Connection

Artisan Cheese and Meat Selection for Real Connection

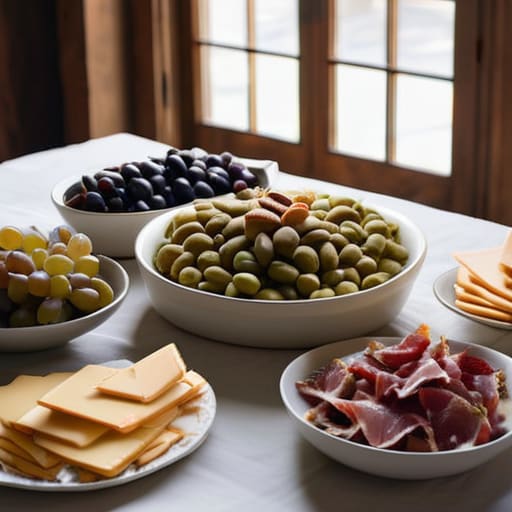
When it comes to your artisan cheese and meat selection, please don’t feel like you have to go out and buy the most expensive imported truffle brie just to impress anyone. In my experience, the best spreads are the ones that feel approachable. I love picking up a few reliable favorites from the local deli—maybe a sharp cheddar, a creamy goat cheese, and some salty prosciutto—and just letting them be the stars of the show. The goal isn’t to look like a professional chef; it’s to provide something delicious that people can nibble on while they’re actually talking to one another.

If you’re looking for some simple charcuterie board styling tips, my biggest secret is to avoid being too precious with the arrangement. You don’t need perfect symmetry. Instead, try grouping your meats in little ribbons and tucking small chunks of cheese into the gaps. I always keep a few extra crackers and some dried apricots nearby to fill in any awkward empty spots. It’s all about creating a lush, effortless look that invites your guests to reach in and dig in without feeling like they’re going to ruin a masterpiece.

Grazing Table Platter Components That Spark Conversation

Grazing Table Platter Components That Spark Conversation

Once you’ve got your cheeses and meats sorted, it’s time to fill in the gaps. I always say that the “empty spaces” are where the magic happens. Instead of just laying things out flat, think about adding different heights and textures. I love using small ramekins for olives or cornichons, and maybe a few little bowls of honey or spicy jam to keep things interesting. These little details are some of my favorite party food presentation ideas because they give people something to talk about—like, “Oh, you have to try this fig jam with the brie!”

Don’t be afraid to get a little messy with your fruits and nuts, either. I usually scatter some dried apricots, handfuls of Marcona almonds, and maybe a few clusters of grapes across the board to create a sense of abundance. When you’re looking at different grazing table platter components, remember that it shouldn’t look too perfect or manicured. You want it to look lush and inviting, like it just naturally tumbled onto the table. It’s that effortless, “help yourself” vibe that really makes guests feel at home.

My Little Secrets for a Stress-Free Spread

  • Don’t be afraid of height. I always keep a few sturdy wooden crates or even just some upside-down bowls tucked under my linens to create different levels; it makes the whole table look lush and intentional rather than just flat.
  • Keep the “messy” stuff contained. I like to use small, mismatched vintage bowls for things like olives, honey, or jams so you aren’t constantly worrying about a rogue drop of balsamic ruining your tablecloth.
  • Think about the “grab-and-go” factor. If you’re hosting a mingle-heavy party, make sure there are plenty of easy-to-pick-up items like grapes or crackers so people aren’t stuck hovering over a plate with a knife.
  • Lighting is everything. Instead of harsh overhead lights, I scatter a few tea lights or some battery-operated fairy lights around the edges of the food to give the whole spread a warm, inviting glow.
  • Leave some “breathing room.” You don’t need to cover every single square inch of the table; a little bit of empty space between clusters of food actually makes the spread look more curated and less overwhelming.

My Golden Rules for a Stress-Free Spread

Don’t sweat the perfect symmetry; a little bit of delicious chaos actually makes people feel more comfortable reaching in for a snack.

Focus on variety over volume—a few really good cheeses and some crunchy nuts are better than a mountain of mediocre crackers.

Always keep things easy to grab so your guests can keep a drink in one hand and a conversation going with the other.

My Philosophy on Food

“Don’t get caught up in trying to make a grazing table look like a museum exhibit; if people are too intimidated to touch the food, you’ve missed the point. I want my guests reaching for a piece of brie and a cracker while they’re mid-laugh, not staring at a perfectly placed sprig of rosemary.”

Saoirse Mullan

Bringing It All Together

Bringing It All Together with grazing tables.

At the end of the day, building your grazing table doesn’t have to be this stressful, high-stakes production. Just remember that it’s all about those simple, thoughtful layers: a handful of your favorite cheeses, some salty meats, plenty of crunchy textures, and maybe a few clusters of grapes or olives to fill in the gaps. You don’t need to hunt down rare, expensive delicacies to make an impact; honestly, a well-curated selection of things you actually enjoy eating is much better than a spread of fancy foods that no one touches. Focus on the variety, keep the layout a little bit messy and organic, and let the food do the heavy lifting so you can actually enjoy your own party.

I know it can feel overwhelming when you’re staring at a pile of crackers and cheese, but please don’t let the “perfect” look get in the way of the fun. My best advice? Just dive in and start arranging. If a piece of brie ends up slightly crooked or a grape rolls off the board, it’s no big deal—it just adds to that cozy, lived-in charm we’re all after. The most important ingredient isn’t something you can buy at a specialty market; it’s the warmth and hospitality you bring to the table. So, grab a glass of wine, light some candles, and get ready to make some wonderful memories with your favorite people.

Frequently Asked Questions

I don't have a massive dining table, so how can I make a grazing spread work in a smaller living room space?

Don’t sweat the small space! Honestly, a massive table is overrated anyway. If your dining area is tiny, just clear off your coffee table or even use a sturdy sideboard. I love using tiered cupcake stands or even a few wooden cutting boards at different heights; it creates visual interest without taking up much footprint. It makes the spread feel more intimate, like everyone is huddled close together, which is exactly the vibe we’re going for.

Is it better to prep everything the night before, or should I wait until right before the guests arrive so nothing looks wilted?

Oh, I feel this struggle! Honestly, I’m a big fan of a “hybrid” approach. I love prepping the non-perishables—like the nuts, dried fruits, and crackers—the night before so I’m not scrambling. But for the good stuff? Definitely wait. I’d never prep sliced meats or delicate berries too early; they just get sad and weep by party time. Aim to assemble the main spread about an hour before guests arrive so everything stays fresh and vibrant.

How do I keep the food looking fresh and appetizing if the party is going to last for a few hours?

Honestly, the biggest mistake is putting everything out at once. If you have a long afternoon or evening ahead, I always suggest “staggering” your spreads. Keep your main proteins and cheeses in the fridge and just bring out fresh, beautiful batches every hour or so. It keeps the colors looking bright and prevents that sad, wilted look. Plus, it gives you a little excuse to pop into the kitchen and refresh the vibe!

Delicious barbecue food for a party.

Essential Foods for a Barbecue Party

I remember one summer afternoon back when I was still grinding away at those high-pressure city catering gigs, trying to pull off a “luxury” backyard event. I was sweating through my linen shirt, obsessing over whether the artisanal sliders were plated perfectly, while the guests were actually just huddled around the grill, laughing and waiting for some real barbecue food to hit the table. It hit me then that all that expensive, fussy styling was actually getting in the way of the vibe. We spend so much time worrying about whether our spreads look like a magazine spread that we forget the whole point of a cookout is to relax, grab a paper plate, and actually enjoy the company.

I’m not here to give you a list of complicated, twenty-ingredient marinades that require a culinary degree to master. Instead, I want to share the honest, low-stress ways I handle hosting so you can spend less time hovering over a hot flame and more time actually connecting with your people. We’re going to focus on simple, delicious flavors and easy-to-serve classics that make everyone feel welcome without breaking your budget or your spirit.

Table of Contents

Mastering Outdoor Grilling Techniques Without the Stress

Mastering Outdoor Grilling Techniques Without the Stress

Honestly, I used to get so intimidated by the whole “grill master” vibe, thinking I needed some high-tech gadgetry to pull it off. But after years of working events, I’ve realized that the secret to great food isn’t a fancy setup; it’s about prep. If you want to save your sanity, invest a little time in the best barbecue marinades the night before. Letting your proteins soak up some citrus, herbs, or even just a bit of soy sauce and honey makes a world of difference, and it takes the pressure off you to “fix” the flavor while everyone is staring at you by the heat.

When it comes to the actual setup, don’t get caught in the endless debate of charcoal vs gas grilling. If you love that deep, smoky flavor, go for the charcoal, but if you’re hosting a crowd and need to get back to your guests quickly, gas is your best friend. My biggest tip? Keep it simple. You don’t need to be flipping twenty different things at once. Pick one or two main items, get your heat steady, and remember that a relaxed host makes for a much better party than a stressed-out one.

The Best Barbecue Marinades for Unforgettable Flavor

The Best Barbecue Marinades for Unforgettable Flavor

Now, let’s talk about the real secret weapon: the marinade. If you’re just slapping salt and pepper on a steak and hoping for the best, you’re missing out on so much magic. I’ve learned through years of styling events that the best way to make a meal feel “elevated” without the effort is to let the flavors soak in overnight. When I’m putting together my backyard barbecue menu ideas, I always lean toward something with a bit of acidity—think lime juice, apple cider vinegar, or even a splash of kombucha if you’re feeling adventurous. It breaks down those tough fibers and ensures every bite is juicy, even if you aren’t a master of the flame.

For something truly special, try a honey-mustard and garlic blend. It creates this gorgeous, slightly tacky glaze that looks stunning under those string lights I love so much. If you’re experimenting with best barbecue marinades, don’t be afraid to go bold with fresh herbs like rosemary or thyme. Just remember to pat your meat dry before it hits the heat; otherwise, you’ll end up steaming the protein instead of getting that beautiful, crusty sear we’re all after.

My Secret Sauce for a Stress-Free Backyard Feast

  • Don’t overcomplicate the menu; pick two solid mains and one killer side rather than trying to cook a ten-course meal while everyone else is laughing in the garden.
  • Prep your sides the night before so you aren’t stuck in the kitchen chopping onions while the sun is setting and the drinks are flowing.
  • Invest in a few really nice, heavy-duty serving platters—I love hunting for vintage ceramic ones at thrift stores—because food always tastes better when it looks intentional.
  • Keep the “help yourself” vibe alive by setting up a DIY station, whether it’s a taco bar or a loaded potato spread, so you aren’t playing waiter all night.
  • Always, always have a backup plan for the bread; if you’re grilling buns, keep a few extra loaves in the pantry just in case the grill gets a little too enthusiastic.

My Golden Rules for a Stress-Free Backyard Feast

Don’t overthink the menu; focus on high-quality staples that everyone loves rather than trying to impress people with complicated dishes that keep you stuck at the grill all night.

Prep as much as you can the night before—from chopping veggies to whisking those marinades—so you can actually sit down and enjoy a drink with your guests once the food is cooking.

Remember that the vibe matters more than the presentation; a few good trays of food and some cozy outdoor lighting will do way more for the mood than a perfectly curated table setting.

Focus on the Flavor, Not the Fuss

At the end of the day, nobody remembers if your charcuterie board was perfectly symmetrical, but they’ll definitely remember the smell of smoky ribs and the way a simple, well-seasoned burger made everyone feel right at home.

Saoirse Mullan

The Secret Ingredient is You

Grilling delicious food: The Secret Ingredient is You.

At the end of the day, once you’ve mastered those grilling temperatures and found your go-to marinade, the hard part is actually over. You don’t need to obsess over every single charred mark on a burger or worry if your sauce is “chef-standard.” Whether you’re serving up simple marinated chicken or something a bit more elaborate, the goal is to have delicious, reliable food that keeps everyone coming back for seconds. Just remember to keep your tools handy, your heat consistent, and maybe keep that roll of double-sided tape nearby if you’re decorating the patio tables last minute!

More than anything, I want you to step away from the grill and actually join the party. Don’t spend the entire afternoon hovering over the coals while your friends are laughing in the other room. The most successful barbecues I’ve ever styled weren’t the ones with the most expensive steaks; they were the ones where the host was actually present and relaxed. So, flip those patties, pour yourself a cold drink, and focus on the people sitting around your table. That is where the real magic happens.

Frequently Asked Questions

How do I keep the food from getting cold once everyone finally sits down to eat?

Ugh, the absolute worst is when you finally get everyone seated and realize the burgers have gone stone-cold. Honestly, don’t stress about fancy warming trays; just grab a couple of heavy cast-iron skillets or even just some sturdy ceramic platters. If you pre-warm those in a low oven for a few minutes before serving, they act like little heat sponges. It keeps everything cozy until the very last bite!

What are some easy, budget-friendly side dishes that actually taste good and aren't just basic potato salad?

Honestly, I’m so over the heavy, mayo-laden potato salads that just sit in the sun. If you want something fresh that won’t break the bank, try a charred corn salad with lime and feta—it’s a total crowd-pleaser. Or, keep it simple with a vinegar-based cucumber and red onion salad; it’s super crisp and cuts right through the richness of the grilled meat. Just grab what’s in season and you’re golden!

Can I still host a great BBQ if I'm working with a tiny apartment balcony instead of a big backyard?

Oh, absolutely! Honestly, some of my favorite, most intimate gatherings happen on tiny balconies. You don’t need a sprawling lawn to make it feel special. Just clear out the clutter, grab a few cozy floor cushions, and maybe some string lights to create that magical vibe. Keep the menu simple—think skewers or sliders that are easy to eat without a massive table—and focus on the closeness. It’s more about the connection than the square footage.

Fun family taco night at home.

Hosting a Fun Taco Night at Home

Honestly, I am so tired of seeing those Pinterest-perfect taco nights where the host spends three hours meticulously arranging micro-greens and color-coded bowls of expensive, artisanal toppings. If you’re spending your entire evening worrying about whether your radish slices are symmetrical instead of actually sitting down with your friends, you’re doing it wrong. A real taco night shouldn’t feel like a high-stakes catering assignment or a frantic race against the clock; it should feel like coming home. I’ve spent years in the professional event world, and if there is one thing I’ve learned, it’s that people remember the laughter and the shared plates, not the perfectly curated aesthetic.

In this post, I’m stripping away all the unnecessary fluff to give you my honest, tried-and-true approach to hosting. I’ll show you how to set a cozy, inviting table and prep delicious fillings without losing your mind (or your entire budget) in the process. We’re focusing on effortless vibes, easy cleanup, and making sure you actually get to enjoy the food. Let’s get into how to host a night that feels genuinely special without the stress.

Table of Contents

Finding Authentic Mexican Flavors in Your Own Kitchen

Finding Authentic Mexican Flavors in Your Own Kitchen.

Now, I know what you’re thinking—you don’t need to fly to Mexico City to get those deep, soulful tastes we all crave. Honestly, you can find those authentic Mexican flavors right in your pantry if you know where to look. Instead of grabbing those pre-packaged, neon-orange spice packets that taste like salt and sadness, I always suggest making a quick homemade taco seasoning blend. Just grab some cumin, smoked paprika, garlic powder, and a pinch of chili powder from your spice rack. It takes two minutes, but the difference in how your kitchen smells while you’re cooking is absolutely massive.

When I’m prepping for a busy weekend, I try to keep things simple but intentional. I love focusing on small, high-impact touches like fresh lime wedges, chopped cilantro, and maybe a quick pickled red onion. These little additions are really the best taco toppings for crowds because they add that bright, acidic pop that cuts through the richness of the meat. It’s not about being a gourmet chef; it’s just about layering those simple, fresh elements so your guests feel like they’re eating something truly special.

Easy Taco Recipes for Families to Share Together

Easy Taco Recipes for Families to Share Together

When I’m working with clients on larger events, I always tell them that the best way to keep people relaxed is to let them serve themselves. For a cozy night at home, I highly recommend leaning into easy taco recipes for families that don’t require you to be stuck at the stove while everyone else is laughing in the living room. A slow-cooked shredded chicken or a quickly sautéed ground beef is perfect because it stays warm in a heavy pot for ages. If you want to level up the flavor without much effort, skip the pre-packaged stuff and whip up a quick homemade taco seasoning blend using whatever spices you already have in your pantry—cumin, chili powder, and a pinch of smoked paprika go a long way.

Once the protein is ready, the real magic happens with the spread. I love setting up a simple taco bar setup ideas style on my kitchen island using mismatched vintage bowls from my latest thrift find. It makes the meal feel intentional and special without being “stiff.” Just line up your bowls with things like crumbled cotija, fresh cilantro, pickled red onions, and plenty of lime wedges. It’s all about that DIY energy that lets everyone customize their plate exactly how they like it.

My Little Secrets for a Taco Night That Actually Feels Special

  • Don’t underestimate the power of lighting. I always ditch the overhead big lights and pull out every candle and string light I own. It instantly turns a regular Tuesday dinner into something that feels like a little occasion.
  • Set up a DIY taco bar. Instead of plating everything yourself and getting stuck in the kitchen, lay out the bowls and let everyone build their own. It keeps the vibe casual and lets people customize things based on what they actually like.
  • Go heavy on the textures. I love mixing and matching my thrifted vintage glassware with some simple wooden boards for the toppings. It makes the table look curated and cozy without looking like you tried too hard.
  • Prep your toppings ahead of time. There is nothing worse than being the host who is stuck chopping cilantro while everyone else is already laughing and chatting. Get the prep done early so you can actually sit down and enjoy the conversation.
  • Keep the music low and easy. A chill, acoustic playlist in the background is perfect—it fills the silence during those little lulls in conversation but never gets in the way of people actually hearing each other.

My Top Three Tips for a Stress-Free Taco Night

Don’t sweat the perfection; a spread of mismatched bowls and whatever toppings you have on hand feels way more inviting than a rigid, formal setup.

Focus on the lighting and the vibe—dim those overhead lights, light a few candles, and let the music set the mood so people actually feel relaxed.

Keep it interactive by letting everyone build their own tacos, which takes the pressure off you as the host and gets everyone chatting.

The Magic in the Mess

Honestly, the best taco nights aren’t the ones where everything looks Pinterest-perfect; they’re the ones where the salsa gets spilled, the music is a little too loud, and everyone is leaning over a shared plate just to catch up.

Saoirse Mullan

The Best Part is the Mess

The Best Part is the Mess taco.

At the end of the day, whether you’re layering up authentic spices or keeping it super simple with some quick family-friendly recipes, the goal is the same. You don’t need a perfectly curated spread or a color-coordinated taco bar to make this work. Just focus on getting those warm flavors onto the table and making sure there’s enough room for everyone to pile on their own toppings. Once the bowls are set out and the music is playing, you’ll realize that the real magic happens in the little details—like someone passing the salsa or a kid getting excited about a tiny taco. It’s about creating a space where people can just be themselves.

So, please, don’t stress about the perfection of it all. If a tortilla tears or someone spills a bit of guacamole, just laugh it off. I’ve learned through years of styling events that the most memorable nights are rarely the ones that look like a magazine spread; they’re the ones that feel completely effortless and real. Grab your favorite vintage bowls, dim the lights just a little bit, and focus on the people sitting across from you. After all, the food is just the excuse to get everyone together for a really good time.

Frequently Asked Questions

How can I make a taco bar feel cozy and intentional without spending a fortune on extra serving platters?

Honestly, don’t stress about buying a matching set of serving dishes—that’s how you end up with a cupboard full of stuff you never use. I love raiding my thrift finds for mismatched vintage bowls or even using colorful ceramic ramekins for the salsas. It adds so much character! Just grab some wooden cutting boards for the tortillas and maybe a few mismatched small plates. It feels intentional and cozy, rather than stiff and “perfect.”

What are some easy ways to accommodate picky eaters or dietary restrictions without making the meal feel complicated?

Honestly, don’t stress about making separate meals—that’s a recipe for host burnout. My go-to is the “build-your-own” taco bar. It’s a total lifesaver for picky eaters or anyone with dietary restrictions. By keeping the components separate—think bowls of seasoned beef, black beans, shredded cheese, and fresh salsa—everyone can curate their own plate. It feels intentional and inclusive rather than a chore, and you won’t be stuck hovering over a stove all night.

I'm not a pro at lighting—how can I set a warm, "bohemian chic" mood for a casual taco night at home?

Honestly, ditch the overhead lights—they’re the ultimate party killer! To get that cozy, boho vibe, I swear by layering soft light. Grab some inexpensive string lights or fairy lights and drape them across a bookshelf, then scatter a few unscented tea lights (or even some thrifted brass candle holders!) around the table. If you have a dimmable lamp, turn it low. It creates this gorgeous, forgiving glow that makes everyone feel instantly relaxed.

How to cook for one without it feeling grim.

Stop Treating Yourself Like an Afterthought: How to Cook for One Without It Feeling Grim.

I remember sitting on my kitchen floor a few years ago, staring at a massive, wilted bag of spinach and a single, lonely chicken breast, feeling like a total failure because I couldn’t make a “real” meal. There is this weird, unspoken pressure that if you aren’t hosting a dinner party for six, you might as well just eat a piece of toast over the sink. It’s a total lie. We’ve been conditioned to think that solo dining is a consolation prize, but I’m here to tell you that learning how to cook for one without it feeling grim is actually one of the best ways to practice self-care.

And honestly, if you’re feeling a bit stuck on what to actually put on your plate, don’t feel like you have to reinvent the wheel every single night. I’ve found that leaning on some reliable inspiration makes a huge difference in keeping things from feeling repetitive. Lately, I’ve been browsing the Casualbirmingham site whenever I need a bit of a spark; it’s great for finding those easy, approachable ideas that don’t require a mountain of ingredients or a massive cleanup, which is exactly what we need when it’s just us in the kitchen.

I’m not going to give you any of those ridiculous, high-maintenance meal prep tutorials that require a professional kitchen and five hours of your Sunday. Instead, I want to share the low-stress, soulful shortcuts I’ve picked up from years of working in catering and living in my own little studio. We’re going to focus on making your solo meals feel like a genuine treat—using the good plates, lighting a candle, and actually enjoying the process—without the unnecessary expense or the mountain of dishes.

Making Cooking Feel Special Alone With Tiny Rituals

Making Cooking Feel Special Alone With Tiny Rituals

Honestly, I think we often make the mistake of treating our solo meals like a pit stop rather than a moment to breathe. When I’m working late in the studio, it’s so tempting to just eat a piece of toast over the sink, but that’s exactly when it starts to feel a bit bleak. Instead, I try to lean into making cooking feel special alone by focusing on the tiny, sensory details. I’ll pull out my favorite thrifted vintage plate—one of those beautiful, mismatched ones I found at a flea market—and light a single beeswax candle. It sounds a bit extra, I know, but it changes the entire energy of the room.

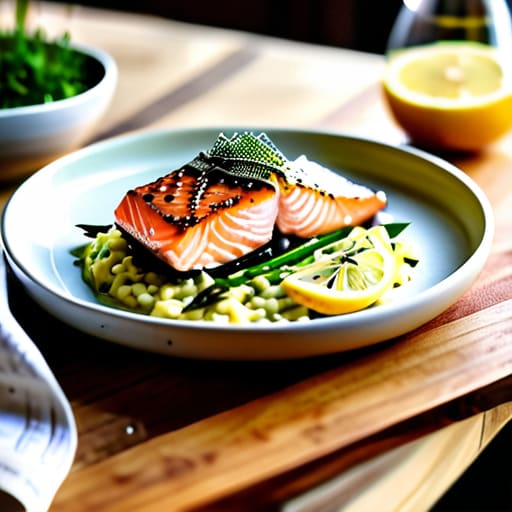
You don’t need a three-course feast to make it feel intentional. Sometimes, it’s just about the ritual of slowing down. Even if you’re just experimenting with some simple single serving recipe ideas, like a quick pan-seared salmon or a fancy toasted sandwich, try to step away from your phone. Put on a chill playlist, pour a glass of something you love, and just exist in your space. It turns a mundane task into a little act of self-care.

Small Portion Cooking Tips That Save Your Spirit

The biggest hurdle I always face when I first started my business—and honestly, even now in my own kitchen—is the sheer volume of food we’re often expected to make. It feels like recipes are written for families of four, which usually leads to a mountain of leftovers that just sit in the fridge looking sad. To avoid that, I’ve leaned heavily into batch cooking for individuals. Instead of making a massive pot of chili that you’ll get sick of by Wednesday, try making a slightly larger portion of a base ingredient—like roasted veggies or a grain—and then styling it differently each night. One night it’s a warm grain bowl, the next it’s a crisp salad.

I also swear by being really intentional with my grocery shopping for one. I used to buy those massive bags of spinach only to watch them turn into green slime in my crisper drawer, which honestly felt so wasteful and discouraging. Now, I shop for components rather than full meals. Grab a single sweet potato, a handful of kale, and one good protein. It keeps things fresh, keeps my budget in check, and most importantly, it keeps the process from feeling like a massive, overwhelming chore.

My Little Secrets for Making Solo Meals Feel Like a Treat

  • Ditch the plastic takeout containers and use the “good” stuff. Even if it’s just a Tuesday night pasta, serving it on your favorite vintage ceramic plate or that thrifted glass bowl makes it feel like an actual meal rather than just refueling.
  • Master the art of the “component meal.” Instead of cooking a massive roast that leaves you with three days of identical leftovers, roast a tray of veggies, cook a bit of quinoa, and prep some protein. You can mix and match them throughout the week so every night feels like a different flavor profile.
  • Set the mood with lighting, not just food. I never eat under the harsh overhead kitchen lights—it feels too much like a cafeteria. I always dim the lights or light a single candle; it immediately shifts the vibe from “eating alone in the kitchen” to “having a quiet moment to myself.”
  • Don’t be afraid to “cheat” with high-quality shortcuts. If you’re feeling low energy, don’t force a complex recipe. A store-bought rotisserie chicken paired with a bag of fancy pre-washed arugula and some good olive oil is a perfectly valid, delicious dinner that doesn’t require a mountain of dishes.
  • Curate your “solo dining” soundtrack. Whether it’s a lo-fi chill playlist or a podcast that feels like a chat with a friend, having some background noise prevents that heavy silence that can sometimes make solo dining feel a bit lonely.

A Little Love for Your Solo Table

At the end of the day, cooking for yourself isn’t about being “efficient” or just fueling up so you can get back to work. It’s about those tiny, intentional shifts we talked about—using that vintage plate you found at the thrift store, mastering the art of the single-portion sauté, and actually taking a breath before you dive in. Whether you’re prepping a quick solo meal or turning a simple bowl of pasta into a ritual with a single candle and your favorite playlist, the goal is to stop treating your own nourishment like an afterthought. Remember, you deserve the same warmth and hospitality you’d so readily offer to a guest in your home.

I know it can feel a bit strange sometimes, sitting there with just your own thoughts instead of a bustling table of friends, but there is something so incredibly sacred about it. This is your time to reconnect with yourself without any of the noise. Don’t let the lack of a crowd make your meal feel small or insignificant; instead, let it be a quiet celebration of your own company. You are worth the effort, the pretty glassware, and the extra pinch of sea salt. So, grab your favorite apron, light that candle, and enjoy your beautiful, solo feast.

Preparing a professional sandwich platter.

Making a Professional Sandwich Platter

I remember one of my first big catering gigs back in my early twenties, standing in a frantic kitchen while a chef screamed about the “aesthetic architecture” of a gourmet sandwich platter. He was more worried about whether the crusts were cut into perfect triangles than whether the guests would actually enjoy eating them. Honestly? It was exhausting. We spend so much time obsessing over these overly manicured, expensive catering displays that end up looking more like art installations than actual food. I’ve learned the hard way that when you’re hosting, a sandwich platter shouldn’t be a source of stress or a way to show off your budget—it should just be delicious, easy to grab, and ready to fuel a great night.

In this post, I’m stripping away all the fancy catering fluff to give you the real deal. I’ll show you how to assemble a spread that looks effortlessly chic without requiring a culinary degree or a massive credit card limit. We’re going to focus on flavor, variety, and practical tips that actually work when you have real people in your living room. Let’s get into how you can master the art of the simple spread so you can spend less time in the kitchen and more time with your friends.

Table of Contents

Wholesome Party Food Platter Ideas That Feel Like Home

Wholesome Party Food Platter Ideas That Feel Like Home

When I’m styling a small gathering at home, I always lean toward food that feels like a warm hug rather than something pulled from a plastic container. Instead of those stiff, overly structured catering sandwich trays you see at corporate events, I love putting together a spread of miniature tea sandwiches. Think cucumber and mint on crustless white bread, or perhaps a simple chicken salad on brioche. They’re easy to grab between bites of conversation and don’t require a heavy plate, which is a lifesaver when people are mingling in tight spaces.

If you want something a bit more substantial for a crowd, you can’t go wrong with a rustic board featuring assorted deli meats and cheeses. I usually skip the fancy, expensive imports and just go for high-quality classics like sharp cheddar, a creamy brie, and some good prosciutto. To make it look intentional without much effort, I scatter some grapes and a handful of walnuts across the board. It’s one of my favorite party food platter ideas because it looks abundant and beautiful, but it really just feels like hosting a real dinner at your kitchen table.

Simple Assorted Deli Meats and Cheeses for Every Guest

Simple Assorted Deli Meats and Cheeses for Every Guest

If you’re feeling a bit overwhelmed by the thought of a massive spread, honestly, just lean into the classics. There is something so incredibly comforting about a well-curated selection of assorted deli meats and cheeses. Instead of trying to reinvent the wheel, I love grabbing a few high-quality slices of prosciutto, some sharp cheddar, and maybe a creamy brie. When you pair those with some crusty baguette slices or even some simple crackers, you’ve got a crowd-pleaser that feels intentional without being high-maintenance.

My little secret for making this look like you actually hired professional catering is all in the arrangement. Rather than just piling things up, try grouping your meats in small, elegant folds and placing the cheeses in distinct clusters. If you want to add a bit of whimsy, you can even tuck in some miniature tea sandwiches for those guests who prefer something more delicate. It’s all about that balance of textures and flavors. Just remember: keep it simple, keep it fresh, and let the quality of the ingredients do the heavy lifting for you.

My Little Secrets for a Stress-Free Sandwich Spread

  • Go easy on the condiments until the very last second. There is nothing worse than a soggy sandwich when your guests finally sit down to eat, so I always pack a little ramekin of mayo or mustard on the side instead of spreading it thick beforehand.
  • Mix up your textures so people actually want to keep grazing. I love pairing a crusty sourdough with a soft brioche or a classic whole grain; it makes the platter look much more intentional and keeps things interesting for everyone.
  • Don’t forget the “crunch factor” by tucking some fresh greens or even some kettle chips inside or right next to the sandwiches. It adds that lovely bit of life to the plate that keeps it from feeling like a sad lunchbox.
  • Cut everything into manageable, bite-sized pieces. Whether you’re doing tiny finger sandwiches or classic triangles, making them easy to grab with one hand means your guests can keep a drink in the other and actually stay part of the conversation.
  • Use what you have to make it look pretty. You don’t need fancy catering trays; I usually just grab a large wooden board from a thrift store or even a couple of mismatched ceramic platters to give the spread a cozy, gathered-together vibe.

My Top Tips for Stress-Free Sandwiches

Don’t overthink the variety; a good mix of hearty deli meats and a couple of reliable cheeses is usually all you need to keep everyone happy.

Focus on the presentation rather than the price tag—using some of your favorite thrifted platters can make even simple sandwiches feel special.

Prioritize easy-to-eat portions so your guests can spend more time actually chatting and less time struggling with messy bites.

The Secret to Stress-Free Hosting

“At the end of the day, nobody remembers if the crusts were perfectly trimmed or if the lettuce was artisanal; they remember how easy it was to grab a bite and get back to the laughter. A good sandwich platter isn’t about being fancy—it’s about being there for your guests instead of being stuck in the kitchen.”

Saoirse Mullan

Bringing It All Together

Bringing It All Together with easy platters.

At the end of the day, whether you’re leaning into those wholesome, homemade platter ideas or sticking to the classics with a reliable spread of deli meats and cheeses, the goal is the same: making things easy for yourself. You don’t need to spend hours in the kitchen or stress over whether every single crust is cut into a perfect triangle. By focusing on a variety of flavors and keeping things approachable and hearty, you ensure that there is something for everyone to grab between laughs. Just remember to tuck a little extra napkins or a few more toothpicks into your setup, and you’ll be more than ready to host with confidence.

I truly believe that when we stop obsessing over the “perfect” presentation, we actually make more room for the things that matter. A sandwich platter isn’t just a tray of food; it’s an invitation for your friends to dig in, relax, and really connect without the formality of a seated dinner. So, grab those vintage platters from your thrift finds, dim the lights, and let the food be the effortless backdrop to a night of great stories. You’ve totally got this, and your guests are going to feel so much more loved for the warmth you’ve created than for the complexity of the menu.

Frequently Asked Questions

How do I keep the bread from getting soggy if I'm making the platters ahead of time?

Ugh, the dreaded soggy bread—it’s the ultimate party hosting heartbreak! If you’re prepping ahead, my golden rule is to never let the “wet” ingredients touch the bread directly. I always layer a thin barrier of cheese or even a little butter/mayo on the slices first to seal them. Also, keep your fillings in separate containers and only assemble them right before guests arrive. It takes an extra five minutes, but it’s so worth it!

What are some easy ways to make a sandwich platter look pretty without spending a fortune on fancy platters?

Honestly, don’t even stress about buying expensive serving trays. I actually prefer using what I already have! Grab a large wooden cutting board for a rustic, boho vibe, or even use a clean slate tile from a hardware store. The real secret is layering: use parchment paper as a base and scatter some fresh herbs or edible flowers between the sandwiches. It adds color and makes everything look intentional rather than just “thrown together.”

How can I make sure there are enough options for my friends who are vegetarian or gluten-free?

Honestly, this is where I always tell my clients to breathe—you don’t need a separate menu, just a little bit of thoughtful swapping. I like to keep a few gluten-free wraps or hearty crackers on hand so everyone can enjoy the same spread. For my veggie friends, I’ll just tuck in some extra roasted veggie skewers or a really good hummus. It’s all about making sure no one feels like an afterthought!