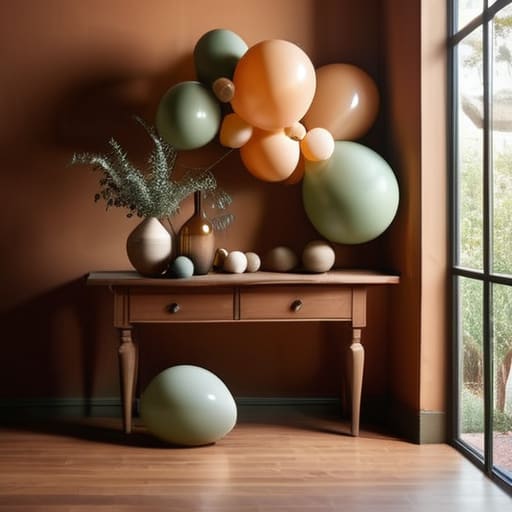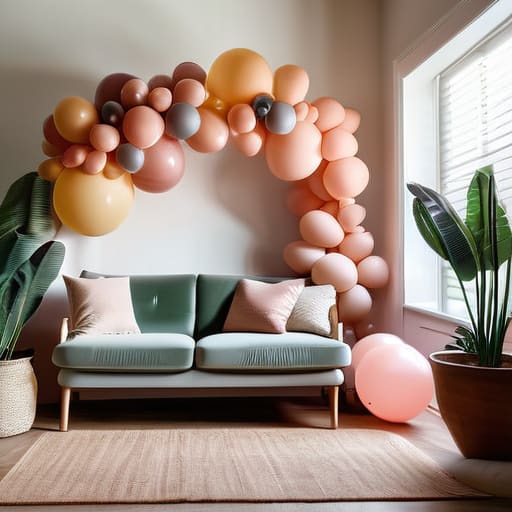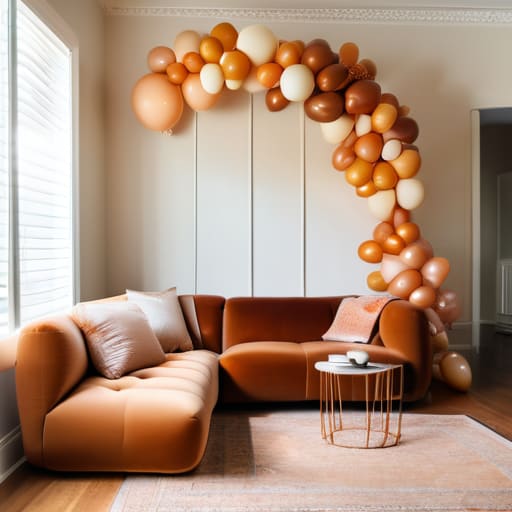
Category: Decor

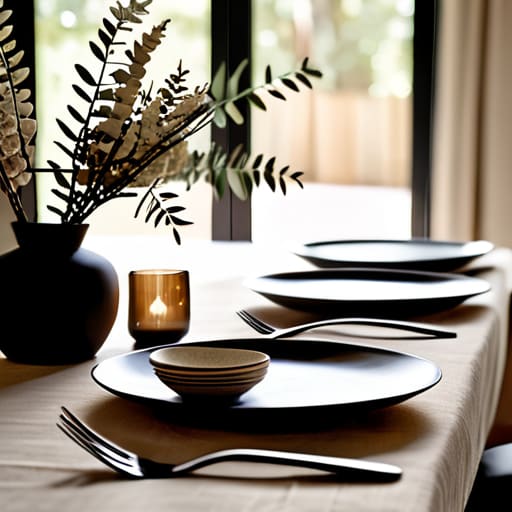
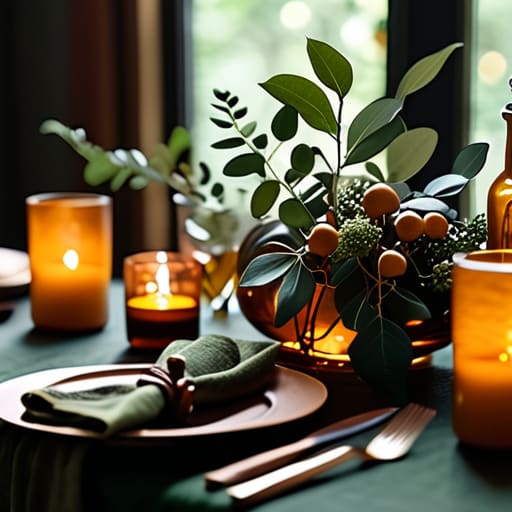
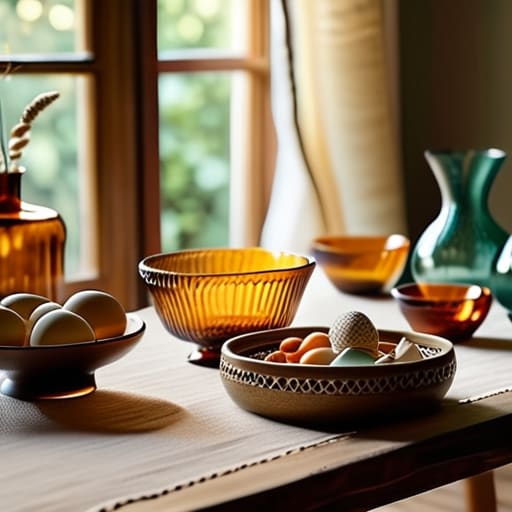
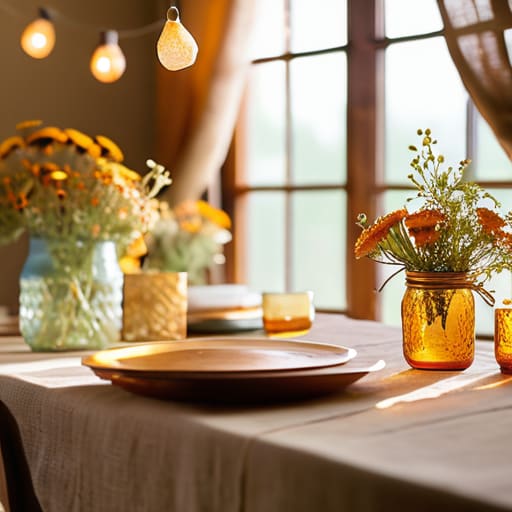
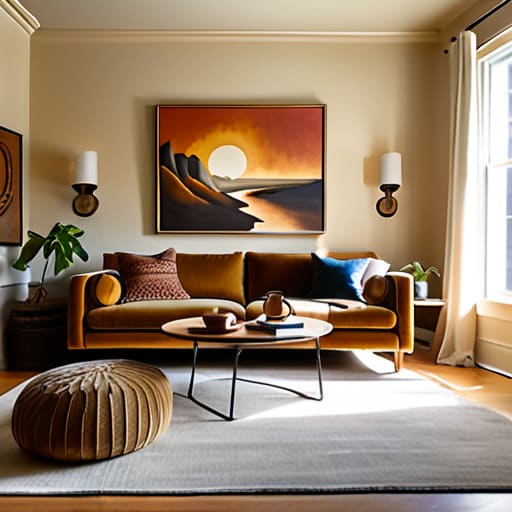
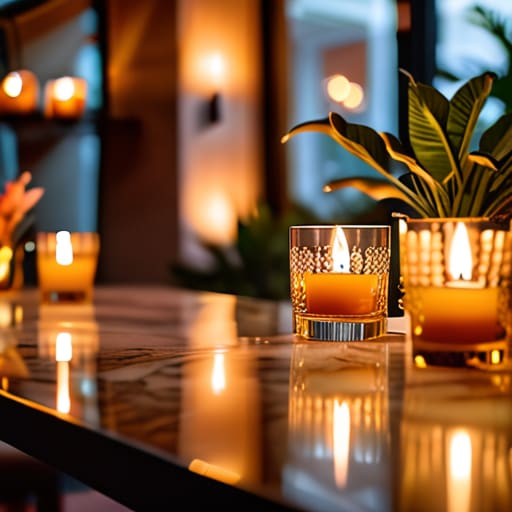
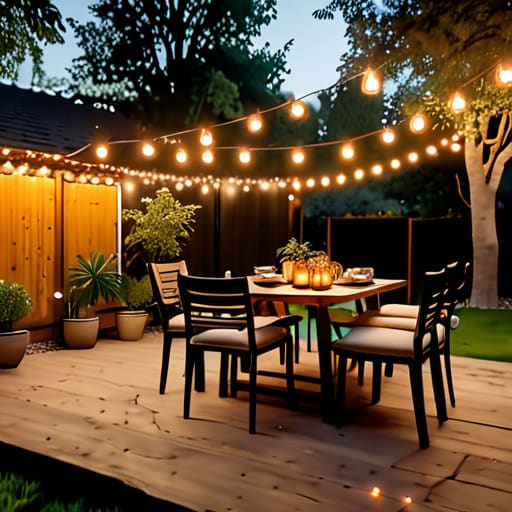
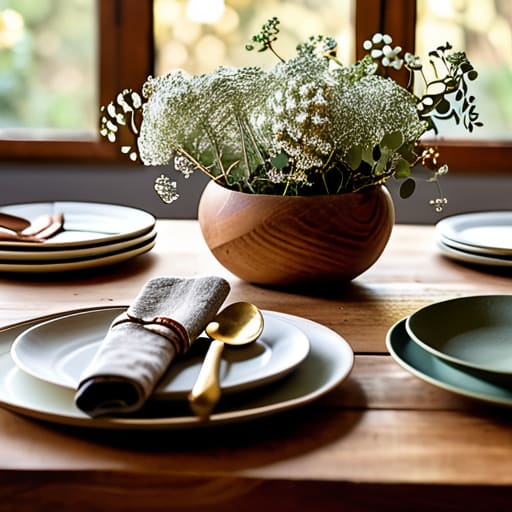
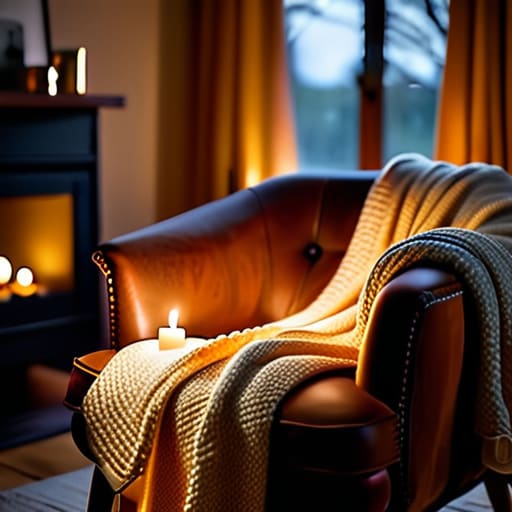
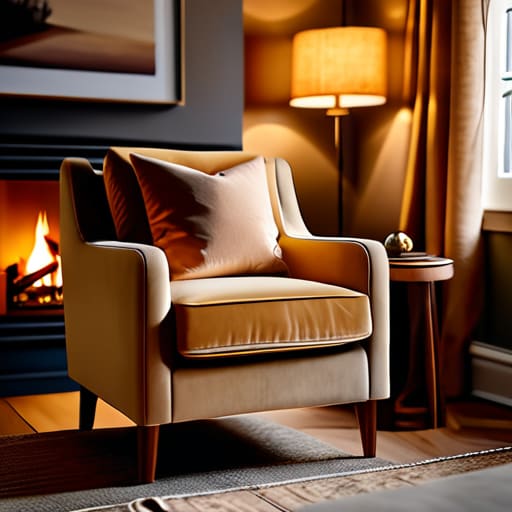
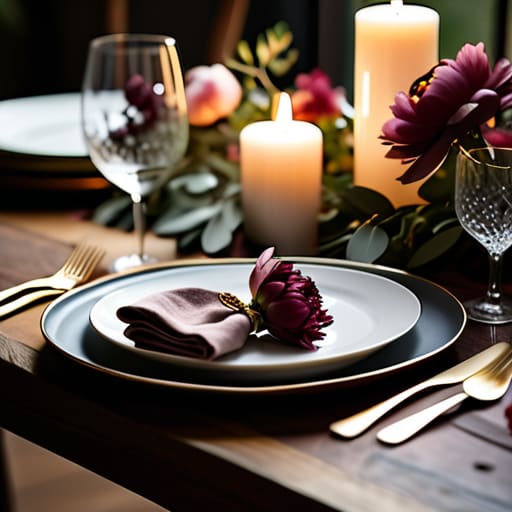
Elegant cocktail party decor setup.

Decorating for a Cocktail Party

I remember standing in the middle of a high-end catering gig a few years back, staring at a table laden with $200 gold-dipped centerpieces that looked absolutely stiff. Everyone was sipping their drinks, but nobody was actually talking; they were all too busy navigating around these ridiculous, oversized floral arrangements that felt more like museum exhibits than party elements. It hit me then that most people approach cocktail party decor with this unnecessary pressure to perform, thinking they need a massive budget or a professional crew to make an impression. Honestly? That’s just a recipe for a room that feels cold instead of cozy.

I’m not here to sell you on expensive, one-time-use props that end up in a landfill. Instead, I want to show you how to use what you already have—or what you can find for a few euros at a thrift shop—to create a space that actually invites connection. I’ll be sharing my favorite low-stress ways to layer textures, play with lighting, and style your surfaces so your guests feel instantly at home. Let’s focus on creating an atmosphere that is effortlessly beautiful and, most importantly, totally approachable.

Table of Contents

Creating Cocktail Hour Ambiance With Mood Lighting for Parties

Creating Cocktail Hour Ambiance With Mood Lighting for Parties

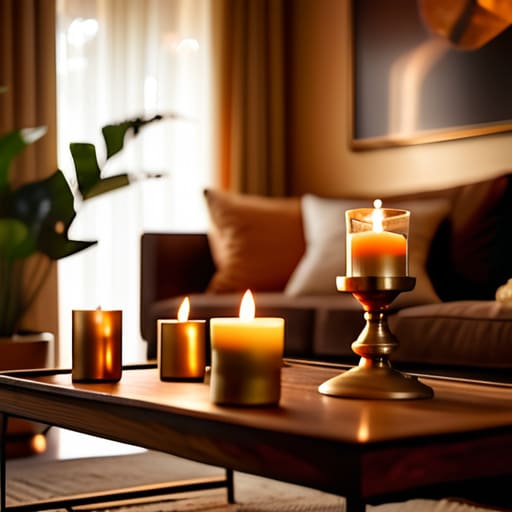
If there is one thing I’ve learned from years of styling events, it’s that overhead lights are the enemy of a good time. The moment you flip on those bright ceiling fixtures, the magic just evaporates. To really nail that cocktail hour ambiance, you want to layer your light sources instead of relying on one big lamp. I love using a mix of unscented tea lights scattered around and maybe a few string lights tucked into a glass bowl. It creates this soft, flickering glow that makes everyone look a little better and feel a lot more relaxed.

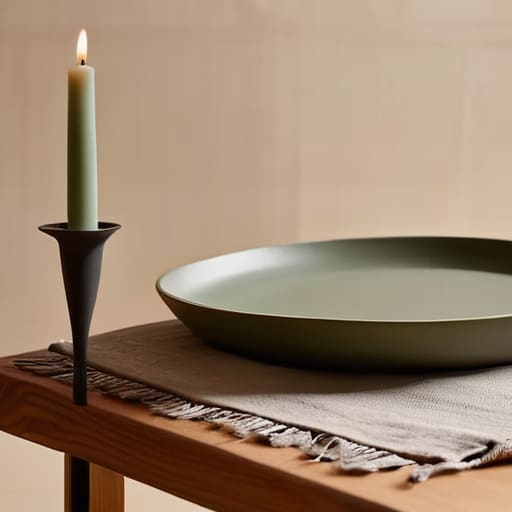
Don’t feel like you need to buy a whole new lighting kit, either. I usually just hunt through thrift stores for some vintage brass candlesticks—they add such a lovely, old-world charm. When you pair warm, low-level light with a few well-placed lamps, you’re setting the stage for actual conversation to happen. It’s one of those simple mood lighting for parties tricks that makes a living room feel like a high-end lounge without you having to spend a fortune on professional rentals.

Modern Entertaining Trends That Prioritize People Over Perfection

Lately, I’ve noticed a huge shift in how we approach hosting. We’re moving away from those stiff, “everything-must-be-perfect” soirées and leaning into what I like to call intentional intimacy. Instead of spending hours obsessing over a massive, intimidating centerpiece, people are looking toward modern entertaining trends that actually encourage guests to relax. It’s less about a museum-quality display and more about creating a flow that feels natural. I’m seeing more people ditching the formal dining setup for low-slung lounge areas or even just a collection of mismatched vintage chairs that make everyone feel like they can actually kick back and stay a while.

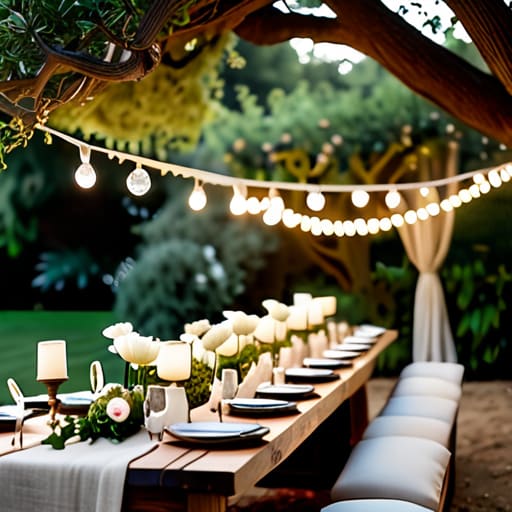
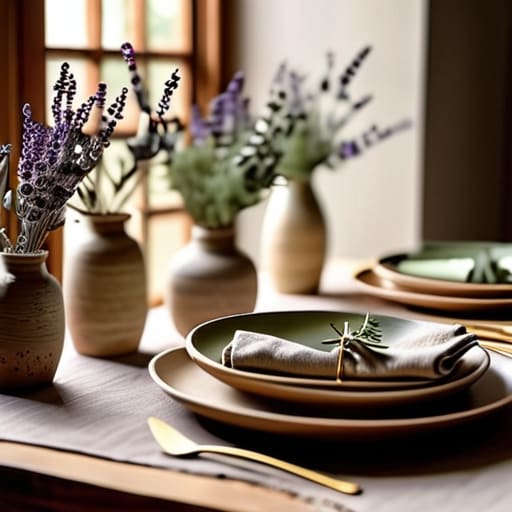
This shift is also changing how we think about our tables. Rather than a rigid, symmetrical layout, I’m loving more organic tablescape design ideas—think scattered herbs, linen runners that aren’t perfectly ironed, and a few well-placed candles. The goal is to create a space where the decor supports the connection rather than distracting from it. When the environment feels lived-in and cozy, the pressure to perform vanishes, leaving nothing but genuine conversation and good vibes.

My Go-To Tricks for Easy, Effortless Decor

  • Don’t overlook your surfaces; instead of buying expensive centerpieces, use those vintage glass bowls from your thrift finds to hold citrus slices or even just some loose greenery to add life to the bar area.
  • Keep the “clutter” contained by using small trays—it makes a random assortment of napkins, coasters, and garnishes look like a deliberate design choice rather than a mess.
  • Create a “self-serve” station that doubles as decor, using tiered cake stands to display snacks so guests can help themselves without you having to play waiter all night.
  • Use height to your advantage; if you’re setting out small appetizers, put a few sturdy books under a tablecloth to create different levels, which makes the spread look much more professional and interesting.
  • Remember that scent is part of the decor, too—light a few subtle, unscented candles near the food and maybe one lightly scented one in the entryway to make that first impression feel cozy and intentional.

My Golden Rules for Stress-Free Decorating

Focus on the “vibe” rather than the price tag; dim lights and cozy textures always beat expensive, stiff centerpieces.

Keep your setup practical so you aren’t stuck in the kitchen—choose decor that allows you to actually hang out with your guests.

Don’t be afraid to mix in vintage finds or thrifted pieces to give your space a soulful, lived-in feel that sparks conversation.

Decor That Actually Works

“At the end of the day, your guests won’t remember if your centerpieces were designer or DIY, but they’ll definitely remember if the vibe felt cozy enough to stay for one more drink.”

Saoirse Mullan

Bringing It All Together

Bringing It All Together for cocktail decor.

At the end of the day, decorating for a cocktail party doesn’t have to feel like a high-stakes production. We’ve talked about how the right lighting can completely shift the energy of a room, how leaning into modern, relaxed trends makes guests feel more at home, and why you should always prioritize meaningful connection over expensive, stiff arrangements. Whether you’re repurposing that vintage glassware you found at the thrift store last weekend or just dimming the overhead lights to create a cozy glow, the goal is to set a stage where people actually want to linger. Remember, your decor is just the backdrop; the real magic happens in the laughter and the shared stories.

So, take a deep breath and stop worrying if every single napkin is perfectly aligned. If you have some decent snacks, a few warm light sources, and a space that feels inviting, you are already halfway there. My best advice? Trust your gut and keep it simple. People won’t remember if your centerpieces were perfectly symmetrical, but they will absolutely remember how they felt when they walked through your door. Now, go grab a drink, put on a good playlist, and get ready to enjoy your own party. You’ve totally got this!

Frequently Asked Questions

I love the idea of using vintage glassware, but is there a way to style it without it looking too cluttered on a small cocktail table?

Oh, I totally get that! I’ve definitely been there—staring at a tiny bistro table wondering if my thrifted finds are going to look intentional or just like a cluttered mess. My trick? Use “clusters.” Instead of spreading every single glass out, group a few different heights together on a small wooden tray. It creates a little focal point and keeps the edges of the table clear for actual drinks!

What are some budget-friendly ways to add a bit of greenery or "life" to the room if I don't want to spend a fortune on fresh floral arrangements?

Honestly, don’t feel pressured to drop a fortune on massive floral installs. I’m a huge fan of “living decor.” Grab a few bunches of eucalyptus from the grocery store—it smells divine and lasts forever—or scavenge some interesting leafy branches from your own backyard. I also love using my thrifted glassware to hold single stems or even just some pretty moss. It feels intentional and lush without that stiff, “expensive wedding” vibe.

Since I'm hosting in a smaller apartment, how do I balance decorating the space without making it feel cramped for my guests to move around?

I totally feel you on this—I’ve hosted more apartment gatherings than I can count! My golden rule is to keep the floor clear. Instead of bulky centerpieces or floor vases, think vertically. Use slim candlesticks or hang some greenery from a bookshelf to add that boho vibe without eating up precious square footage. Also, keep the snacks on a small side table rather than the main coffee table so people can actually circulate!

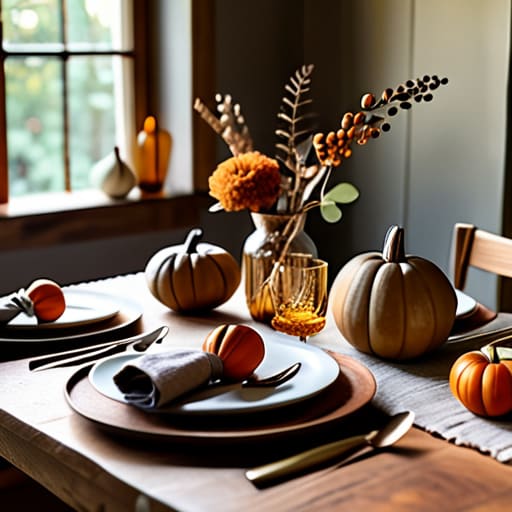
Festive holiday party decor setup.

Creating Festive Holiday Party Decorations

I remember one particular New Year’s Eve working for a high-end catering firm where the client spent more on a massive, motorized ice sculpture than the entire food budget. The room looked stunning in photos, sure, but it felt completely frozen—and I don’t just mean the temperature. People were hovering awkwardly around these expensive, stiff displays instead of actually sinking into the sofa and laughing. It’s that same pressure that makes us stress over the “perfect” holiday party decor, thinking we need a professional crew and a massive credit card limit just to host a decent gathering.

I’m here to tell you that we are officially over the hype. In this guide, I’m going to show you how to create a space that feels warm and inviting without the soul-crushing price tag. We’re going to focus on real atmosphere—think cozy lighting, thrifted finds, and setups that actually encourage people to stay for a second helping. I promise to share nothing but honest, low-key tips that prioritize meaningful connection over expensive clutter. Let’s make your home feel like a sanctuary, not a showroom.

Table of Contents

Finding Your Holiday Party Atmosphere Through Cozy Winter Party Aesthetics

Finding Your Holiday Party Atmosphere Through Cozy Winter Party Aesthetics.

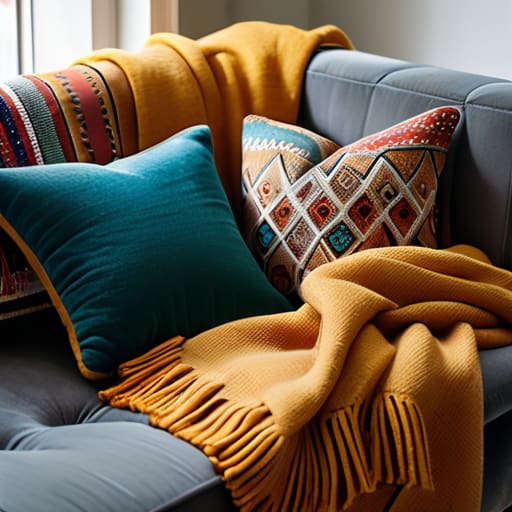
When I think about cozy winter party aesthetics, I don’t think about matching everything perfectly or buying a massive set of coordinated ornaments. To me, it’s all about layering textures that make people want to sink into a chair and stay for hours. Think chunky knit throws tossed over the sofa, a few unscented beeswax candles flickering on the mantle, and maybe some dried orange slices hanging from a branch. It’s that warm, lived-in feeling that tells your guests, “Hey, relax, you’re home.”

If you want to lean into this vibe without breaking the bank, I love playing with light. Instead of using those harsh overhead lights, try scattering small tea lights or even some thrifted brass candlesticks around the room. This is where you can really play with festive centerpiece inspiration—maybe a simple wooden bowl filled with pinecones and some sprigs of rosemary from the grocery store. It’s not about being perfect; it’s about creating a soft, glowing environment where the conversation can actually flow.

Simple Diy Holiday Party Accents That Spark Real Connection

Simple Diy Holiday Party Accents That Spark Real Connection

Honestly, I’ve always felt that the best way to break the ice isn’t through some grand, expensive statement piece, but through the little things that make people feel at home. Instead of spending a fortune on polished store-bought sets, I love leaning into DIY holiday party accents that feel a bit more soulful. For instance, I recently spent a Saturday afternoon scouring local thrift stores for mismatched vintage glassware. When you scatter those uneven, beautiful pieces across the table, it immediately lowers the “formality bar.” It tells your guests, “Hey, grab a drink and make yourself comfortable,” which is exactly the kind of vibe I’m aiming for.

If you’re looking for some quick festive centerpiece inspiration, try keeping it organic. I’m a huge fan of gathering some evergreen branches or even just a few dried orange slices and arranging them in simple ceramic bowls. It’s easy, it smells incredible, and it doesn’t block anyone’s view. When people can actually see each other across the table without a giant floral arrangement in the way, the conversation just flows so much more naturally.

My Go-To Tricks for a Stress-Free, Soulful Setup

  • Skip the overhead lights and lean hard into “mood lighting.” I always tell my clients to turn off those harsh ceiling lights and stick to unscented candles, fairy lights, or a few well-placed lamps. It instantly makes the room feel like a hug rather than a showroom.
  • Don’t feel pressured to buy a matching set of everything. I love mixing and matching my thrifted vintage glassware with whatever plates you already have in the cupboard. That little bit of imperfection actually makes the table feel more lived-in and welcoming.
  • Use greenery to bring the outside in without breaking the bank. A few sprigs of eucalyptus or some pine branches tucked into a simple vase can make a huge impact. It smells amazing and adds that organic, bohemian vibe we’re all after.
  • Create “conversation pockets” rather than one big, intimidating seating area. If you have a small space, pull a couple of mismatched chairs closer to the sofa or even toss some floor cushions down. It encourages people to settle in and actually stay a while.
  • Keep your decor functional so it doesn’t get in the way of the fun. I always make sure my centerpieces aren’t so tall that people have to crane their necks to see each other. If you can’t see the person across from you, the decor is doing too much work.

My Golden Rules for a Stress-Free Holiday

Focus on the vibe, not the budget—dimming the lights and using warm textures does way more for the mood than expensive, stiff decorations ever will.

Prioritize comfort so your guests actually want to linger; if the seating is cozy and the lighting is soft, the conversation will follow naturally.

Keep your DIY projects simple and meaningful—it’s better to have three heartfelt, handmade touches than a house full of cluttered, store-bought trinkets that don’t feel like “you.”

My Golden Rule for Decorating

“At the end of the day, your guests won’t remember if you had matching linen napkins or a designer wreath; they’ll remember how the room felt. Focus less on perfection and more on creating a space that feels warm enough to make everyone want to stay for one more drink.”

Saoirse Mullan

Bringing It All Home

Cozy holiday decor, Bringing It All Home.

At the end of the day, decorating for the holidays shouldn’t feel like another item on your never-ending to-do list. We’ve talked about finding that perfect cozy aesthetic, leaning into DIY accents that feel personal, and focusing on the little details that actually make a difference. Whether you’re thrifted vintage glassware or just dimming the overhead lights to create a warmer glow, remember that the goal is to create a sense of ease. You don’t need a massive budget or a professional team to make your home feel festive; you just need a few intentional touches that make your guests feel like they can finally kick off their shoes and stay a while.

If you find yourself stressing over whether the centerpiece is perfectly symmetrical or if you have enough greenery, take a deep breath and let it go. I’ve spent years in the catering industry seeing people obsess over perfection, only to realize that the most memorable nights are the ones where the host is actually present and relaxed. Your friends aren’t coming over to critique your table settings; they’re coming to see you and to share a laugh. So, grab a glass of something tasty, turn on those fairy lights, and just enjoy the magic of having your favorite people all in one room. That’s the best decor there is.

Frequently Asked Questions

How can I make my tiny apartment feel festive without it looking cluttered or overwhelming?

Honestly, small spaces are my absolute favorite because you can be so intentional. My rule of thumb? Think vertically. Instead of crowding your coffee table with knick-knacks, hang a slim garland over a doorway or drape some fairy lights along a bookshelf. I love using a single, beautiful thrifted tray to group a few candles and some greenery—it creates a “moment” without swallowing your entire living room. Keep it light, keep it airy!

Are there any ways to use thrifted items or things I already have so I'm not spending a fortune on new decor?

Oh, absolutely! Honestly, that’s my favorite way to do it. I’m constantly hunting through thrift stores for vintage glassware—nothing makes a cocktail table feel more special than a mismatched collection of amber or colored glass. Before you hit the shops, though, raid your own linen closet. Those old lace tablecloths or even just some unscented tea lights you’ve tucked away can completely change the vibe. It’s about layers, not newness.

What’s the best way to set up lighting so the room feels cozy rather than just bright and clinical?

Honestly, the quickest way to kill a vibe is by turning on those big overhead lights—they just make everything feel so clinical and harsh. My golden rule? Layer your lighting. Instead of the ceiling light, lean into lamps, string lights, or even a few unscented tea lights scattered around. It creates these soft little pockets of warmth. If you can dim your existing lamps, do it! It’s all about that low, amber glow.

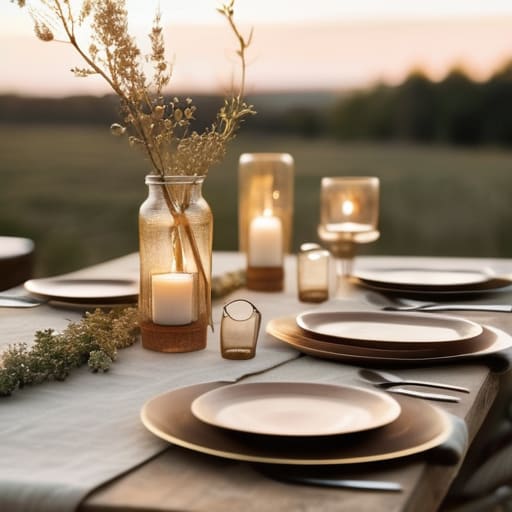
Elegant anniversary decor for a celebration.

Decorating for an Anniversary Celebration

I remember one of my first big catering gigs where the client spent a small fortune on massive, towering floral arrangements that practically blocked the view of the couple. People were literally leaning around giant hydrangeas just to see each other talk! It felt so stiff and performative, and honestly, it missed the entire point of the celebration. When we talk about anniversary decor, I think we often get caught up in this idea that more is better, or that we need to spend a month’s rent on professional rentals to make it look “official.” But if your guests are struggling to navigate a forest of expensive centerpieces, you haven’t actually created a celebration; you’ve just created a showroom.

I’m not here to sell you on a Pinterest-perfect fantasy that requires a professional crew and a massive budget. Instead, I want to share my favorite ways to use simple, soulful touches to create a space that feels truly intimate. We’re going to focus on low-stress, high-impact ideas—think warm lighting, meaningful textures, and maybe a few thrifted finds—that celebrate your love without breaking the bank. Let’s get back to what actually matters: making your space feel cozy enough for real connection.

Table of Contents

Finding Magic in Simple Anniversary Party Decorations Ideas

Finding Magic in Simple Anniversary Party Decorations Ideas.

When I’m working on a project, I always tell my clients to look at what they already have before running to a party supply store. You don’t need a high-end, luxury anniversary setup to make the night feel significant. Instead, try leaning into personalized anniversary gifts and decor that actually mean something to the two of you. Maybe it’s a collection of framed photos from your first year together or those mismatched vintage bud vases I’m always hunting for at thrift stores. It’s these little nods to your shared history that create a sense of intimacy that money just can’t buy.

If you want to elevate the mood without breaking the bank, focus on your romantic table settings. I love using a simple linen runner paired with a few scattered tea lights to create a soft, flickering glow. It’s all about that indoor anniversary ambiance—think warm tones, soft textures, and enough space for everyone to actually lean in and talk. You don’t need a mountain of expensive floral arrangements; a few sprigs of eucalyptus and some well-placed candles will do more for the vibe than any overpriced centerpiece ever could.

Personalized Anniversary Gifts and Decor That Tell Your Story

Personalized Anniversary Gifts and Decor That Tell Your Story

I’ve always found that the most meaningful touches aren’t the ones you buy from a big-box retailer, but the ones that actually mean something to you as a couple. Instead of aiming for a stiff, luxury anniversary setup that feels more like a showroom than a home, I love leaning into things that spark a “remember when?” conversation. Maybe it’s a collection of framed photos from your first year together tucked into your greenery, or even using old concert tickets as little place cards. These personalized anniversary gifts and decor elements act as little anchors for your memories, making the whole evening feel deeply intimate.

If you’re looking to weave your history into the actual layout, think about your journey through your anniversary color palettes. Did you meet in a bright, sunny coastal town? Bring in those seafoam blues and sandy neutrals. If your first date was a cozy jazz club, lean into those moody, deep jewel tones. It’s not about being perfect; it’s about creating a visual language that says, “this is us.” When the decor reflects your unique story, the space feels lived-in and warm rather than just “decorated.”

My Little Secrets for Making the Space Feel Special (Without Breaking the Bank)

  • Don’t underestimate the power of lighting. I always tell my clients to ditch the overhead big lights and go for a mix of unscented tea lights and some warm fairy lights tucked into glass jars. It instantly makes the room feel intimate and soft.
  • Bring the outside in with greenery. You don’t need a massive, expensive floral arrangement; just a few sprigs of eucalyptus or some wildflowers from the garden in those vintage glass vases I’m always hunting for at thrift stores can change the whole vibe.
  • Create a “memory corner” instead of a formal photo booth. Set up a small side table with a few framed snapshots of your favorite moments together and maybe a handwritten note. It’s much more meaningful than a prop-filled photo station.
  • Think about texture to make things cozy. Drape a soft linen tablecloth over your table or toss a few velvet cushions on the floor if you’re doing a more casual, bohemian setup. It makes guests feel like they can actually sink in and relax.
  • Keep the tabletop functional for real conversation. Avoid centerpieces that are too tall or wide—you don’t want your guests having to crane their necks just to see each other. Keep the decor low and beautiful so the focus stays on the people across the table.

My Top Tips for a Stress-Free Celebration

Focus on the feeling, not the price tag—warm lighting and cozy textures do more for the mood than expensive, stiff decorations ever could.

Let your history guide your decor by using meaningful, personal touches that actually spark conversation rather than just filling up space.

Keep it simple so you can actually enjoy the party; if the setup feels like a chore, it’s going to take away from the magic of the moment.

The Heart of the Decor

“At the end of the day, your anniversary decor shouldn’t feel like a showroom; it should feel like a warm hug. Don’t get caught up in making everything perfect—just focus on the little touches that make your partner feel seen and your guests feel at home.”

Saoirse Mullan

Bringing It All Together

Bringing It All Together with thoughtful decor.

At the end of the day, decorating for an anniversary isn’t about following a strict Pinterest board or buying every single thing in your cart. Whether you’re leaning into those simple, magical touches like warm candlelight or diving deep into your history with personalized decor that tells your unique story, the goal is the same. It’s about creating an environment where you can actually sit down, relax, and focus on the person sitting across from you. Remember, it’s the thoughtful details—the things that reflect your journey together—that truly make the space feel special, not the price tag attached to them.

So, take a deep breath and don’t let the planning stress you out. If you end up using a few mismatched vintage glasses I found at a thrift shop or just some fairy lights draped over the mantel, it’s going to be beautiful because it’s uniquely yours. Your anniversary is a celebration of your connection, and no amount of perfect styling can replace the warmth of a shared laugh or a meaningful conversation. Just focus on making the space feel like home, and I promise the magic will follow. Now, go grab a glass of something bubbly and enjoy your moment!

Frequently Asked Questions

How can I decorate for an anniversary if I'm on a super tight budget?

Honestly, I’ve been there! When the budget is tight, lean into what you already have. I’m a huge fan of “repurposing” rather than buying. Take those mismatched vintage glasses you’ve thrifted, scatter some tea lights around, and use fresh greenery from your own garden as a runner. It feels intentional and lush without the price tag. Focus on lighting and atmosphere—warm, soft glows make everything look expensive and incredibly cozy.

What kind of lighting works best to make a small living room feel intimate rather than cluttered?

When you’re working with a smaller space, the secret is to ditch the big overhead light—it’s way too harsh and makes everything feel exposed. Instead, think in layers. I love using small clusters of tea lights or battery-operated fairy lights tucked into vintage glassware. It adds that soft, golden glow without taking up floor space. A single, dimmable floor lamp in a corner does wonders for creating cozy pockets of light that feel intentional, not crowded.

Are there any easy ways to incorporate vintage or thrifted items into the decor without it looking messy?

Oh, I love this question! Honestly, my thrifted glassware collection is my pride and joy, but I totally get the fear of it looking like a cluttered antique shop. My secret is “the rule of three” and color grouping. Instead of scattering random bits everywhere, pick a small palette—maybe some amber glass and brass accents—and group them in clusters. It makes the items look intentional and curated rather than just… accidental.

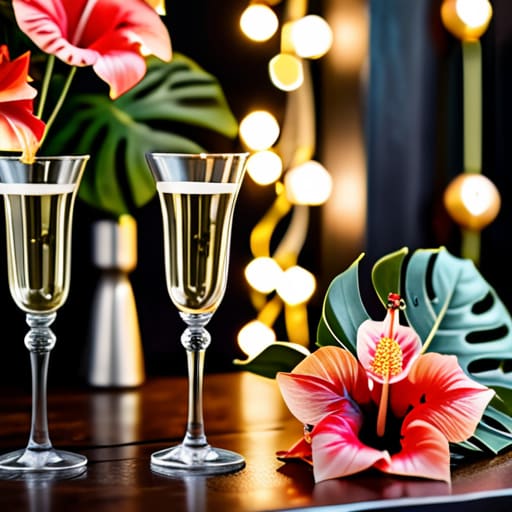
Elegant engagement party decor ideas.

Ideas for Engagement Party Decoration

I was once knee-deep in a sea of expensive, stiff floral arrangements at a high-end catering gig, watching a bride-to-be look absolutely terrified that a single misplaced petal would ruin her entire night. It hit me right then that we’ve been sold this lie that engagement party decor has to be some untouchable, museum-quality setup that costs a small fortune and leaves everyone feeling too intimidated to even sit down. Honestly? If your guests are too afraid to move a coaster because they might ruin the “aesthetic,” you haven’t decorated a party—you’ve curated a stressful exhibition.

I’m not here to sell you on gold-leafed everything or professional balloon arches that cost more than your groceries. Instead, I want to show you how to use what you already have—or what you can find for a few bucks at a thrift shop—to create a space that actually feels like home. I’ll be sharing my favorite low-stress, high-impact tricks for lighting, textures, and tabletop styling so you can focus on the people you love. Let’s make your celebration feel effortlessly beautiful without the headache.

Table of Contents

Warm Engagement Party Lighting Ideas for Cozy Late Night Chats

Warm Engagement Party Lighting Ideas for Cozy Late Night Chats

If you want your guests to actually stay and talk instead of hovering awkwardly by the snack table, you have to ditch the harsh overhead lights. I always tell my clients that lighting is the secret sauce to any successful gathering. For those late-night vibes, I’m a huge fan of layering different light sources. Think about scattering some unscented tea lights around your engagement party centerpiece ideas to create little pools of warmth on the tables. It makes everything feel much more intimate and intentional.

If you’re hosting outdoors or in a large living room, string lights are your absolute best friend. I love draping warm Edison bulbs or delicate fairy lights across a mantle or through some greenery to lean into those boho engagement party aesthetics. It creates this soft, dreamy glow that makes everyone look great and feel instantly relaxed. Just a little tip from my own experience: if you’re using battery-operated candles, keep a few spares tucked away in your kit—or even just in your purse—because there is nothing worse than a flickering light dying right when the deep conversations start!

Boho Engagement Party Aesthetics That Focus on Connection

Boho Engagement Party Aesthetics That Focus on Connection

When it comes to boho engagement party aesthetics, I always tell my clients to lean into textures rather than perfection. You don’t need a massive budget to make a space feel intentional; instead, think about layering things like woven floor cushions, mismatched linen napkins, and maybe a few dried floral arrangements. I’m a huge fan of using low-to-the-ground seating areas because it immediately breaks down those formal barriers and encourages people to actually settle in and stay a while.

For your tables, skip the stiff, traditional setups. I love seeing elegant engagement party table settings that feel a bit more lived-in—think unscented taper candles in thrifted brass holders and scattered eucalyptus leaves. If you want to add a little more structure without losing that relaxed vibe, you could try some simple, personalized engagement party signage written on small pieces of driftwood or vintage mirrors. It adds a lovely, personal touch that makes your guests feel like they’re part of something really special and intimate, rather than just attending a formal event.

My go-to little tricks for a beautiful (and stress-free) setup

  • Don’t feel pressured to buy everything new; I’m a huge fan of hitting up local thrift stores for mismatched vintage glassware or brass candlesticks. It adds so much soul to the table and keeps things feeling relaxed rather than stiff.
  • Use greenery as your best friend. Instead of expensive, formal floral arrangements that feel a bit too “wedding-y,” grab some eucalyptus or even some interesting branches from your backyard to tuck into vases. It’s effortless and smells amazing.
  • Create “conversation pockets” with your layout. Instead of one giant, intimidating table, try grouping small clusters of seating or using floor cushions if you’re going for that boho vibe. It makes people feel much more comfortable opening up.
  • Keep the centerpieces low to the ground. There is nothing worse than trying to have a deep chat through a massive wall of flowers. Keep your decor tucked low so everyone can actually see each other across the table.
  • Always have a “styling kit” ready. I never host without my trusty roll of double-sided tape and a few extra tea lights in my bag. Being able to quickly fix a drooping streamer or add a little extra glow mid-party is a total lifesaver.

My Golden Rules for a Stress-Free Celebration

Focus on the vibe, not the price tag—warm lighting and comfortable seating do more for your guests than expensive, stiff centerpieces ever could.

Keep the decor personal and relaxed so your friends feel like they can actually kick back and have a real conversation.

Don’t overcomplicate things; use what you have, mix in a few thrifted gems, and remember that the best part of the night is the people you’re with.

My Golden Rule for Decorating

At the end of the day, your guests won’t remember if the floral arrangements were professionally styled or if you used silk flowers from a thrift store; they’ll remember how the room felt and how easy it was to settle in and actually talk to one another.

Saoirse Mullan

Bringing It All Together

Bringing It All Together: Effortless Party Decor

At the end of the day, decorating for an engagement party doesn’t have to be some high-stress, Pinterest-perfect marathon. We’ve talked about how much of a difference the right lighting can make for those late-night heart-to-hearts, and how leaning into a relaxed, boho aesthetic can take the pressure off everyone. Whether you’re layering in some vintage glassware from your latest thrift haul or just scattering a few unscented candles around the room, the goal is to create a backdrop that feels completely effortless. Remember, you aren’t trying to win an interior design award; you’re just setting the stage for a beautiful milestone.

If you find yourself spiraling about whether the table looks “just right” an hour before guests arrive, take a deep breath and step away from the centerpieces. Your friends aren’t coming over to critique your floral arrangements; they are coming to celebrate the love between two people. If the lights are low, the food is easy, and the atmosphere feels welcoming, you have already won. Focus on the magic of the moment and the people filling your home. That is what stays with everyone long after the last candle has burned down.

Frequently Asked Questions

How can I decorate my small apartment for an engagement party without it feeling cluttered or cramped?

I totally get it—hosting in a small space can feel a little daunting, but it’s actually a secret weapon for intimacy! My best tip is to think vertically. Instead of crowding your tables, use tall, slim taper candles or hang some delicate greenery from your curtain rods to draw the eye up. Keep your surfaces mostly clear, too; maybe just one beautiful thrifted tray for snacks, so guests actually have room to set down a drink while they chat.

What are some budget-friendly ways to reuse things I already have at home instead of buying new decor?

Honestly, my favorite way to decorate is by raiding my own cupboards! Grab those mismatched vintage glassware pieces from your thrift hauls or even just some plain glass jars from the pantry. Clean them up, pop a few sprigs of greenery inside, and you’ve got instant centerpieces. You can also repurpose old hardcover books as pedestals for snacks or use pretty linen napkins you usually save for Sundays. It feels way more soulful that way.

Should I try to stick to a specific color palette, or is it okay to just mix and match what I find while thrifting?

Oh, I love this question! Honestly, don’t feel pressured to stick to a strict, Pinterest-perfect color palette. If you’re thrifting, the magic is in the hunt! I always say: aim for a “vibe” rather than a color swatch. If you find a gorgeous vintage amber glass vase, use it! Just try to keep a common thread—maybe a certain texture or a general warmth—so the mix feels intentional rather than accidental.

Colorful graduation party decor for celebrations.

Decorating for a Graduation Celebration

I was sitting on my studio floor last week, surrounded by half-empty boxes of glittery streamers and those massive, overpriced plastic balloon arches that seem to be everywhere lately, and I just had to laugh. Honestly, if I see one more “luxury” graduation party decor package that costs more than a decent dinner for four, I might actually lose it. We’ve been sold this idea that celebrating a huge milestone requires a mountain of disposable, shiny junk that’ll end up in a landfill by Monday morning. But here’s the thing: your graduate doesn’t need a showroom-perfect setup to feel celebrated; they need a space that actually feels like them.

I’m not here to give you a checklist of expensive trends that will leave your bank account empty and your living room cluttered. Instead, I want to share how you can pull together meaningful graduation party decor using things you probably already own, a few thrifted finds, and some really good lighting. I’m going to show you how to create a cozy, effortless vibe that encourages people to actually sit down, grab a drink, and celebrate the person behind the diploma without the stress of a professional production.

Table of Contents

Diy Graduation Centerpieces That Actually Spark Conversation

Diy Graduation Centerpieces That Actually Spark Conversation

I’ve always found that the best centerpieces are the ones that don’t feel like a “set piece” sitting there looking untouchable. Instead of buying those stiff, pre-made arrangements, I love leaning into diy graduation centerpieces that actually give guests something to talk about. One of my favorite tricks is using those vintage glass vessels I find while thrifting—think mismatched amber bottles or colorful coupes. Fill them with simple greenery or even just some interesting dried flowers, and suddenly your table feels curated rather than cluttered.

If you want to lean into a more personal touch, try creating small “memory clusters” along your graduation party table settings. You could tuck a few polaroids of the graduate with their friends into small wooden holders or even nestle them among some unscented tea lights. It keeps the focus on the milestone and the people celebrating it, rather than just looking like a showroom display. It’s all about creating those little pockets of nostalgia that make your guests lean in, smile, and start sharing their own favorite stories from the last four years.

Class of 2024 Decorations That Feel Like Home

Class of 2024 Decorations That Feel Like Home

When it comes to picking out your class of 2024 decorations, I always tell my clients to steer clear of that overwhelming, bright-plastic look you see in big-box stores. It can feel a bit cold and impersonal. Instead, I love leaning into things that feel lived-in and cozy. Think about pulling some mismatched linen napkins from your linen closet or using those vintage amber glasses I’m always hunting for at thrift stores to create some lovely graduation party table settings. It’s those little, tactile details that make a house feel like a celebration rather than a showroom.

If you really want to lean into a specific look, try tying your theme to a feeling rather than a rigid concept. Instead of hunting for generic “graduation party theme ideas” that involve endless amounts of cardboard, try something like “Golden Hour Garden” or “Cozy Nostalgia.” You can use warm string lights or even a few clusters of eucalyptus to soften the edges of the room. The goal is to make the space feel like an extension of your home where people can actually breathe and relax while they celebrate the big milestone.

My Little Secrets for a Stress-Free Setup

  • Lean into the “thrifted” look. Instead of buying a massive set of matching decor that you’ll never use again, hit up a local charity shop for some mismatched vintage brass candlesticks or colorful glass bowls. It adds so much more character and feels way more intentional than something straight out of a big-box store.
  • Lighting is your best friend (and your biggest mood-setter). I can’t tell you enough how much better a room feels with warm string lights or a few scattered unscented tea lights rather than those harsh overhead lights. It instantly makes the whole space feel cozy and relaxed, which is exactly what you want for a celebration.
  • Don’t forget the “functional” decor. I always tell my clients that a beautiful way to display the menu or a little handwritten note by the snack table counts as decor! It’s practical, it helps the flow of the party, and it adds that personal, thoughtful touch that makes guests feel looked after.
  • Keep your surfaces clear for actual living. It’s so easy to over-decorate and end up with no place for people to actually set down a drink or a plate. I like to keep centerpieces low or slim so people can actually see each other across the table—the goal is conversation, not staring at a massive floral arrangement.
  • Pack a “just in case” kit. I never show up to a setup without my trusty roll of double-sided tape and a few extra command hooks. Whether it’s a banner that won’t stay up or a stray decoration that’s gone rogue, having those little fixes on hand saves you so much unnecessary stress when the guests start arriving.

My Top Tips for a Stress-Free Celebration

Focus on the atmosphere over the “stuff”—warm lighting and comfortable seating will always do more for your vibe than a mountain of expensive streamers.

Keep your decor personal and conversational; choose pieces that tell a story or spark a “where did you find that?” moment rather than just filling up empty space.

Don’t try to do it all yourself—aim for a space that feels cozy and lived-in rather than a showroom, so you can actually spend time with your guests instead of fussing with a centerpiece.

My Golden Rule for Decorating

“At the end of the day, your guests aren’t going to remember if your streamers were perfectly straight or if you spent a fortune on themed balloons; they’re going to remember how the room felt—the warmth of the light, the comfort of the seating, and the fact that they actually felt at home while celebrating a huge milestone.”

Saoirse Mullan

Bringing It All Together

Bringing It All Together for graduation decor.

At the end of the day, decorating for a graduation doesn’t have to be this massive, overwhelming production. Whether you’re leaning into those DIY centerpieces that get people talking or just layering in some warm, cozy lighting to make your living room feel a bit more magical, the goal is the same: creating a space that feels genuinely welcoming. You don’t need a massive budget or a professional styling team to make your graduate feel seen. Just focus on the small, thoughtful touches—like a few thrifted glass vases or some handwritten notes—that turn a standard room into a celebratory sanctuary for your favorite people.

As you start pulling everything together, please remember to take a deep breath and step away from the decorations once they’re set. Your friends and family aren’t coming over to critique your table settings; they are coming to celebrate a huge milestone and to connect with you. If a centerpiece is a little crooked or the streamers aren’t perfectly straight, let it go. The most beautiful part of any party is the laughter and the stories shared around the table. So, grab a drink, dim the lights, and focus on the memories being made. You’ve got this!

Frequently Asked Questions

I really want to go the DIY route, but how do I keep everything looking cohesive instead of just a messy pile of random stuff?

I totally get that—it’s so easy for DIY projects to end up looking like a craft store exploded in your living room. My secret? Pick a “tether.” Choose two or three colors or a specific texture, like brushed gold or dried florals, and repeat them everywhere. If you’re using mismatched thrifted glassware, maybe keep all your napkins in one consistent linen tone. It ties the chaos together and makes it look intentional, not accidental.

What are some ways to decorate if I'm hosting in a tiny apartment and don't have much floor space for big displays?

When you’re working with a tiny apartment, you have to think vertically! Since floor space is precious, I love using wall space or even the tops of bookshelves for decor. Think about draping some fairy lights along a mantle or hanging a cluster of photos from a branch. I also swear by “elevated” snacking—use tiered cake stands to save table real estate. It keeps the vibe cozy without making the room feel cluttered.

Since I'm on a bit of a budget, where are the best places to find affordable, vintage-feeling decor that doesn't look like cheap plastic?

Honestly, please stay away from the big-box party aisles—that neon plastic just kills the vibe. My absolute favorite way to source is hitting up local thrift stores or estate sales; you can find the most gorgeous mismatched glassware for pennies. I also love scouring Facebook Marketplace for old brass candlesticks or wooden trays. It takes a little more hunting, but it adds so much soul to the table without breaking the bank.

Elegant bridal shower decor styling.

Styling a Beautiful Bridal Shower

I remember standing in the middle of a high-end catering gig a few years back, staring at a table laden with $200 silk peonies and gold-plated centerpieces that looked like they belonged in a museum rather than a home. The atmosphere was so stiff you could practically hear the guests holding their breath, terrified they might accidentally smudge a perfectly placed napkin. It hit me then that all that expensive bridal shower decor was actually doing the opposite of what it was supposed to do; it was creating a barrier instead of a bridge. We often get so caught up in the “Pinterest-perfect” aesthetic that we forget the whole point is to celebrate a person, not a budget.

I’m not here to tell you how to spend a fortune to impress people you barely know. Instead, I want to show you how to pull together effortless, soulful spaces that actually encourage people to lean in and chat. I’ll be sharing my favorite ways to use thrifted finds, cozy lighting, and simple greenery to create beautiful bridal shower decor that feels warm and intentional without breaking your heart or your bank account. Let’s focus on making it feel like home.

Table of Contents

Embracing Minimalist Bridal Shower Decorations for Better Connection

Embracing Minimalist Bridal Shower Decorations for Better Connection

I honestly think we sometimes overcomplicate things when we’re trying to plan these events. We get so caught up in the “perfect” Pinterest board that we end up cluttering the space with things that don’t actually serve a purpose. When it comes to minimalist bridal shower decorations, my philosophy is simple: if it doesn’t make the room feel warmer or the conversation easier, leave it in the box. I love leaning into boho bridal shower aesthetics because they feel so intentional yet relaxed. Think a few scattered eucalyptus sprigs, some unscented tea lights, and maybe a stack of linen napkins. It’s about creating a vibe that says “relax and stay a while” rather than “look at how much I spent on this.”

When you strip away the massive, towering floral arrangements, you actually make room for people to see each other. I’ve found that simpler wedding shower table settings allow guests to focus on the person sitting across from them instead of navigating around a giant centerpiece. Instead of a heavy floral explosion, try a few small, mismatched bud vases or some simple greenery. It keeps the energy light and ensures that the true magic of the day stays centered on the bride and her favorite people.

Soft Pastel Color Palettes for Showers That Feel Like Home

Soft Pastel Color Palettes for Showers That Feel Like Home

If you’re feeling a bit overwhelmed by all the high-pressure Pinterest boards out there, I really can’t recommend leaning into pastel color palettes for showers to keep things grounded. I’ve always found that when we move away from those harsh, high-contrast colors and stick to soft sages, dusty roses, or creamy peaches, the whole energy of the room shifts. It stops feeling like a “staged event” and starts feeling like a cozy afternoon in a sunlit living room. It’s much more about creating a gentle backdrop that lets your guests’ personalities shine rather than competing with them.

When it comes to the actual setup, I love using these soft tones to pull together your wedding shower table settings without needing a massive budget. Instead of matching everything perfectly—which can feel a bit stiff—try mixing some mismatched vintage plates I’ve found at thrift stores with simple linen napkins in a similar shade. If you want to add a little life to the table, some bridal shower centerpiece ideas involving sprigs of dried lavender or eucalyptus look stunning against those muted tones. It’s that effortless, lived-in look that makes everyone feel instantly at ease.

Small Touches That Make a Big Impact (Without Breaking the Bank)

  • Don’t underestimate the power of thrifted glassware. I’m always hunting through local charity shops for mismatched vintage coupes or colored glass tumblers; they add so much character to a dessert table and feel way more intentional than a set of identical store-bought glasses.
  • Lighting is everything. Skip the harsh overhead lights and lean into warm fairy lights, tapered candles, or even a few well-placed floor lamps. You want the room to feel like a cozy hug, not a brightly lit office.
  • Bring the outdoors in with “imperfect” florals. Instead of spending a fortune on tight, professional rose arrangements, grab a few bunches of seasonal wildflowers or even some interesting greenery from your own garden. A little bit of wildness makes the space feel relaxed and approachable.
  • Use textures to add depth. Mix a linen tablecloth with some velvet napkins or a woven runner. It’s those little tactile details that make a table setting feel curated and high-end, even if you’re just setting up in your dining room.
  • Keep the “clutter” functional. Instead of buying plastic signage, use small chalkboard easels or even pretty vintage frames to display the menu or a welcome note. It keeps the decor feeling cohesive and gives the items a purpose beyond just taking up space.

My Top Three Tips for a Stress-Free Shower

Focus on lighting over expensive props—dimming the overheads and using a few scattered candles or fairy lights will do more for the mood than any store-bought centerpiece.

Keep the decor “breathable” so your guests aren’t constantly navigating around fragile trinkets; you want them focused on the bride, not avoiding a trip hazard.

Use what you have or find it at a thrift shop—vintage glassware and mismatched linens add way more character and warmth than a perfectly coordinated, pricey set.

My Golden Rule for Decorating

“At the end of the day, your friends aren’t going to remember if you had matching silk napkins or a professional floral installation; they’re going to remember how the room felt when they walked in and how easy it was to sit down, grab a drink, and actually catch up.”

Saoirse Mullan

Making It Your Own

Personalizing decor by Making It Your Own.

At the end of the day, whether you’ve gone with a minimalist approach to keep things calm or leaned into those soft, dreamy pastels to set a cozy mood, the goal is the same. You don’t need to spend a fortune on professional rentals or follow every single Pinterest trend to host something beautiful. It’s really just about layering in those little touches—like a few thrifted glass vases or some warm, dim lighting—that make the room feel lived-in and loved. Just remember that the decor is there to support the vibe, not to distract from the bride or the guest list.

If you find yourself panicking about a centerpiece being two inches off-center, just take a breath and reach for that roll of double-sided tape in your purse! Seriously, though, don’t let the “perfect” aesthetic steal your joy. The most magical moments at a bridal shower happen when the host is relaxed enough to actually sit down and join the conversation. Focus on creating a space where your friends feel comfortable enough to linger over their tea and share a laugh. That connection? That’s the best kind of decor there is.

Frequently Asked Questions

I love the cozy vibe, but how can I decorate a small apartment without it feeling cluttered or overwhelming?

Oh, I’ve been there! When I’m styling smaller spaces, my golden rule is to think vertically. Instead of crowding your coffee table with bulky platters, try using tiered cake stands or even hanging some delicate greenery from a curtain rod. It keeps the surfaces clear so people actually have a place to set their drinks. Stick to a tight color story, too—it makes a small room feel intentional and curated rather than just messy.

Since I'm on a budget, what are some easy ways to use thrifted finds or vintage glassware to make the tables look intentional?

Oh, I love this question! Honestly, my favorite way to decorate is through thrifting. Don’t feel like you need matching sets; that’s actually way too stiff. Instead, grab a handful of mismatched vintage coupes or colored glass tumblers from your local charity shop. Even if they don’t “match,” they look incredibly intentional when you group them by color or height. Pair them with some simple sprigs of greenery, and suddenly, your table looks curated and soulful rather than just “cheap.”

How do I balance the decor so it looks pretty but doesn't get in the way of people actually eating and chatting?

Honestly, this is my favorite question because I’ve seen so many beautiful parties ruined by massive centerpieces that act like tiny walls between guests! My golden rule? Keep the “visual heavy lifting” to the perimeter. Use low, bud vases for the tables so people can actually see each other across the snacks, and save those tall, statement pieces for a side buffet or the entryway. If you can’t see the person sitting opposite you, the decor is too big!

Elegant baby shower decor ideas.

Decoration Ideas for Baby Showers

I was sitting in my studio last week, surrounded by half-empty boxes of vintage glassware and a mountain of silk ribbons, when I saw another “Pinterest-perfect” baby shower setup that looked more like a museum exhibit than a celebration. Honestly, it broke my heart a little. All those stiff, over-the-top arrangements and expensive, single-use plastic banners just feel so performative. When people start obsessing over every tiny detail of their baby shower decor, they often forget that the whole point is to celebrate a new life and actually enjoy the company of their favorite people. You shouldn’t feel like you need a professional production crew just to welcome a little one into the world.

I’m not here to sell you on a lifestyle you can’t afford or a level of perfection that feels totally unnatural. Instead, I want to share my no-nonsense approach to styling a space that feels warm, intentional, and—most importantly—human. I’ll be walking you through how to use cozy textures, soft lighting, and a few clever DIY touches to create a beautiful atmosphere without the stress. Let’s focus on making a space where your guests can actually relax and connect, rather than just staring at a centerpiece.

Table of Contents

Embracing Boho Baby Shower Aesthetics for a Cozy Vibe

Embracing Boho Baby Shower Aesthetics for a Cozy Vibe

When I think about boho baby showers, I don’t think about anything stiff or formal. For me, it’s all about creating a space that feels like a warm hug. I love leaning into boho baby shower aesthetics by mixing textures rather than trying to match everything perfectly. Think macramé wall hangings, some mismatched vintage rugs on the floor, and maybe a few rattan baskets scattered around to hold extra blankets. It’s that effortless, lived-in look that makes guests feel like they can actually kick their shoes off and relax.

If you’re feeling a bit overwhelmed by all the Pinterest boards out there, my best advice is to stick to soft, earthy tones. Instead of bright, jarring colors, try playing with pastel color palettes—think dusty rose, sage green, or a creamy sand color. These shades keep the energy calm and soothing, which is exactly what you want for a celebration centered around a new life. You don’t need a massive budget to pull this off; honestly, a few sprigs of dried eucalyptus in some thrifted amber glass bottles can do more for the vibe than a dozen expensive centerpieces ever could.

Gentle Pastel Color Palettes for a Calming Atmosphere

Gentle Pastel Color Palettes for a Calming Atmosphere

If you’re feeling a bit overwhelmed by all the bright, neon-heavy options out there, I really want to encourage you to lean into something softer. I’ve always found that pastel color palettes work wonders for setting a mood that feels intentional but totally relaxed. Instead of going for those super intense, saturated colors, try mixing muted sage, dusty rose, or a creamy vanilla. It creates this lovely, dreamy backdrop that doesn’t compete with the guest of honor—it just wraps the whole room in a gentle hug.

When I’m working on minimalist event styling, I love using these soft tones to keep things looking cohesive without needing a mountain of props. You can keep it simple by pairing a few sprigs of dried eucalyptus with some pale peach tones for a bit of floral arrangement inspiration. It’s such an easy way to make the space feel elevated and special without it feeling like you’re trying too hard. Honestly, when the colors are this subtle, it really lets the actual conversation and the joy of the day take center stage.

My Little Secrets for Making the Space Feel Special

  • Don’t go overboard with the store-bought stuff; I always find that a few clusters of mismatched vintage brass candlesticks or some thrifted glass bud vases add way more character than a giant, plastic centerpiece ever could.
  • Lighting is your absolute best friend when you want to set a mood. Skip the harsh overhead lights and lean into warm fairy lights or even just a few well-placed floor lamps to keep things feeling soft and intimate.
  • Bring in some life with greenery. You don’t need expensive floral arrangements—just some eucalyptus sprigs or even some interesting dried branches from your own backyard can make a table look styled and intentional without costing a cent.
  • Think about texture rather than just “stuff.” Tossing a few linen napkins or a chunky knit throw over a chair makes the room feel lived-in and cozy, which is exactly the vibe you want for a celebration like this.
  • Keep your decor functional so it doesn’t just get in the way. I love using pretty wooden boards or vintage trays to group snacks together; it keeps the clutter down and makes the whole spread look like a curated part of the design.

My Top Tips for a Stress-Free Setup

Focus on the feeling, not the perfection; a few well-placed candles and some soft textures will do way more for the mood than a bunch of stiff, expensive decorations.

Mix and match what you already have—don’t be afraid to raid your own linen closet or hit up a local thrift shop for unique glassware to add some character without the high price tag.

Keep your layout practical so people can actually move and talk; remember, the best part of a baby shower is the connection, so make sure your decor doesn’t get in the way of a good conversation.

## Focus on the Feeling, Not the Price Tag

“At the end of the day, your friends aren’t going to remember if the floral arrangements were professionally curated; they’re going to remember how warm the lighting felt and how much love was in the room.”

Saoirse Mullan

Bringing It All Together

Bringing It All Together for cozy decor.

At the end of the day, whether you’re leaning into that effortless boho vibe with some dried florals or sticking to a soft, calming pastel palette, the goal is the same: creating a space where everyone feels tucked in and comfortable. You don’t need to follow every single Pinterest trend or spend your entire savings on high-end rentals to make this day feel special. Just remember to focus on those little touches—the warm lighting, the comfortable seating, and maybe a few thoughtfully placed greenery accents—that make a room feel lived-in and welcoming. It’s about building a beautiful backdrop for the celebration, not creating a museum exhibit that people are afraid to touch.

As you start gathering your supplies and sketching out your ideas, try not to let the stress of “perfect” get in the way of the joy. I’ve seen some of the most stunning showers happen in tiny living rooms with nothing more than a few thrifted vases and some string lights, and those are always the ones where people actually connect and laugh. Your friends and family are there to celebrate this new little life and your journey into motherhood, not to critique your centerpiece height. So, take a deep breath, grab a roll of tape just in case, and just have fun with it. You’ve got this!

Frequently Asked Questions

I'm on a tight budget—how can I make the space look intentional without spending a fortune on decor?

Honestly, I’ve been there! When the budget is tight, focus on “grouping” rather than “buying.” Instead of scattering tiny knick-knacks everywhere, cluster a few thrifted glass vases or even some mismatched candlesticks together. It creates a focal point that looks totally intentional. Also, don’t underestimate the power of greenery—a few sprigs of eucalyptus from the grocery store tucked into your centerpieces can make the whole room feel lush and curated without the designer price tag.

How do I decorate a small living room so it feels festive but doesn't end up feeling cluttered or cramped?

Honestly, the biggest mistake is trying to fill every empty corner. When you’re working with a smaller living room, think vertically! Instead of big floor arrangements that trip people up, try hanging delicate greenery or paper lanterns from the ceiling. I love using a few meaningful thrifted pieces on a coffee table rather than a dozen tiny trinkets. Keep the pathways clear so guests can actually move—good flow is way more important than “more stuff.”

What are some easy ways to incorporate DIY elements that actually look high-end rather than "crafty"?

The secret is all in the details—think “curated,” not “constructed.” Instead of messy glitter or hot glue, try using natural textures. I love using linen runners or sprigs of fresh eucalyptus tucked into thrifted brass candlesticks. If you’re making signage, skip the neon markers and go for simple, elegant calligraphy on heavy cardstock. It’s those intentional, tactile touches that make a DIY project feel like a professional design choice.

Colorful gender reveal decor for a party.

Decorating for a Gender Reveal Party

Honestly, if I see one more gender reveal party that looks like a high-budget commercial set, I might actually lose it. We’ve reached this point where people think you need a professional balloon arch installation and custom-etched acrylic signage just to find out if you’re having a boy or a girl. It’s exhausting! All that pressure to have the perfect Instagram backdrop for your gender reveal decor completely overshadows the actual reason you’re gathering: to celebrate a new life with the people you love. You shouldn’t have to go into debt or spend weeks DIY-ing complicated props just to make a meaningful announcement.

I’m here to tell you that we can do this better—and much cheaper. In this post, I’m sharing my favorite ways to create a beautiful, cozy atmosphere using things you probably already have or can find at a local thrift shop. I’ll be giving you my no-nonsense guide to selecting decor that feels intentional and warm without feeling stiff or performative. Let’s focus on creating a space where your family can actually sit down, grab a drink, and really connect while you share your big news.

Table of Contents

Embracing Gender Neutral Party Aesthetics for a Cozy Vibe

Embracing Gender Neutral Party Aesthetics for a Cozy Vibe

Honestly, I’ve always been a bit wary of the “pink vs. blue” explosion that usually happens around these events. While those bright colors are fun, they can sometimes feel a bit overwhelming or even a little cliché. Lately, I’ve been leaning much more into gender neutral party aesthetics, focusing on earthy tones, creams, and maybe a pop of sage green or terracotta. It creates such a calm, grounded atmosphere that lets the actual excitement of the news take center stage without all the visual noise.

If you want to lean into this vibe, you don’t need to go overboard with expensive store-bought kits. Instead of searching for specific boy or girl decorations, try mixing in some natural elements like dried eucalyptus or pampas grass. You could even pull together a simple gender reveal balloon arch using muted, matte colors like sand, peach, and white. It looks incredibly high-end and intentional, but it’s actually quite easy to DIY in your living room. The goal is to make the space feel warm and inviting for your guests, rather than just a sea of primary colors.

Simple Gender Reveal Backdrop Ideas You Can Make Yourself

Simple Gender Reveal Backdrop Ideas You Can Make Yourself

If you’re anything like me, you probably don’t want to spend your entire weekend untangling streamers or fighting with a professional setup. I love a good DIY project, but it shouldn’t feel like a chore. One of my absolute favorite gender reveal backdrop ideas involves using what you already have at home. Grab some sheer curtains or even a nice linen sheet, hang it up, and layer some warm fairy lights behind it. It creates this soft, dreamy glow that looks incredible in photos without costing a cent. If you want a bit more “oomph,” you can always tuck in some dried eucalyptus or even some of those vintage brass candlesticks I’m always hunting for at thrift stores.

For something a little more festive, you can definitely play around with a simplified balloon arch. You don’t need those expensive, professional kits; just grab a handful of matte-finish balloons in cream, sage, or terracotta to keep that gender-neutral vibe going. I usually find that mixing different sizes makes it look much more intentional and “boutique” rather than just a bunch of air-filled rubber. It’s all about creating a focal point that feels inviting and effortless rather than stiff and over-the-top.

My Little Secrets for Decor That Actually Feels Like You

  • Don’t go overboard with the pink and blue everywhere; it can get a bit overwhelming. I love mixing in some earthy tones or even just some greenery to keep the vibe relaxed and cozy rather than looking like a department store aisle.
  • Lighting is your absolute best friend. Skip the harsh overhead lights and grab a few cheap string lights or some unscented tea lights. It instantly makes the room feel intimate and helps everyone settle in for the big moment.
  • Keep your “reveal” moment simple so it doesn’t overshadow the guests. Instead of a massive, expensive production, try something tactile like a vintage box filled with balloons or even just pulling a ribbon. It feels more personal and much less staged.
  • Use what you have or find it secondhand. I’m a huge fan of hitting up thrift stores for unique glassware or mismatched platters. It adds so much character to your tablescape and saves a ton of money that you can put toward better snacks!
  • Think about the flow of the room. You don’t want your beautiful decor to become a tripping hazard when everyone rushes in to see the big reveal. Make sure there’s a clear little “stage” area that doesn’t block the path to the food.

Quick Tips for a Stress-Free Reveal

Focus on the atmosphere, not the perfection; dim the lights and use a few cozy textures so your guests feel relaxed enough to actually enjoy the moment.

Keep your DIY decor simple and manageable so you aren’t stuck behind a glue gun when you should be celebrating with your favorite people.

Don’t get caught up in the “perfect” Pinterest look—if the decorations make you smile and the snacks are easy to grab, you’ve already won.

My Philosophy on Decorating

At the end of the day, your guests aren’t going to remember if the balloon arch was perfectly symmetrical or if you used the most expensive streamers; they’re going to remember the warmth of the room and the way it felt to share that big, life-changing moment with you.

Saoirse Mullan

At the Heart of the Celebration

At the Heart of the Celebration setup.

At the end of the day, whether you went all-out with a DIY backdrop or kept things super chill with a gender-neutral color palette, the goal is the same: celebrating this huge new chapter. We’ve talked about how you can lean into those cozy, earthy tones to keep the vibe relaxed, or how a few simple, handmade touches can make a space feel so much more personal than anything you’d find in a big-box party store. Just remember that you don’t need a Pinterest-perfect setup to make the moment feel monumental. As long as you have your favorite snacks, some warm lighting, and a way to share the big news, you’ve already won the day.

If you find yourself stressing over whether the streamers are straight or if you have enough eucalyptus on the table, just take a breath and let it go. I promise you, your friends and family aren’t there to critique your styling; they are there because they love you and are so excited to meet this little human. Focus on the actual connection and the laughter that happens between the big reveals. That’s the stuff that stays with you long after the balloons have deflated. Now, go grab a drink, find your seat, and enjoy every single second of this magic.

Frequently Asked Questions

How can I decorate for a gender reveal if I’m hosting it in a really small apartment?

Honestly, small spaces are my favorite because they naturally feel so much more intimate! Don’t try to spread decor across every surface; it’ll just feel cluttered. Instead, pick one “hero” spot—like a single corner or even just your coffee table—and make that your focal point. Use vertical space with a few floating balloons or a simple hanging banner to keep the floor clear. It keeps things cozy without feeling cramped.

Are there any ways to do the decor without using a ton of single-use plastic that'll just end up in the trash?

Oh, I am so glad you asked! Honestly, nothing kills my vibe more than seeing a mountain of plastic confetti or cheap streamers in the trash the next day. Instead, lean into my favorite hobby: thrifting! Grab some vintage glass bud vases from a local charity shop and fill them with wildflowers. You can also use fabric scraps or linen bunting for color. It feels much more intentional, looks gorgeous, and actually leaves you with something beautiful to keep.

What are some budget-friendly ways to incorporate both pink and blue without it looking like a toddler's birthday party?

I totally get that—nobody wants their living room looking like a chaotic daycare center! My trick is to ditch the primary colors and go for softer, more sophisticated tones. Think dusty rose and a muted slate blue rather than bubblegum and sky blue. You can also use textures to bridge the gap; maybe some linen napkins in one shade and dried florals in another. It keeps things feeling intentional and chic, not cluttered.

Colorful pastel party decor for celebrations.

Using Pastel Colors for Party Decoration

I was scrolling through a huge wedding magazine the other day and saw a spread on “luxury” aesthetics that honestly made my eyes ache. Everything was so stiff, so perfectly curated, and—let’s be real—completely unreachable for most of us. It felt like you needed a massive budget and a professional lighting crew just to pull off a simple theme. I’m so over the idea that you need to spend a fortune to make a room look intentional. If you’re looking into pastel party decor, please don’t fall into the trap of thinking it has to look like a high-end showroom. You don’t need perfection; you just need a little bit of soft color to make the space feel approachable and kind.

In this post, I’m stripping away all the fluff and sharing how I actually use color in my own studio. I’ll show you how to mix in some thrifted finds and simple textures so your pastel party decor feels lived-in and cozy rather than clinical. My goal is to give you practical, low-stress ideas that focus on creating a warm atmosphere where your guests can actually relax and talk, rather than feeling like they’re walking through a museum.

Table of Contents

Dreamy Event Styling for Meaningful Moments

Dreamy Event Styling for Meaningful Moments.

When I’m dreaming up a new look for a client, I always start by thinking about the feeling I want the room to have. For me, dreamy event styling isn’t about buying every single thing on a Pinterest board; it’s about layering textures that make people want to linger. I love playing with a macaron color palette—think creamy peaches, soft lemon, and dusty rose—because these tones feel incredibly welcoming. Instead of heavy, structured arrangements, I lean toward things that feel a bit more organic and lived-in, like mismatched vintage plates or scattered petals that look like they just fell there.

If you’re planning something a bit more specific, like baby shower pastel decorations, my biggest piece of advice is to focus on the lighting. You can have the most beautiful setup in the world, but if the overhead lights are too bright, that magic just evaporates. I always suggest using unscented tea lights or even some fairy lights tucked into a glass bowl to soften the edges. It’s those little, thoughtful touches that turn a simple gathering into a moment people actually remember.

Soft Hue Table Settings That Invite Conversation

Soft Hue Table Settings That Invite Conversation

When it comes to the table, I always say that the goal isn’t to create a museum exhibit; it’s to create a space where people actually want to linger over their drinks. Instead of going overboard with heavy, formal arrangements, I love leaning into soft hue table settings that feel light and airy. Think about mixing and matching some of my favorite thrifted glassware with a subtle macaron color palette—soft pinks, creams, and buttery yellows. It’s much more inviting than a rigid, matching set, and it gives the whole meal a relaxed, effortless vibe.

If you’re feeling a bit more adventurous, playing with mint and lavender party themes can add such a lovely, whimsical touch without feeling “too much.” I usually suggest scattering a few sprigs of dried eucalyptus or some mismatched linen napkins to break up the lines. It keeps the look organic rather than manufactured. You don’t need to hunt down expensive, high-end aesthetic party supplies to make this work; honestly, a few well-placed candles and some soft textures are what really encourage everyone to lean in and actually start talking.

My Go-To Secrets for Keeping Pastels Feeling Fresh (and Not Like a Baby Shower)

  • Mix in some textures so it doesn’t feel flat. Instead of just using smooth tablecloths, throw on some linen napkins or a chunky knit runner. It adds that “effortless boho” vibe I love and keeps the pastel colors from looking too sugary.
  • Don’t be afraid to lean into the vintage side of things. I’m always hunting for mismatched glassware at thrift stores, and honestly, a few dusty rose or mint green vintage coupes add so much more character than a matching set from a big-box store.
  • Use greenery to ground the soft colors. If you’re using a lot of pale lavender or peach, tucking in some eucalyptus or even just some simple dried wildflowers helps the palette feel more organic and a little less “perfectly staged.”
  • Lighting is your best friend when working with light colors. Avoid those harsh overhead lights at all costs! Stick to warm fairy lights or a few unscented tapered candles; it makes the pastel tones glow rather than looking washed out.
  • Keep the “pop” subtle. If you want to add a bit of contrast, don’t go for neon. Just grab something like a muted sage or a deeper terracotta to anchor the lighter shades so your eyes have a place to rest while you’re chatting.

Quick Tips for a Stress-Free Pastel Party

Keep things low-pressure by mixing your pastel colors with textures you already own, like linen napkins or vintage glass, so it feels cozy rather than staged.

Focus on lighting to bring those soft hues to life; dimming the overheads and using a few warm lamps will make even the lightest colors feel intimate and inviting.

Don’t get caught up in perfection—if a centerpiece isn’t exactly how you pictured it, just lean into the relaxed, bohemian vibe and focus on making sure your guests have a drink in hand.

Keeping it Light and Lovely

“I always tell my clients: don’t let the decor become the main event. Use those soft, dreamy pastels to set a gentle stage, but make sure the real magic is happening in the laughter and the stories shared around the table.”

Saoirse Mullan

Bringing the Magic Home

Bringing the Magic Home with pastel decor.

At the end of the day, decorating with pastels isn’t about following some strict design rulebook or matching every single napkin perfectly. It’s really just about using those soft, calming tones to create a backdrop where your guests feel relaxed from the moment they walk through the door. Whether you’re layering mismatched vintage glassware on a thrifted tray or just scattering some pale peach blooms across the table, the goal is to build an atmosphere that feels intentional but effortless. Remember, you don’t need a massive budget to pull this off; you just need a few thoughtful touches that make the space feel warm and inviting.

Please, don’t let the stress of “perfect” styling get in the way of actually enjoying your own party. I’ve been in those situations where the host is so worried about a crooked centerpiece that they spend the whole night in the kitchen instead of sitting down with their friends. Your people are coming to see you, not to audit your color palette. So, grab a drink, dim the lights, and let those soft hues do the heavy lifting. If you focus on the connection and the conversation, the decor will naturally fall into place. You’ve got this, and I promise, your guests are going to love it.

Frequently Asked Questions

How do I mix different pastel shades without the whole setup looking a bit washed out or messy?

I totally get it—it’s so easy for pastels to turn into a blurry, washed-out mess if you aren’t careful. My secret? Pick one “anchor” color to be the star, then layer in the others. If you’re leaning into a soft sage, use a tiny bit of dusty rose or pale lemon to add contrast. Also, don’t be afraid of texture! A chunky linen tablecloth or some vintage glassware helps define those soft colors so they actually pop.

Can I use pastel decor for a more "grown-up" dinner party, or does it always end up feeling a bit like a baby shower?

Oh, I get this question all the time! And honestly? Absolutely. You can totally pull off pastels for a sophisticated dinner without it feeling like a nursery. The trick is all in the textures and the “weight” of your pieces. Instead of matte plastics, think heavy linen napkins in sage or dusty rose, or even some of those vintage amber glasses I love hunting for. Pair them with darker wood or metallic accents, and it feels intentional and chic, not sugary.

What kind of lighting works best to make those soft colors actually pop instead of looking dull in a dim room?

Honestly, this is where most people trip up! If the room is too dark, those lovely pastels just turn into a muddy grey. To keep them looking fresh, skip the harsh overhead lights and go for warm-toned lamps or plenty of fairy lights. If you can, layer in some unscented tea lights too. That soft, golden glow makes the colors feel intentional and cozy rather than just washed out in the shadows.

Elegant monochrome decor in a modern room.

Decorating With a Monochrome Color Scheme

I used to think that if I wanted a “designer look” for a dinner party, I had to spend a small fortune on coordinated linens, custom floral arrangements, and those ridiculously expensive sculptural centerpieces that look beautiful in photos but leave you with zero room to actually set down a drink. Honestly, the idea that you need a massive budget to pull off a cohesive vibe is such a myth. I’ve learned through years of styling events that leaning into monochrome decor isn’t about being boring or clinical; it’s actually the ultimate cheat code for making a space feel intentional without the stress of matching a dozen different colors.

In this post, I’m stripping away the fluff and sharing how you can use a single color palette to create a mood that feels warm and welcoming rather than stiff. I won’t be giving you a list of luxury items to buy, but rather some practical, real-world ways to layer textures and light so your setup looks effortless. We’re going to focus on how to make your home feel like a curated sanctuary where the decor sets the stage, but the actual conversation remains the star of the show.

Table of Contents

Embracing Minimalist Interior Design Principles for Better Conversation

Embracing Minimalist Interior Design Principles for Better Conversation

When we’re hosting, it’s so easy to let the “stuff” take over. I’ve seen so many beautiful parties where the table is so cluttered with tiny trinkets and elaborate floral arrangements that guests feel like they shouldn’t even touch anything. By leaning into minimalist interior design principles, you’re essentially clearing the stage for your guests to shine. When the visual noise is dialed down, people naturally gravitate toward each other rather than getting distracted by a dozen different focal points.

The trick to making a single-color space feel cozy rather than cold is all about texture layering in monochromatic rooms. If you’re working with a cream or beige palette, don’t just throw out a plain white tablecloth. Instead, mix in a chunky knit throw, some linen napkins, and maybe even some smooth ceramic bowls. This creates a sense of richness and warmth that invites people to lean in and stay a while. It’s about creating a soft, tactile environment where the atmosphere feels intentional, but the focus stays exactly where it belongs: on the actual conversation happening around the table.

Using Neutral Color Schemes for Living Rooms to Ease the Mind

Using Neutral Color Schemes for Living Rooms to Ease the Mind

When I’m styling a space for a client, I always tell them that the goal isn’t to make a room look like a museum, but to make it feel like a hug. Using neutral color schemes for living rooms is one of the easiest ways to do that. When you strip away the loud, clashing patterns and bright neon pops, the visual noise just… stops. It’s like the room finally takes a deep breath. For me, a palette of soft creams, warm sands, or even a very light greige creates this calm, steady backdrop that lets your guests actually relax into their seats rather than feeling overstimulated by the decor.

The trick to making sure a neutral room doesn’t feel “flat” or boring is all about texture layering in monochromatic rooms. Since you aren’t using color to create interest, you have to use touch. Think about pairing a chunky knit throw over a smooth linen sofa, or placing some rough, handmade ceramic bowls on a sleek wooden coffee table. It’s those little variations in shades and tints that add soul to the space, making it feel intentional and cozy rather than just empty.

My Little Secrets for Pulling Off a Monochrome Look Without It Feeling Cold

  • Play with textures so things don’t look flat. If you’re doing an all-cream setup, mix a chunky knit throw with some smooth linen napkins and maybe a velvet cushion. It keeps the eye moving and makes the room feel cozy rather than sterile.
  • Don’t be afraid of “near-miss” shades. You don’t need ten different cans of the exact same beige; in fact, it’s better if they aren’t identical. Mixing slightly different tones of the same color adds a lovely depth that feels much more natural and lived-in.
  • Use your lighting to create the mood. Since you aren’t relying on bright colors to pop, use warm lamps or a few scattered candles to create shadows and highlights. It adds that “magical” layer to a monochrome space that makes people want to linger.
  • Let your thrifted finds do the heavy lifting. I love pulling in a vintage glass vase or an old ceramic pitcher that fits your color palette. It adds a bit of soul and history to the room so it doesn’t look like you just bought everything in one go from a big-box store.
  • Keep your “pops” organic. If you’re doing a moody, dark monochrome look, use greenery or even just a bowl of fruit to break things up slightly. It provides a tiny bit of life without breaking the cohesive, intentional vibe you’ve worked so hard to create.

My Top Three Tips for Keeping it Simple

Don’t get caught up in the “perfect” color palette; pick one or two soothing tones and let the textures—like a chunky knit throw or some linen napkins—do the heavy lifting so the room feels cozy rather than cold.

Use your decor as a backdrop, not the main event; when the visual noise is turned down, your guests naturally gravitate toward each other and the conversation flows much more easily.

Focus your budget on the things people actually touch and taste, like good glassware or comfortable seating, rather than spending a fortune on tiny decorative bits that just end up collecting dust.

## The Magic of Less

“I’ve learned that when you stop trying to compete with a million different colors and patterns, you actually create space for the people in the room to breathe. A monochrome palette isn’t about being boring; it’s about turning down the visual volume so the laughter and the conversation can finally take center stage.”

Saoirse Mullan

Making It Your Own

Making It Your Own with monochrome decor.

At the end of the day, leaning into a monochrome palette isn’t about following some strict design rule or making your home look like a sterile showroom. It’s really just a clever way to strip away the visual clutter so that your guests can actually focus on each other. By using those calming neutrals to set the stage and keeping your decor intentional rather than overwhelming, you’re creating a space where the atmosphere does the heavy lifting for you. Whether you’re playing with different textures to keep things cozy or sticking to a single, sophisticated shade, the goal is to build a backdrop that feels effortless and inviting rather than staged.

So, please don’t feel like you need to go out and buy a whole new set of furniture just to get this look right. Start with what you have, maybe add a few thrifted pieces in a similar tone, and focus on that warm, soft lighting we talked about. Hosting should be about the laughter shared over a good meal, not whether your color coordination is technically perfect. Remember, your home is a living, breathing space, not a museum. Just clear a little bit of the noise, dim the lights, and let the real magic happen through the people sitting around your table.

Frequently Asked Questions

Won't a single-color setup feel a bit cold or uninviting for my guests?

I totally get that worry—I used to think “monochrome” meant “hospital waiting room,” too! But the trick is to play with textures rather than colors. Instead of adding more hues, think about layering a chunky knit throw over a linen sofa, or using ribbed glassware next to smooth ceramic plates. It’s all about that tactile warmth. When you mix materials, the room feels incredibly cozy and intentional, never cold or clinical.

How do I mix different textures so the room doesn't just look flat and boring?

This is such a common worry! When you’re sticking to one color, things can definitely start feeling a bit “flat” if you aren’t careful. My secret is to play with tactile variety. Think about pairing a chunky knit throw over a smooth velvet sofa, or placing some rough, organic linen napkins on a sleek wooden table. It’s all about that contrast—mixing smooth, fuzzy, and grainy elements keeps the eye moving without needing extra colors.

Is it okay to mix in a few vintage or colorful pieces, or will that ruin the whole vibe?

Oh, absolutely! In fact, that’s exactly how you stop a monochrome room from feeling like a sterile hotel lobby. If everything is perfectly matched, it can start to feel a bit stiff. I love throwing in a few mismatched vintage glass coupes or a single, colorful ceramic bowl I found at a thrift shop. Those little pops of personality act like conversation starters and make the space feel lived-in and cozy rather than just “designed.”